14
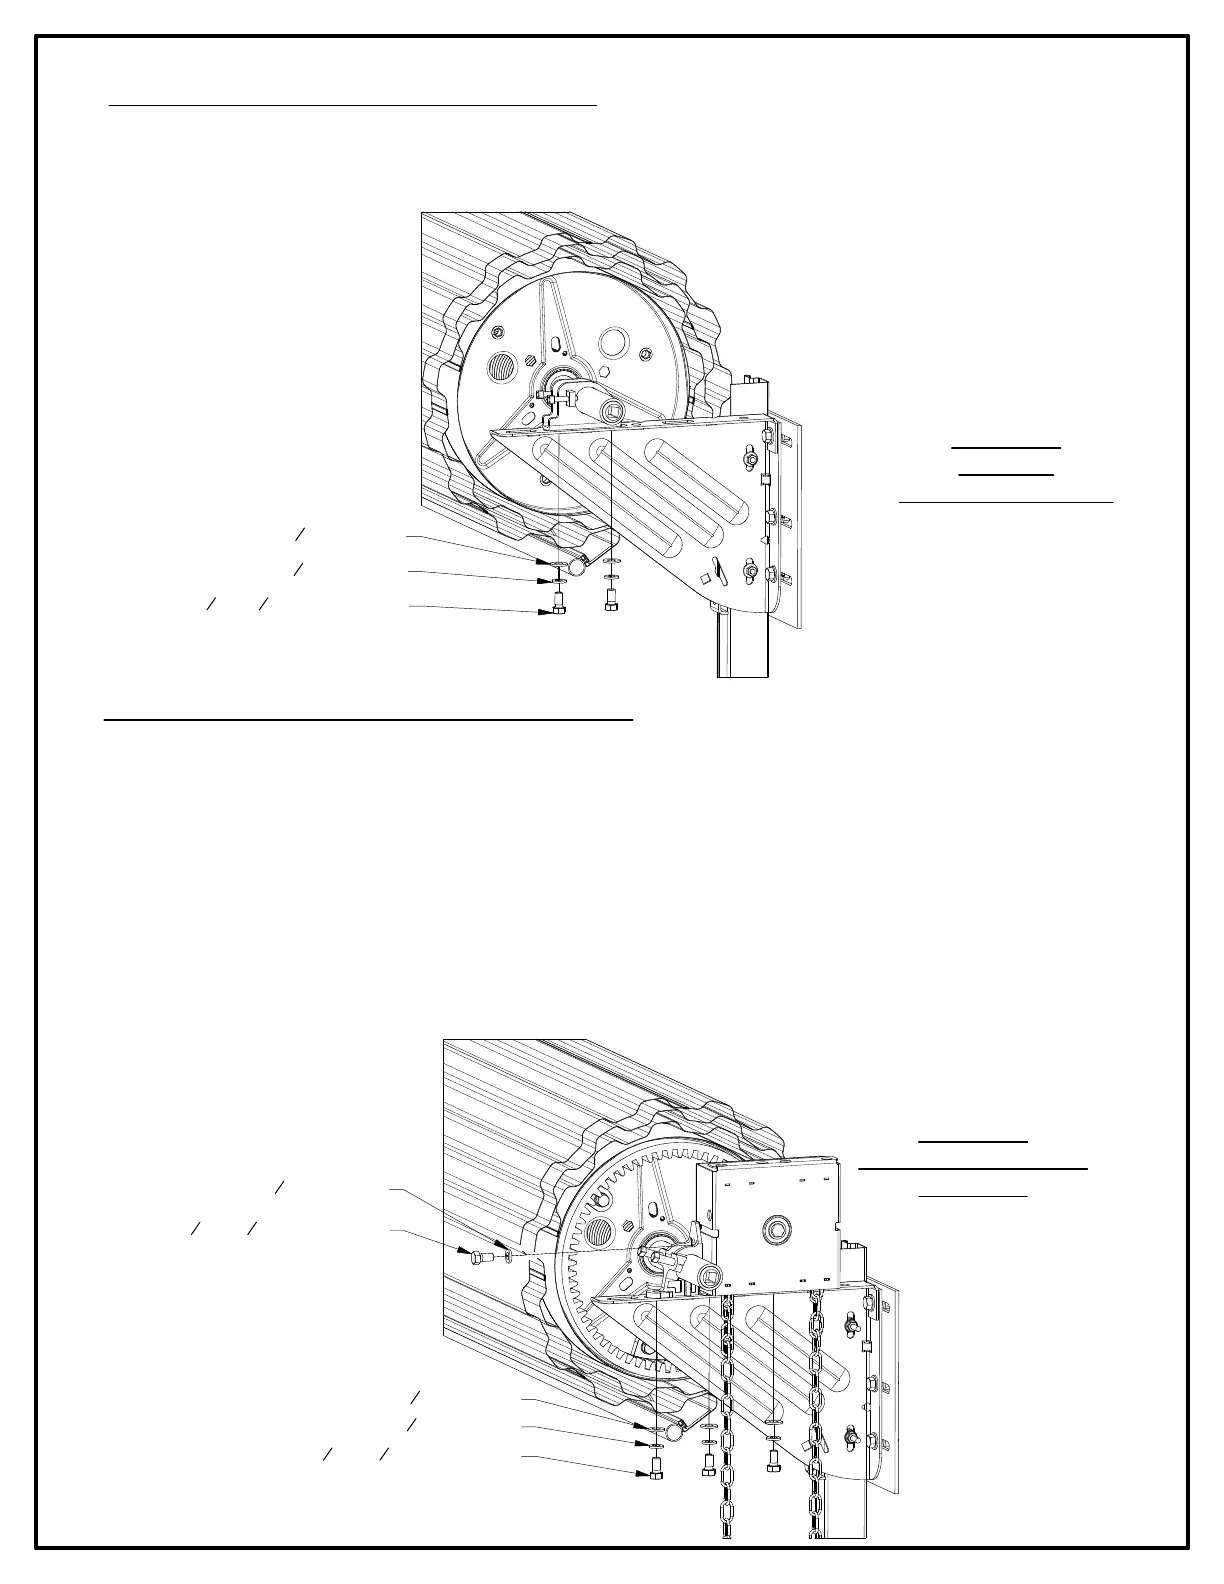
STEP 12: REDUCED HAND CHAIN DRIVE END
►Attach cast axle support bracket to door bracket using 3/8" - 16 x 3/4" grade 5 hex bolt, 3/8" lock washer and 3/8" flat washer.
►Position chain hoist assembly on door bracket next to cast axle support and attach to door bracket using two (2) each
3/8 "- 1
6 x 3/4" grade 5 hex bolts, 3/8" lock washers and 3/8" flat washers. The spur gear on the hoist will engage with
th
e external teeth of the cast ring gear on the end of the drum.
►Connect cast axle support bracket to side of chain hoist using 3/8" - 16 x 3/4" hex bolt and 3/8" lock washer.
►Feed hand chain over chain pocket wheel and through hoist. Connect ends of hand chain, being careful not to twist
ch
ain. Hand chain may be lengthened or shortened as necessary.
►Install hand chain keeper on wall or jamb.
STEP 11: PUSH-UP NON-TENSIONER END
►Attach stamped axle support to door bracket using two (2) 3/8" - 16 x 3/4" grade 5 hex bolts,
(2)
3/
8" lock washers and (2) 3/8" flat washers.
(2)
3
8" - 16 -
3
4" GRADE 5 HEX BOLTS
(2)
3
8" FLAT WASHER
(2)
3
8" LOCK WASHER
3
8" LOCK WASHER
3
8" - 16 X
3
4" GRADE 5 HEX BOLT
(3)
3
8" FLAT WASHER
(3)
3
8" LOCK WASHER
(3)
3
8" - 16 X
3
4" GRADE 5 HEX BOLT
FIGURE 17:
PUSH-UP
NON-TENSIONER END
FIGURE 18:
REDUCED HAND CHAIN
DRIVE END