55
VEHICLE OPERATION
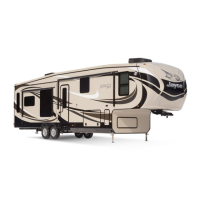
Securing the spare tire, put the steel hoist lift support located on the end of the cable through
the rim of the tire. The hoist lift support clips need to seat inside the center hole of the tire
rim. The valve stem of the tire MUST be pointed in the up position or toward the bottom of
the RV. Reverse this process to release the spare tire for usage.
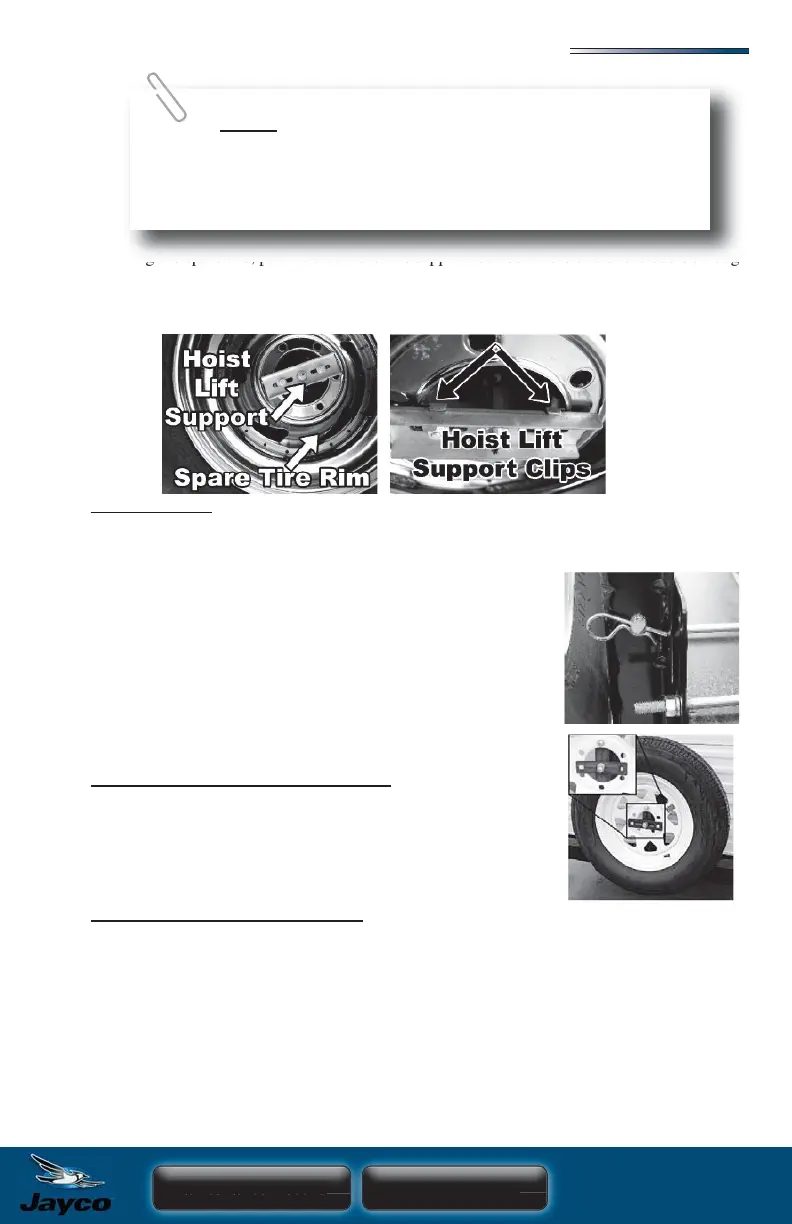
Bumper mount
The spare tire bracket can be released and extended down to access a storage compartment
at the rear of the trailer without removing the tire.
To extend the tire down
1. Remove the cotter key from the pin holding the tire carrier
in place.
2. Remove the pin and extend the tire carrier away from the
trailer.
3. Always return the tire carrier to the upright position and
lock it in place while traveling.
To remove the tire from the tire carrier
1. Remove the lug nuts holding the tire in place.
2. Remove the support bracket from the bottom lug.
3. Pull the tire from the tire carrier.
To install the tire on the tire carrier
1. Place the tire on the carrier with the top lug bolt inserted into one of the holes in the tire
rim and the bottom lug bolt in the center of the rim.
2. Install the top lug nut.
3. Place the support bracket over the bottom lug bolt across the center of the rim.
4. Install the bottom lug nut over the support bracket.
5. Make sure the lug nuts are tightened securely before returning to travel.
Bumper mount
uring the spare tire, put the steel hoist lift support located on the end of the cable throug
NOTE:If the manual crank access port is located in a slideout,
the slideout room must be in the travel position. If the slideout is
H[WHQGHGWKHFUDQNZLOOQRWUHDFKWKHPHFKDQLVPWRUDLVHRUORZHU
the tire.