8
Assembly
Read and understand all
assembly instructions before attempting
assembly! Failure to comply may cause
serious injury!
Stand
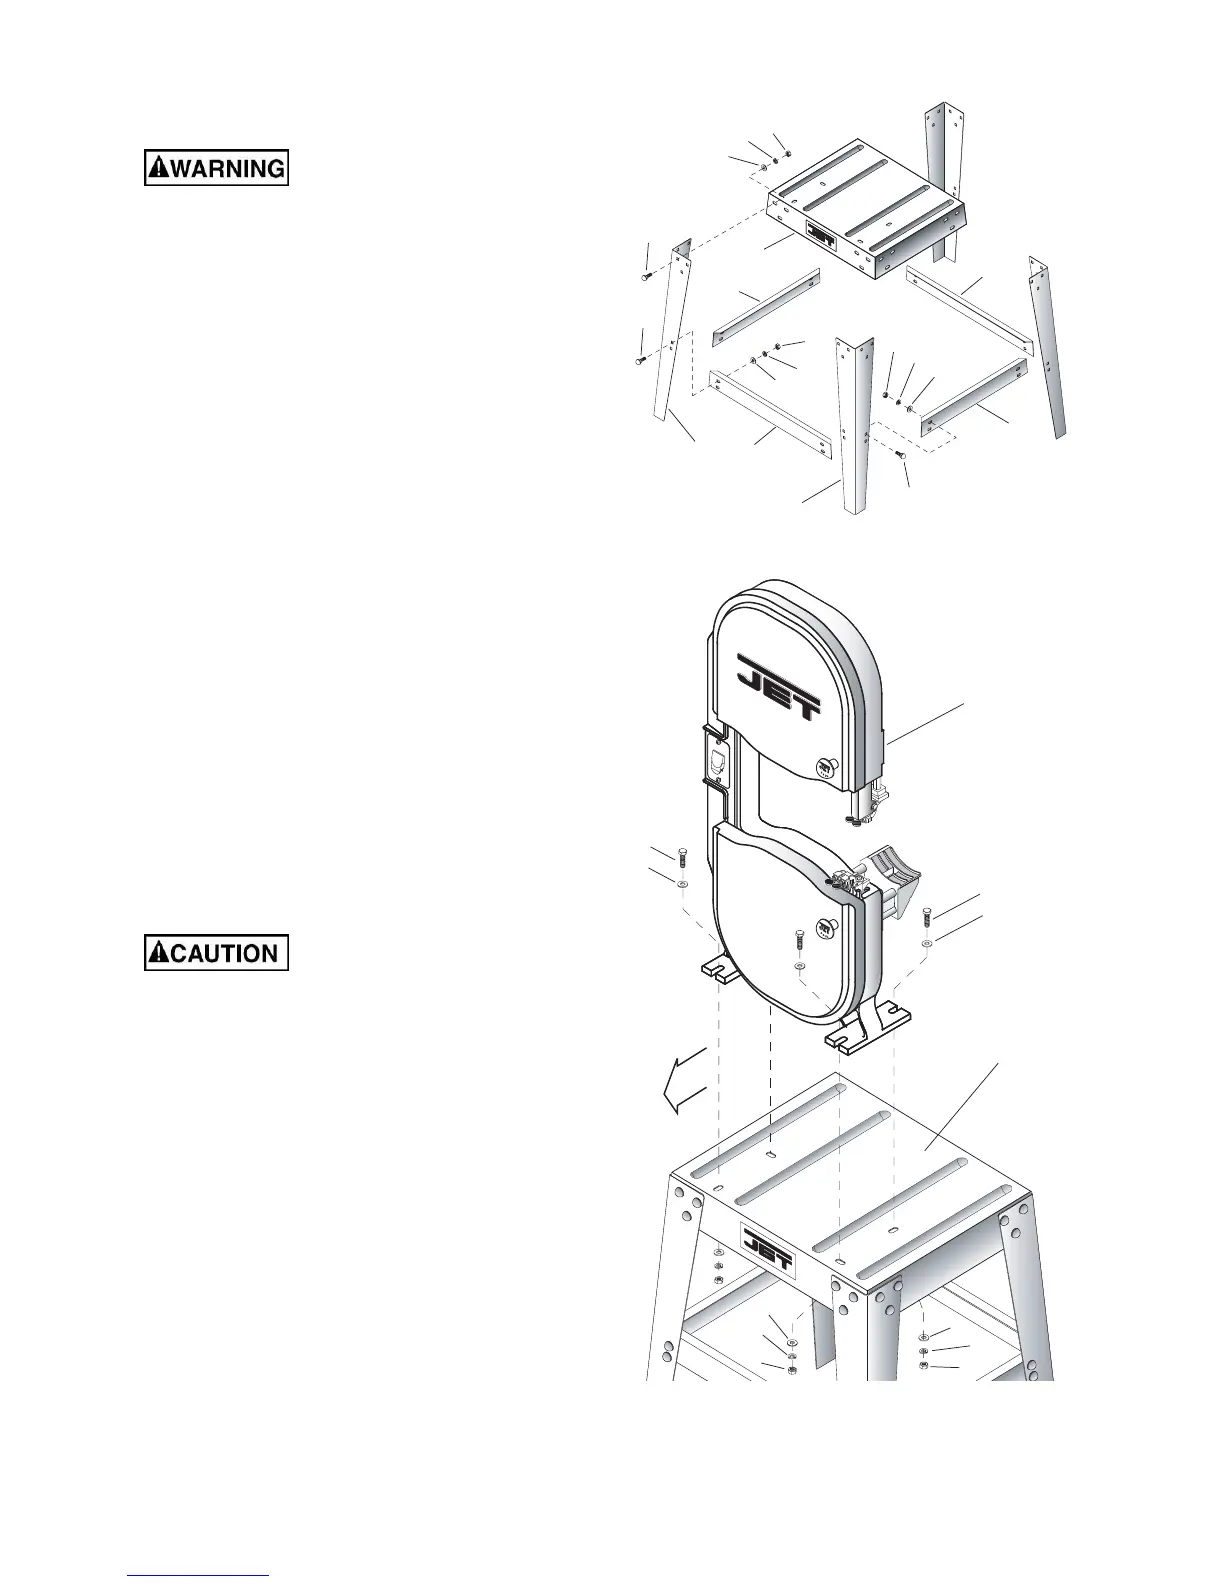
Referring to Figure 1.
1. Assemble four legs (E) to the table (F). Secure
each leg with six ea M8x16 carriage bolts (W),
M8 flat washers (T), M8 lock washers (S), and
M8 hex nuts (Q). Hand-tighten only at this time.
2. Assemble the long plates (L) to the legs (E).
Secure each plate with 4 ea M8x16 carriage
bolts (W), M8 flat washers (T), M8 lock
washers (S), and M8 hex nuts (Q). Hand-
tighten only at this time.
3. Assemble the short plates (K) in the same
manner as described in step 2.
4. Place the stand upright on a level surface.
Make sure that all four legs are contacting the
surface.
5. Tighten all nuts with a 13mm socket or wrench.
Mounting Bandsaw to Table
The saw body is heavy! Use
caution when lifting! Stabilize until firmly
attached to the stand! Failure to comply may
cause serious injury!
Referring to Figure 2:
1. With the aid of a second person, lift the saw
body (A) and place onto the stand top. Be sure
front of saw (with JET logo) faces stand front
(JET logo).
2. Place four M8 flat washers (P) on four M8x35
hex cap screws (N) and insert screws through
four mounting holes in the bandsaw and stand.
3. Place M8 flat washers (P) and M8 lock wash-
ers (S) on the ends of the screws protruding
through the bottom of the stand top. Secure
with four M8 hex nuts (Q).
4. Tighten all nuts with a 13mm socket or wrench.
W
W
S
T
Q
F
E
L
S
T
Q
K
W
S
T
Q
L
K
E
Figure 1
A
Stand Top
Front
N
P
P
S
Q
Q
S
P
N
P
Figure 2
 Loading...