Mains 1~230V, PE, 50Hz
Output power 0,75 kW (1HP) S1
Reference current 5.5 A
Extension cord (H07RN-F): 3x1,5mm²
Installation fuse protection 10A
Isolation class I
4.3 Noise emission
Acoustic pressure level (EN ISO 11202):
Idling LpA 72,5 dB(A)
In operation LpA 78,4 dB(A)
The specified values are emission levels and are not
necessarily to be seen as safe operating levels.
As workplace conditions vary, this information is intended to
allow the user to make a better estimation of the hazards and
risks involved only.
4.4 Content of delivery
300 mm tool rest
Tool rest extension
75mm face plate
Spur centre and tooling knockout bar
Live centre
Operating tools
Assembly kit
Operating manual
Spare parts list.
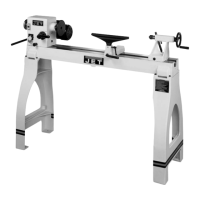
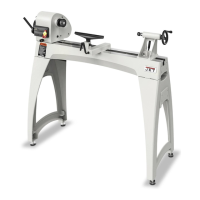
Cast iron leg set (JET Option # 719492)
including levelling feet
Fig 2
5. Transport and start up
5.1 Transport and installation
The machine is designed to operate in closed rooms and
must be placed stable on firm and levelled surface.
For safety reasons, the machine must be bolted to the work
bench or to the optional leg stand.
The bed has eight 5/16”-18UNC thread hole (Fig 3).
Four 5/16“-18UNC x 60mm grub screws, washers and nuts
are supplied with the machine for a possible work bench
mount.
Fig 3
For packing reasons the machine is not completely
assembled
5.2 Assembly
If you notice transport damage while unpacking, notify your
supplier immediately. Do not operate the machine!
Dispose of the packing in an environmentally friendly manner.
Clean all rust protected surfaces with a mild solvent.
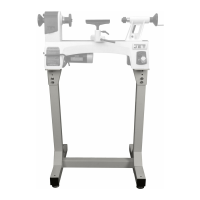
Attach the leg stand: (JET Option # 719402)
At this point the headstock, tailstock and tool rest should be
removed.
Unscrew the stud (N, Fig 4) from each end of bed.
Fig 4
Remove headstock, tailstock and tool rest support from bed.
The machine bed is heavy! With the help of a second person.
Carefully turn bed upside down. Place a mat or cardboard
beneath it to prevent scratching the bed ways.
Install legs with eight screws, lock washers and flat washers.
Tighten screws firmly with 6mm hex key. (see Fig 5).
 Loading...