34
4.2-1
4.2-3
4.2-4
4.2.1-1
4.2-2
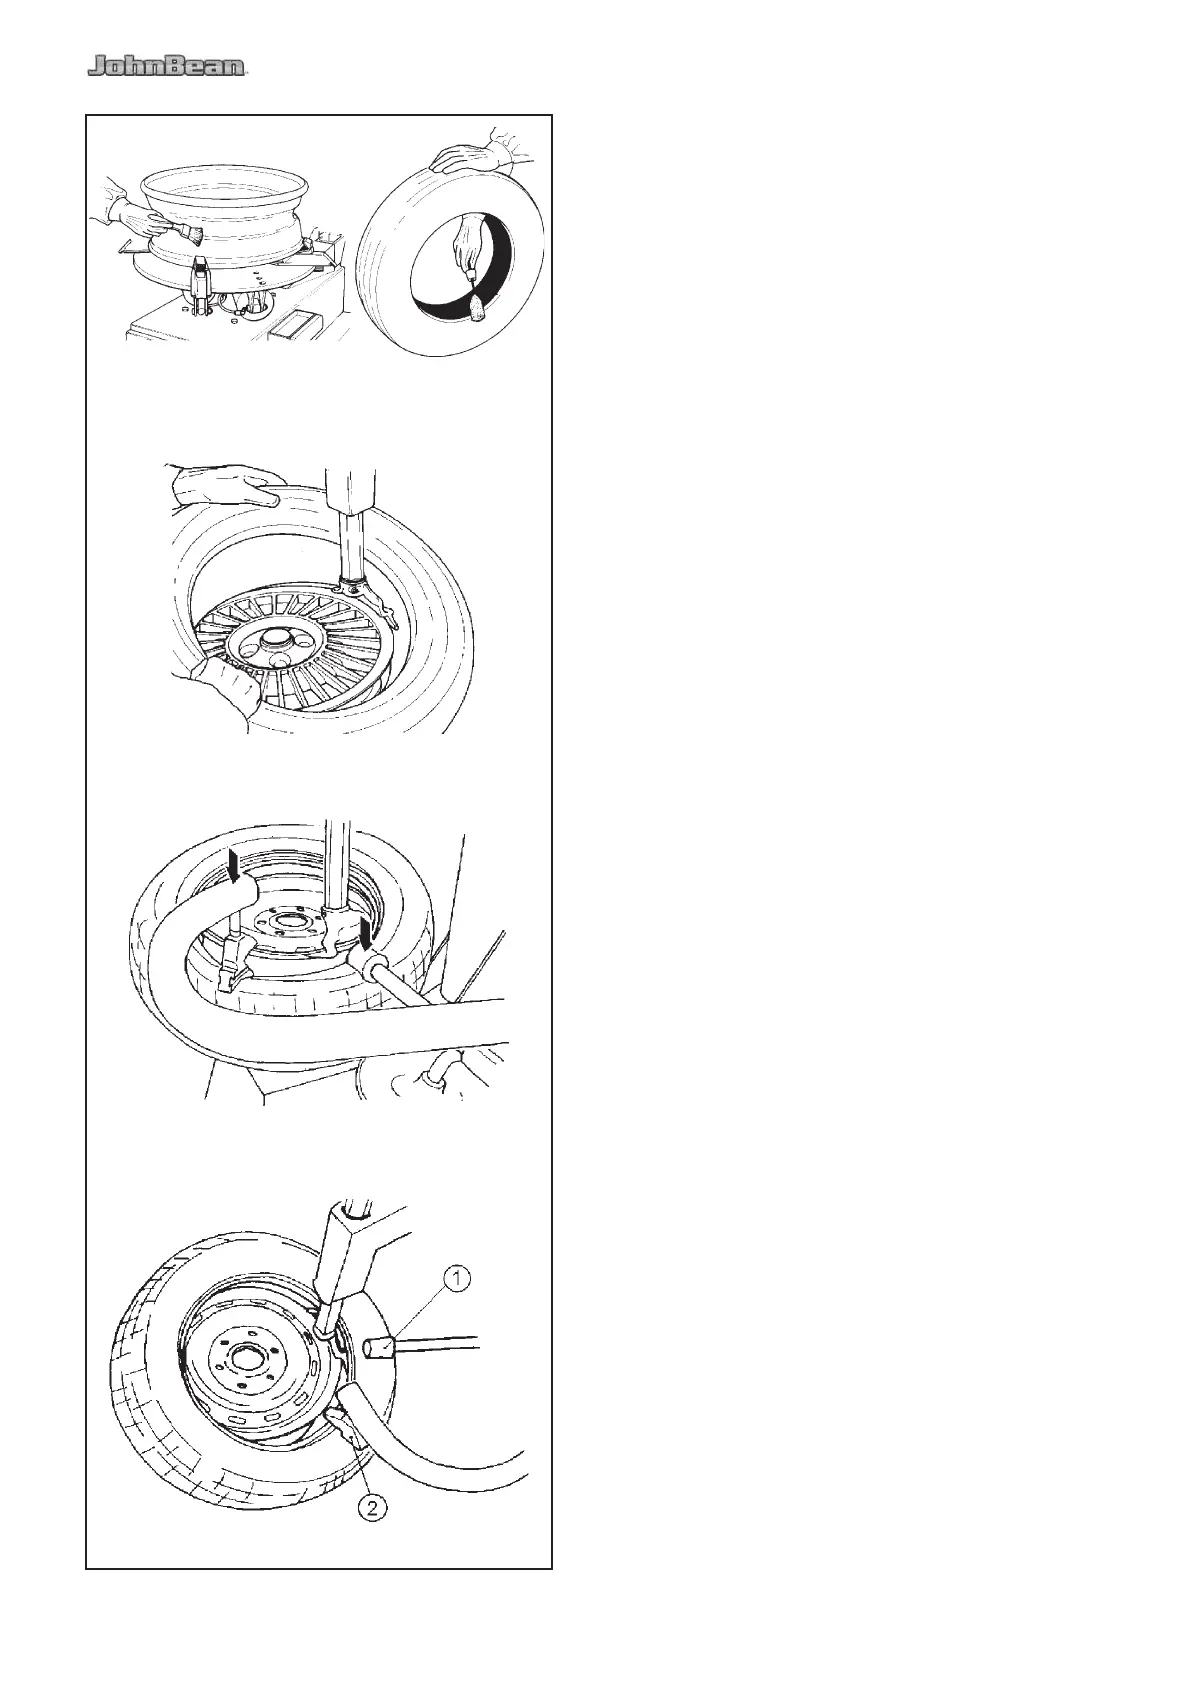
4.2 Mounting tubeless tires
A. Lubricate the entire rim surface (Fig. 4.2-1).
Lubricate both beads, inside and outside, (Fig. 4.2-2).
WARNING
LIBERAL LUBRICATION OF THE TIRE AND RIM
IS NECESSARY TO MOUNT TIRE CENTERING
CORRECTLY AND GET A PROPER ON THE
RIM. BE SURE YOU ARE USING APPROVED
LUBRICANT ONLY.
WARNING
OBSERVE THE ROTATION DIRECTION OF
THE TIRE, IF REQUIRED. SOME TIRES HAVE
A COLOR DOT THAT MUST BE KEPT ON THE
OUTSIDE OF THE WHEEL.
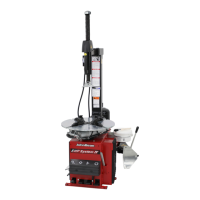
B. Lock the rim on the turntable and rotate it to have the
valve in 5 o’clock position. Place the tire to be mounted
on the rim. Swing the mounting arm forward so that the
mount/demount tool is in the working position. Engage
the lower bead OVER the mounting wing and UNDER
the mounting ! nger of the mounting tool. Turn the wheel
clockwise and push the tire down into the drop center,
opposite to the mount/demount head (Fig. 4.2-3).
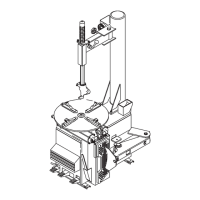
C. Mount the upper bead following the directions
in section B (Fig. 4.2-4). With low pro! le tyres the
pneumatic bead holding and mounting tool “MH 320
Pro” can help to facilitate mounting of the top bead
(Fig. 4.2-4).
4.2.1 Use the bead presser as a mounting
help device.
A. Mount the ! rst bead.
Position the roller (Item 1) and the bead pusher tool
(Item 2) as showed in Fig. 4.2.1-1.
B. Lower the bead pusher so that the roller and the
bead pusher tool on the tire help keeping the bead into
the drop center (Fig. 4.2-4).
The bead pusher tool follows the tire rotation during
the mounting operation.
Bring the roller and the bead pusher tool back to rest
position.