JOHNSON CONTROLS
8
FORM 130.13-NOM8 (1021)
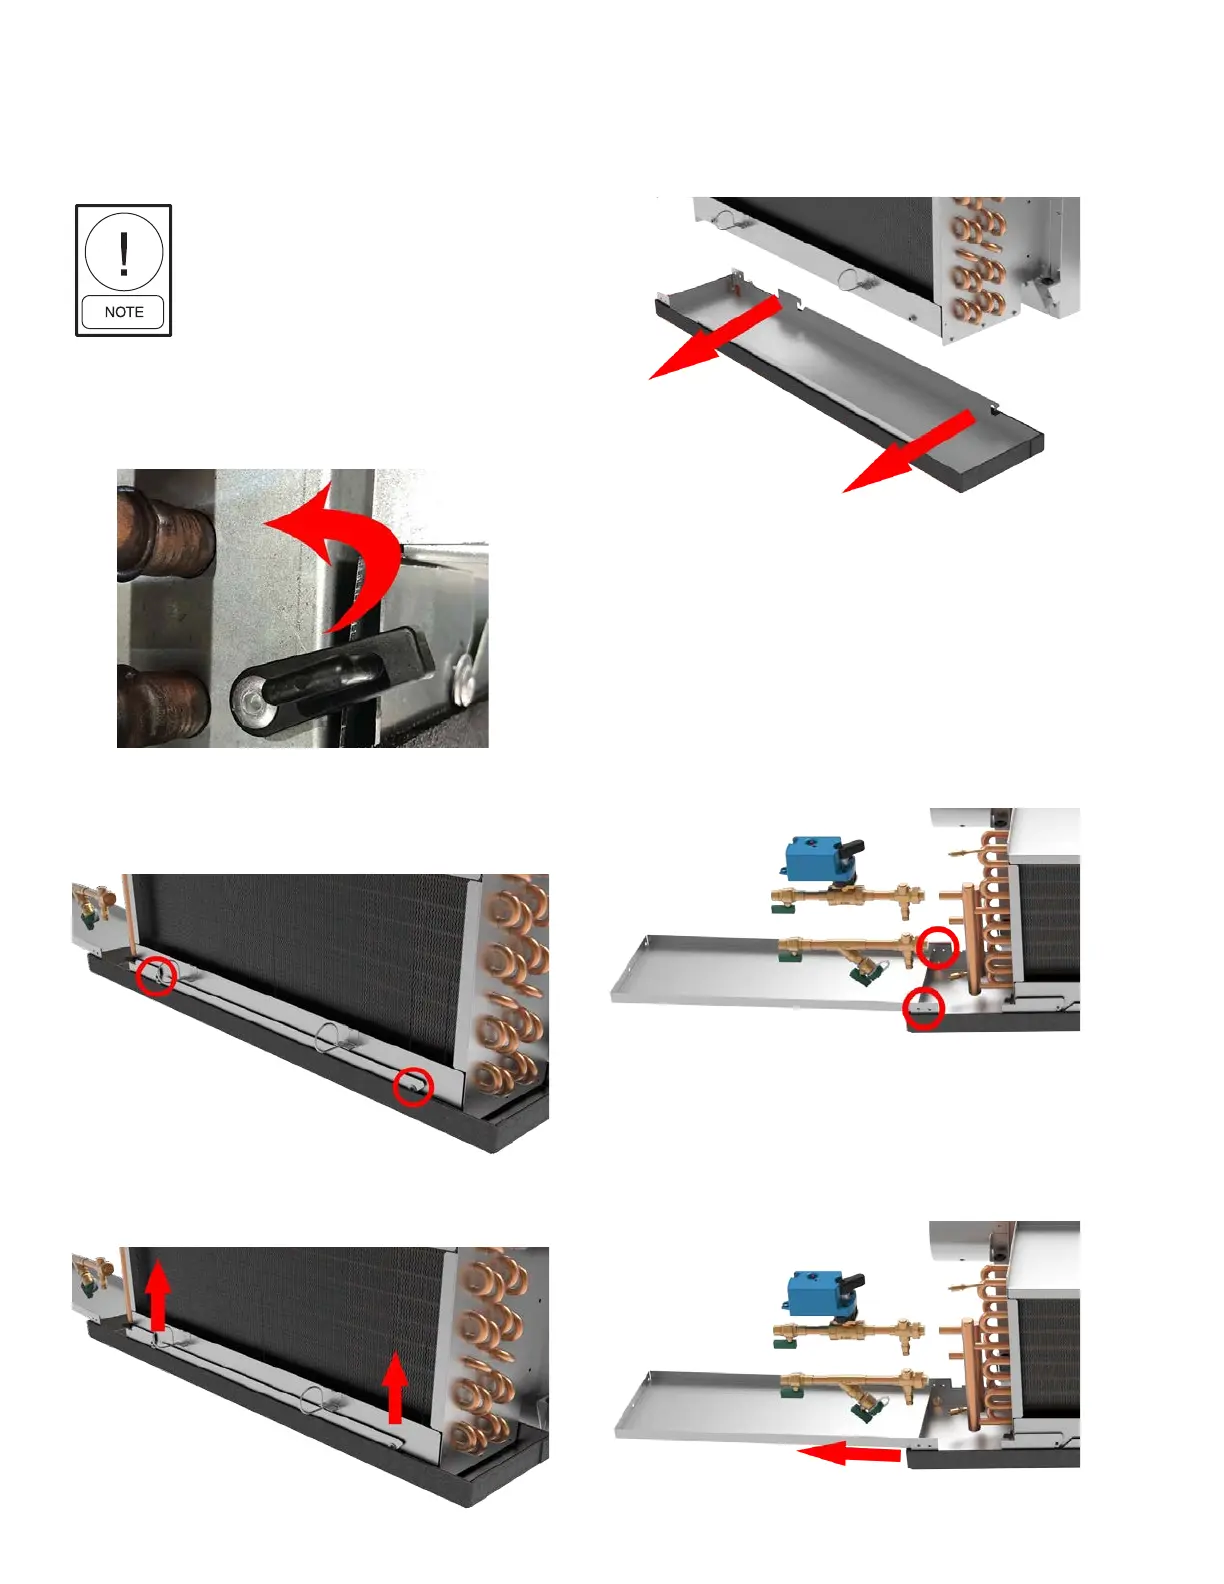
AUXILIARY DRIP PAN REMOVAL
The auxiliary drip pan is easily removable for cleaning.
For auxiliary drip pan removal, follow the two-step
process illustrated below, by locating and then removing
the four (4) retaining screws which secure the auxiliary
drip pan to the side of the drip pan.
Step 1: Locate The Four (4) Retaining Screws
Which Secure The Auxiliary Drip Pan To The Drip
Pan.
Step 2: Remove Retaining Screws And Carefully
Remove The Auxiliary Drip Pan From The Drip
Pan.
Step 2: Visually Locate Drip Pan Retention
Studs.
Step 1: Locate Drip Pan Retention Clip.
Press Upward Until Clip Clears Edge Of
Drip Pan.
Step 3: Apply Slight Upward Pressure
to Drip Pan.
Tool-Free Drip Pan Removal
For drip pan removal, follow the four-step
process illustrated below.
Step 4: Disengage Pan Via 45° Downward
Motion Along Guides, Remove Drip Pan From
Unit
To prevent condensation drip out-
side of the drip pan area, drip pan
retention clip must be returned to its
original engagement position within
the drip pan area (see below)
 Loading...