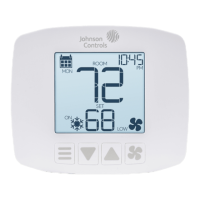
WT-4000 Series Pneumatic-to-Direct Digital Control (DDC) Room Thermostats Installation Instructions
10
Net Config Screen
1. While in the Configuration Mode, press the
Up/Down buttons to select the Net Config option
(Figure 6).
2. Press to confirm the selection.
3. Press the Up/Down buttons to select CH to change
the radio channel number, GI to change the device
network group ID, and DI to change the unique
thermostat device ID (Figure 7).
Note: The high byte of the device ID must be in the
range of 71 to 80. The low byte can be set to any value.
4. Press to confirm the selection. The LCD
returns to the normal operation screen, and the
settings are effective immediately.
Maintenance – Pneumatic Settings
1. While in the Configuration Mode, press the
Up/Down buttons to select the Maintenance option
(Figure 8).
2. Press to confirm the selection.
3. Press the Up/Down buttons to select the
Dir Acting, SP Psi, Gain, Prop Bnd, or Unoc Psi
option (Figure 9).
4. Press to edit the selected option, which is
highlighted on the menu.
5. Change the direction as desired (Figure 10).
a. Press the Up button to enable direct
acting (Dir Acting).
b. Press the Down button to enable reverse
acting (Rev Acting).
Figure 6: Selecting Net Config
FIG:nt_cnfg
t Config
n Mode
andalone
aintenance
esh
Figure 7: Selecting CH, GI, or DI
FIG:ntwrk_infrmtn_ch11
H11
I 111.111
I 71.40
etwork
nformation
Figure 8: Selecting Maintenance
FIG:mntnce
et Config
an Mode
tandalone
aintenance
Mesh
FIG:pnmtc_sttngs
SPPsi
9.0
Gain
2.0
PropBn d
6.0
UnocPsi
Figure 9: Selecting the Pneumatic Settings
FIG:drct_actng
SPPsi
9.0
Gain
2.0
PropBnd
6.0
UnocPsi 0.0
DirActing
Figure 10: Changing the Direction
 Loading...


