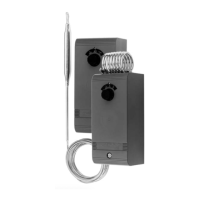
WT-4000 Series Pneumatic-to-Direct Digital Control (DDC) Room Thermostats Installation Instructions
9
Using the Shoulder Mode Button
The Shoulder Mode button allows the WT-4000 Series
Room Thermostat to be placed into a shallow setback
mode. When the room thermostat is activated, it does
not use HVAC equipment as long as the temperature is
within the Shoulder Mode configured setpoint limits
(default ±5F° [±3C°]).
For example, with a setpoint of 70°F (21°C) and the
Shoulder Mode activated, the room thermostat does
not turn the HVAC equipment on as long as the room
temperature is between 65 and 75°F (18 and 24°C).
Use the Shoulder Mode to save energy when a room or
zone is vacated earlier than when the Unoccupied
Mode is scheduled to begin.
1. Press the Shoulder button to activate the
Shoulder Mode.
2. The Shoulder Mode period has a limited duration;
the room thermostat goes back to its regularly
scheduled mode at the next scheduled Unoccupied
Mode change.
3. Press the Shoulder button again to return to
the Occupied Mode.
Configuration
The following steps describe pre-installation,
device-level configuration.
Room Thermostat Configuration Mode
1. Bend the four locking tabs on the wallplate outward
to separate the wallplate from the room thermostat.
2. Install the four 3.6 V lithium batteries included with
the room thermostat into the battery compartment.
Be sure to match the positive (+) battery ends with
the positive (+) battery terminals in the battery
compartment.
3. Once powered up, the room thermostat initializes
in:
a. 30 seconds if the room thermostat can connect
to a network.
b. 3 minutes if a network is not present.
Figure 2 illustrates the LCD during room
thermostat initialization.
4. Press and hold the Shoulder button and the
Override button simultaneously for
6 seconds to set the room thermostat in the
Configuration Mode. Initially, the LCD changes to
the firmware version screen (Figure 5), and then
after 10 seconds the configuration menu appears
(Figure 6).
5. Use the Up/Down buttons to navigate through the
room thermostat menu. All further configuration
settings must be made while in the Configuration
Mode.
Note: If the configuration screen is left idle for
10 seconds, it returns to the normal operation screen.
IMPORTANT: Do not press any buttons during the
initialization process. Configuration changes made
during initialization are not saved.
Figure 5: WT-4000 Series Room Thermostat Firmware Version Screen
RF:
Radio Module Firmware Number
FIG:frmwr_vrsn_scrn
Radio Channel Number
GI:
Device Network Group ID
DI:
Unique Thermostat Device ID
DF:
Display Firmware Number
DF 0. 3. 37
RF 1. 16. 14
CH 11
GI 111.111
DI 71.40
Firmware