Date and time
After you press the Date and Time button, the Date and Time screen displays. Use the following
procedure to make changes.
Note: To enter the date information, the format is: YYYY / MM / DD.
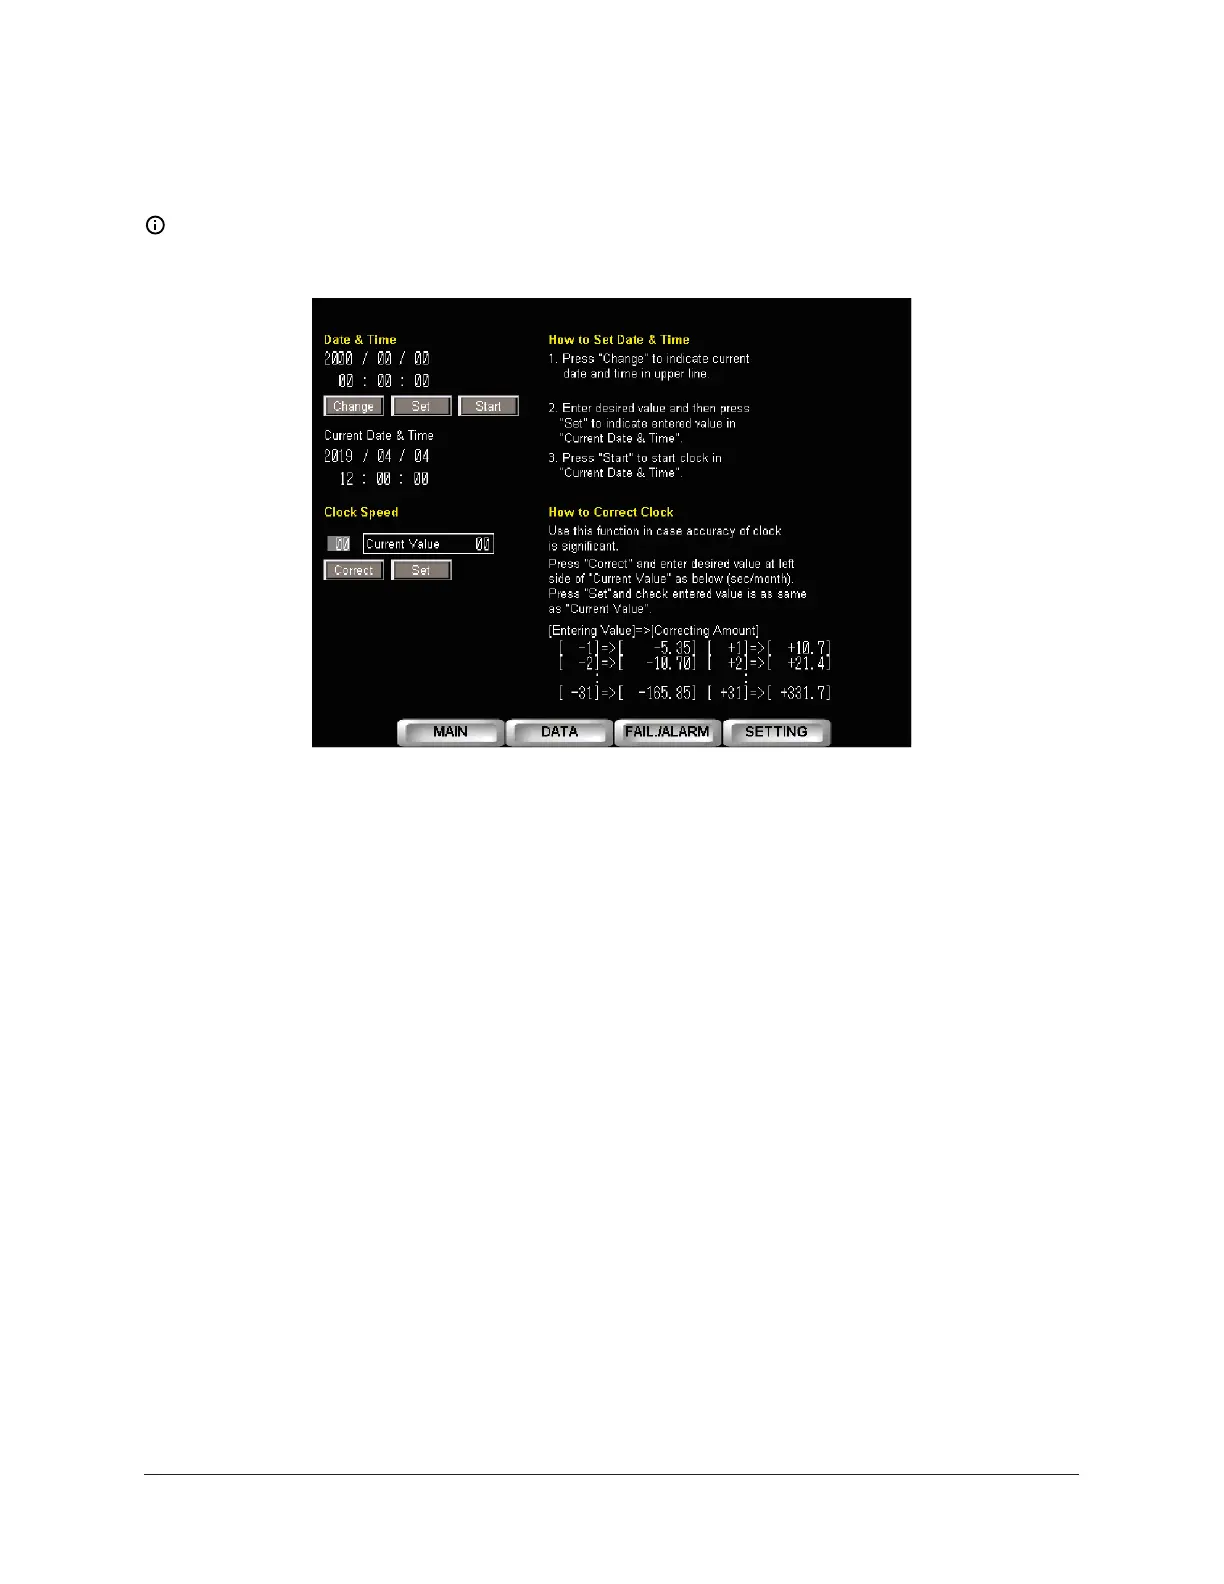
Figure 67: Date and time
1. Press the Change button.
2. Enter the correct date and time.
3. Press the Set button to set the time.
4. Press the Start button to restart the clock.
If the clock is not keeping the correct time, use the following to fix it:
1. Press the Correct button to specify a correcting amount (+ or -).
2. Press the Set button to update the time.
Operation switch
In this screen section, choices can be made about the mode of operation for the various devices.
Use the buttons to make your choice. The choices are:
Forced Dilution: indicates whether forced dilution is ON or OFF.
Refrigerant Pump: indicates whether the refrigerant pump is operating automatically (Auto mode)
or is stopped (Stop mode)
Purge Mode: The Auto and Manual buttons control the purge operation. The lit button indicates if
the purge mode is Automatic or Manual.
Manual Purge: The ON and OFF buttons control the manual purge operation. The lit button tells
you if the manual purge operation is running or not. If you press the Purge Mode Auto button, the
purge is done automatically. If you press the Purge Mode Manual button, the purge starts when
you press the Manual Purge ON button. The purge stops when you press the Manual Purge OFF
button.
139YHAU-C Single Effect Steam-Fired Absorption Chiller
 Loading...