CONSOLE CABLE REPLACEMENT PROCEDURE (5100series)
Tools required:
u Philips
screwdriver
u Adjustable
wrench
u hex key(8mm)
u crank extractor
u coin
Procedure:
1. Loosen the screws that
hold the console to the
console holding bracket.
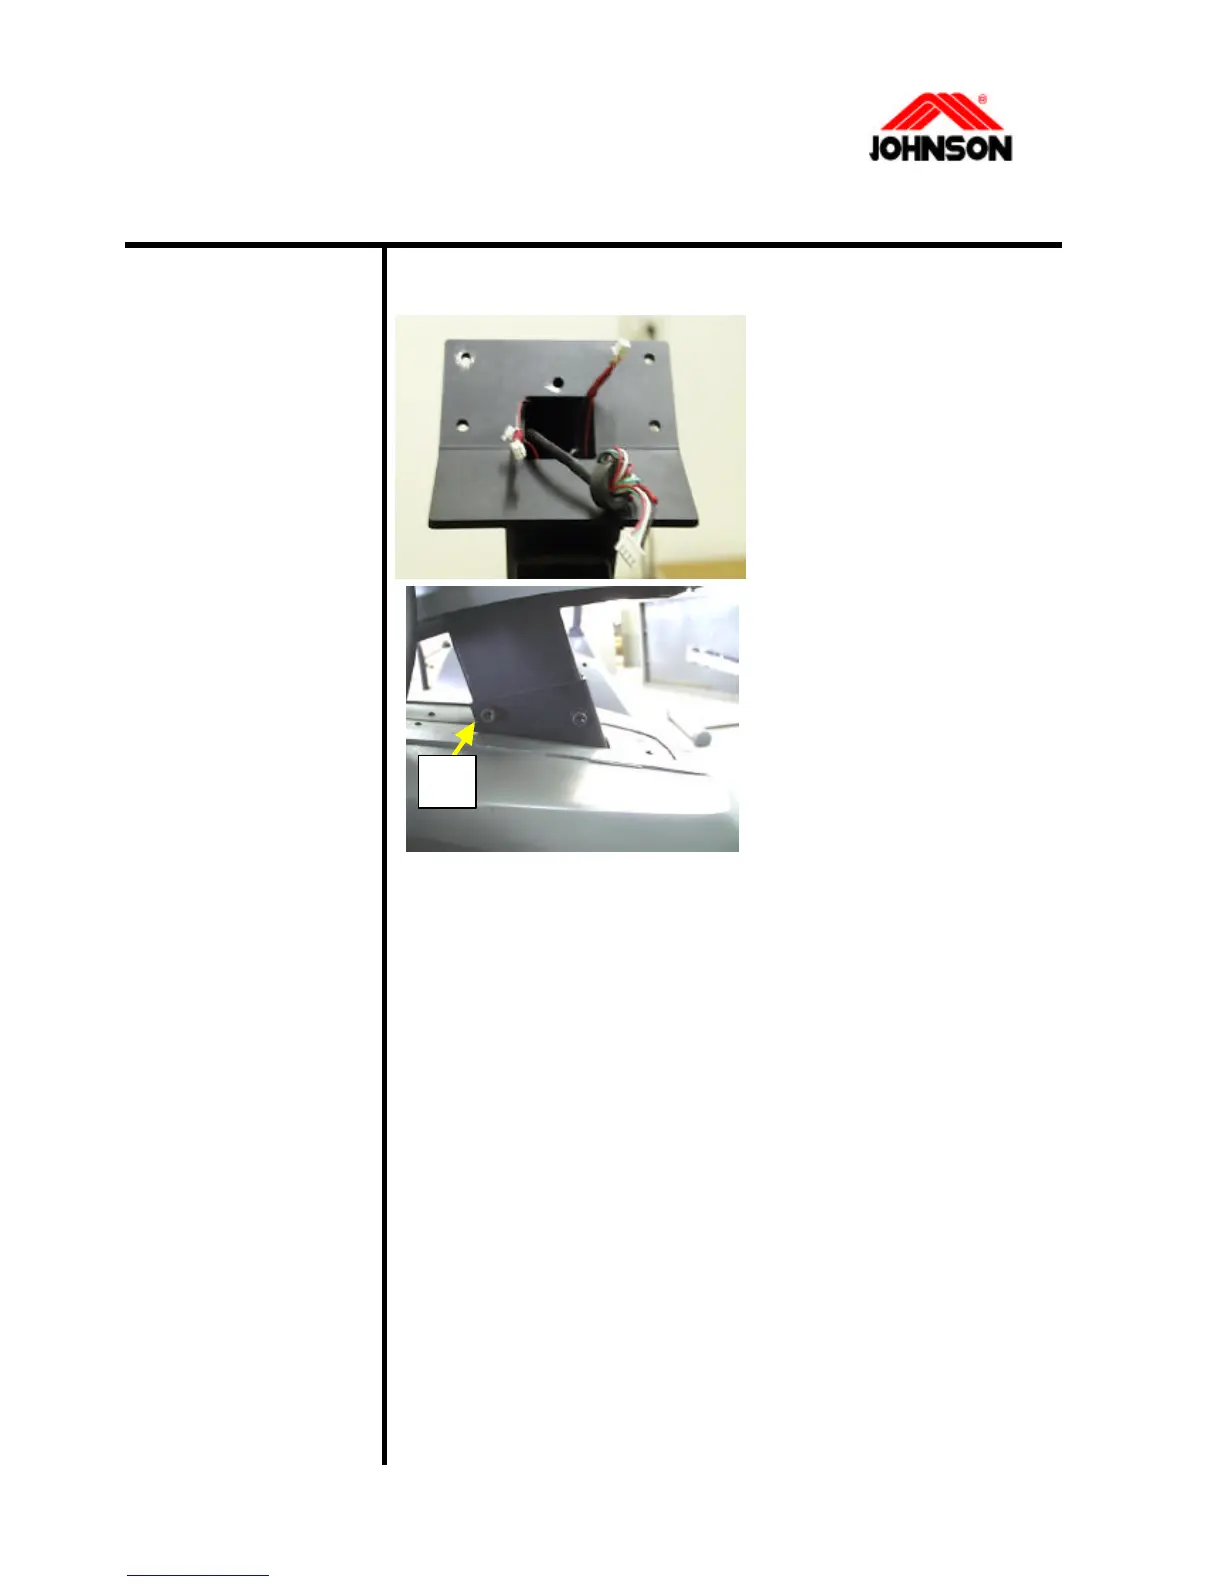
2. Unplug the console
cable from the console
connectors.
3. Remove the upper cover,
screw
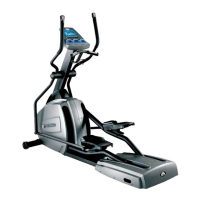
4. Remove the screw (A)
and take bracket out (for
JPE). Remove the crank and
side cover(for JPC/B/S).
5. Disconnect the console cable from the connectors, and
then tie the old cable to the new one with a rigid string.
6. Pull the old cable from the top end until the new cable
threads all the way through the support.
7. Reconnect the console cables to both the console and
control board.
8. Tighten the screws that hold the console to the console
bracket.
9. Install the parts.
A
3-2 Revision: 1.0 Date: 2001/06/01