V Range 502 l 652 l 802 Maintenance Manual
MA6:4
Chapter - Wearing Items
These parts are also abraded by the material being conveyed from the suction nozzle and must be periodically
inspected and replaced when worn or holed. The duct is 250 mm diameter.
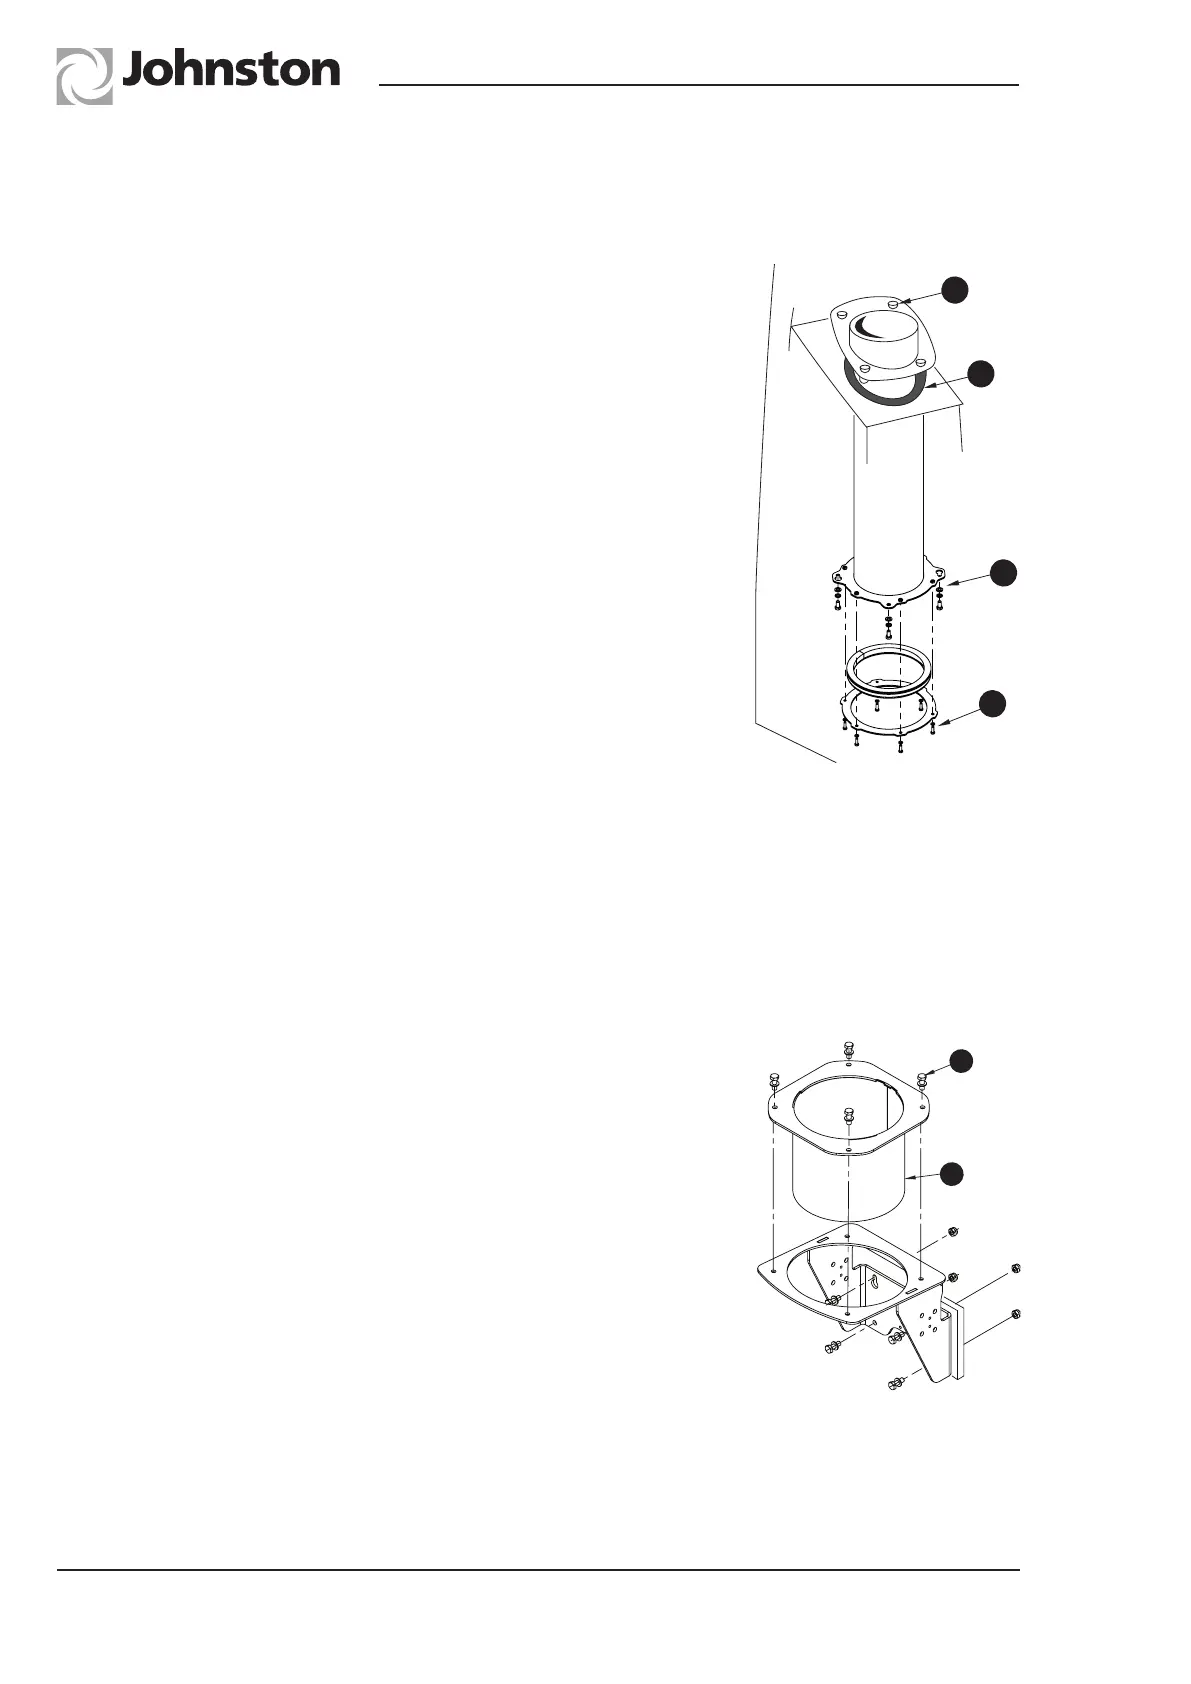
Removal
Enter body after carrying out the same precautions as for intake flap
replacement. Remove the four screws securing the collar around the
intake duct (A). Lift up the flap manually (if fitted) and remove collar.
A rubber cord (B) will now be visible which should also be removed
with care to prevent damage. Dismount from body. Tip body and
support on prop. Remove the six screws (D) securing the make/break
rubber seal retention flange. (This seal assembly can be kept intact
for re-fitment to the replacement intake duct unless deemed requiring
replacement too.) Release two of the screws (C) in the key-holed
intake duct flange and remove the other two. Twist the intake duct so
the two released screws pass through the larger part of the keyhole
and remove the duct.
Refitting
Reverse of removal procedure. Align slots in the intake duct flange
with the released screws and twist. Fit the other two bolts and tighten.
Re-fasten the make/break seal assembly to the intake duct flange
with six screws. Replace the rubber cord and collar plate inside the
body and secure by fully tightening the four duct top retaining bolts.
M02MA-022
D
A
B
C
Intake Seat
Removal
Raise the body and ensure the body prop is engaged in the rack.
Release trunking from tube as described on previous page.
Remove the four bolts (A). Lift seat (B) clear of bracket.
Refitting
Reverse of removal procedure. As no adjustment for seal compression
is provided, it is wise to check seal compression when the body is
lowered.
Intake Duct
M02MA-021
A
B
Intake Trunking
Removal
Lower suction nozzle to the ground, release worm drive clips at either end and remove flexible trunking.
The nozzle trunking has an inside diameter of 250mm.
Refitting
Loosely fit worm drive clips to either end of trunking. Engage trunking onto the nozzle with a 55 mm
(2”) overlap and tighten clip. Fit other end to the intake seat and secure. Check trunking is not twisted
or rucked and does not foul anything when the nozzle is raised or lowered again.