TP820 User’s Manual
- 12 -
response after “Close this window on success” is checked, and then this dialog is closed
automatically. Select “Reload Timer” then the software will wait for the printer’s response.
Generally, printer will take response in a circle time if network connection is correct.
Click “Cancel” if you abandon the modification.
Click “Search” in the main interface again to update printer information after modifying the
printer’s IP address.
3) Report printer’s IP address
Report the printer’s IP address, which will be used in the section “Newly-install printer network
driver” or “Upgrade-install printer network driver (setting driver’s network port)”.
2.6.3 Installing Printer Network Driver
The ways of installing network driver are divided into Newly-install way and Upgrade-install way
according to whether the PC installs the printer driver or not.
If the printer driver hasn’t been installed on the PC, adopt newly-install way whose steps are
shown in “Newly-install printer network driver”.
If the printer driver has been installed on the PC, adopt Upgrade-install way whose steps are
shown in “Upgrade-install printer network driver”.
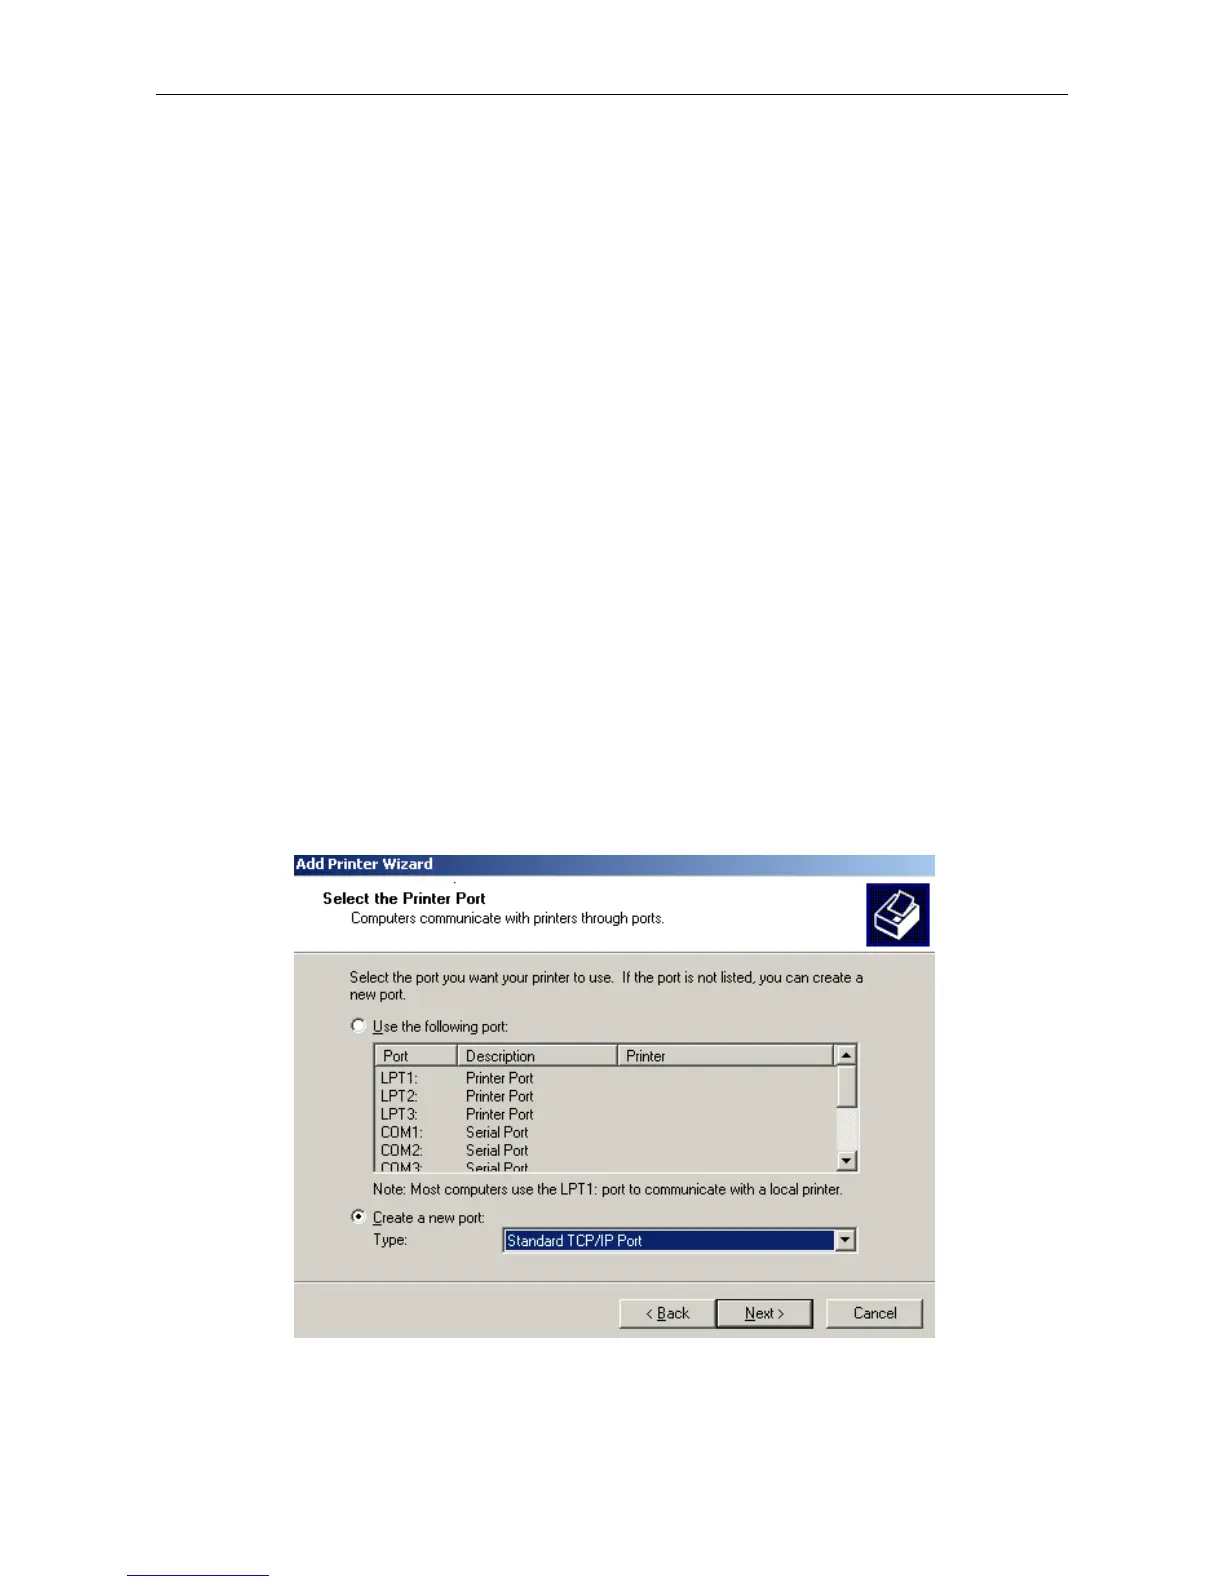
1. Newly-install printer network driver
1) Click “Start”Æ”Settings”, select “Printers.
2) Click “Add printer”, then come out a window of “Add Printer Wizard”, click “next”, then please
read the select direct carefully. Such as, select “local or Network Printer”, then click “next”.
3) Come out a window of “Select the Printer port”, select a port you want your printer to use. For
example, select “Create a new port”, select “Standard TCP/IP Port” in the port, click “next”.
4) Come out a window of “Add standard TCP/IP Printer Port Wizard”, click “Next”.
5) Come out a window of “Add Port”, enter the IP address reported by the “Setting printer’s IP
address” in the “Printer Name or IP Address” column. Take IP address “192.168.0.240” for
example. “Port Name” is created automatically after finishing filling in IP address.