82
7
Cylinder and piston
A
2
3
4
1
A
B
Check that the bearing holder's rubber
seals are undamaged.
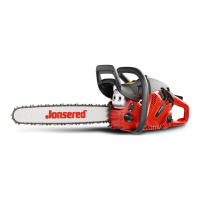
Press down the crankshaft’s bearing
holder in the bearing seats on the cylinder
and tighten the cylinder screws crosswise.
Fit the other parts in the reverse order to
dismantling.
NOTE!
The cylinder screws should be re-tighte-
ned.
Dismantling
Mod. 2054/2055
Remove the screws (A) and (B), and the
cover over the oil pump.
Remove the cylinder screws.
Check that the rubber seals on the bearing
holder are undamaged.
Press down the crankshaft’s bearing
holder in the bearing seats on the cylin-
der. It is not necessary to use sealing
compound.
Tighten the cylinder screws crosswise.
Use Locktite on the screws.
Tightening torque: 11 Nm.
Fit the other parts in the reverse order to
dismantling.
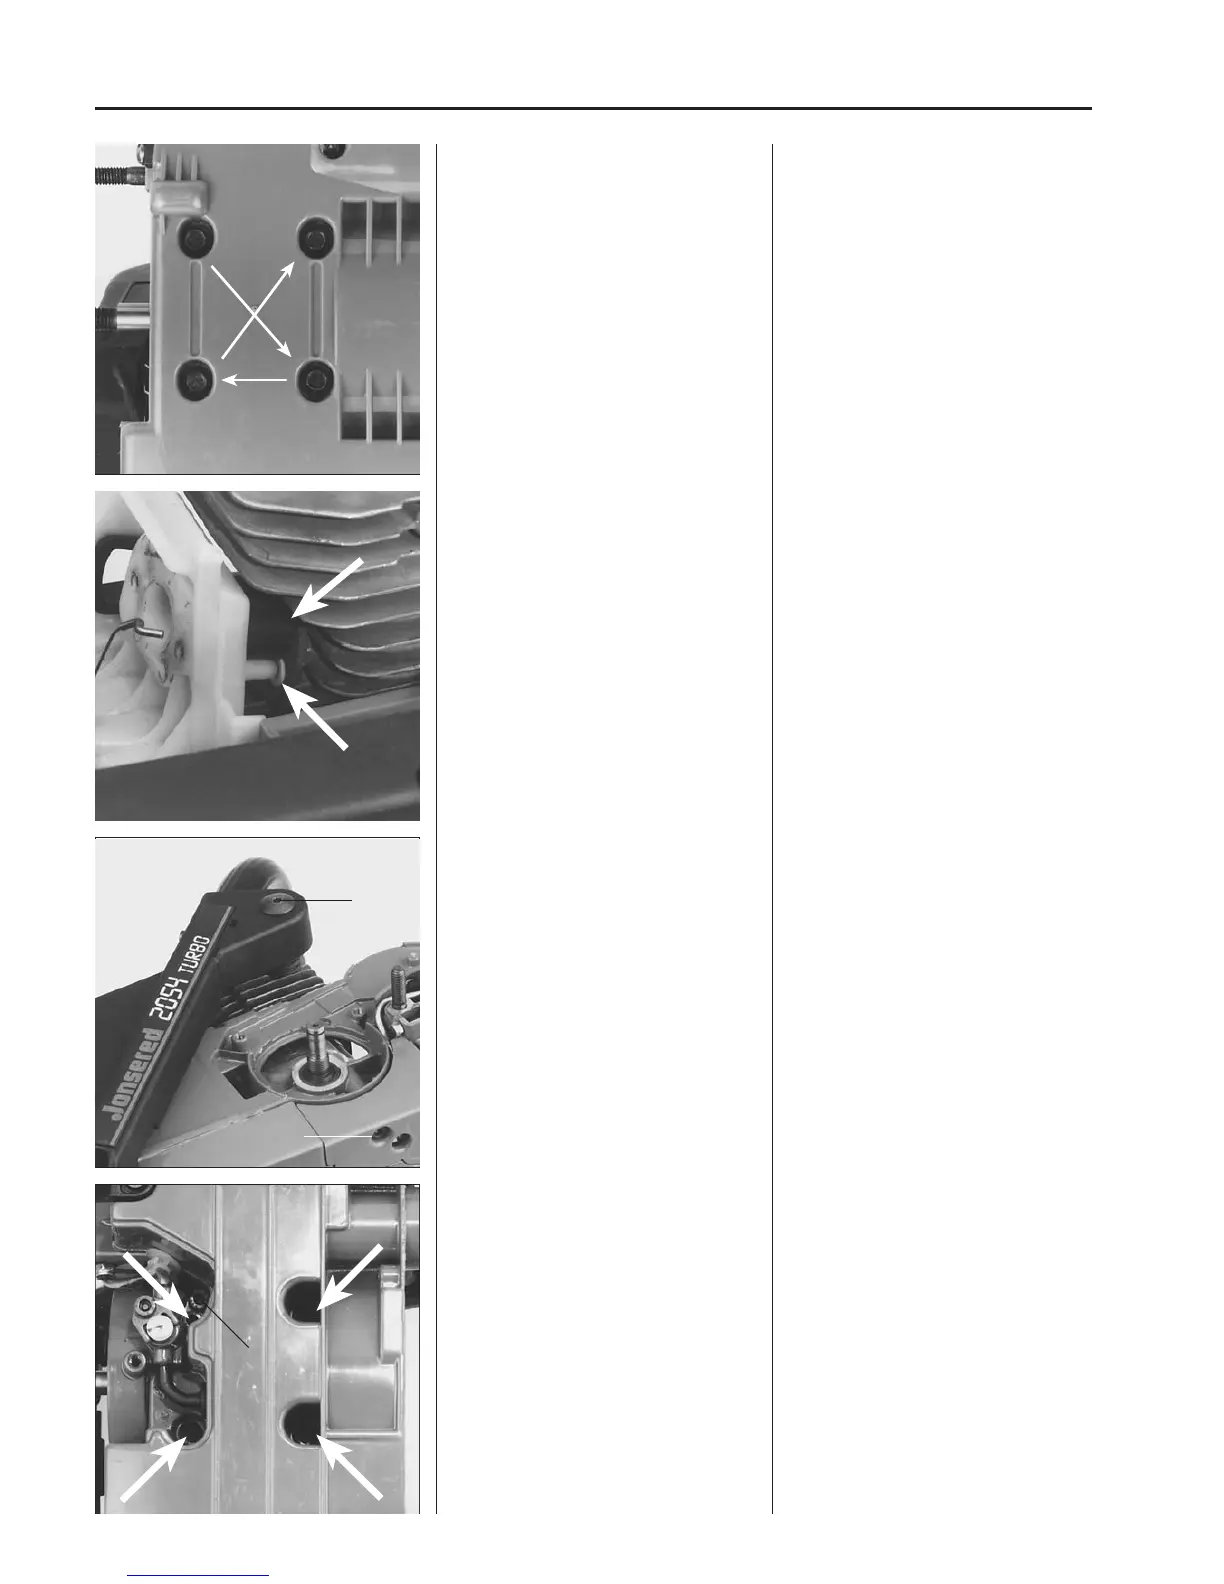
Check when fitting the adapter that the
inlet pipe and impulse channel are posi-
tioned correctly and seal tightly.
NOTE!
The cylinder screws shall be re-tighte-
ned.
Fit the bar and chain and run the saw
warm for 2-3 minutes.
Allow the engine to cool and re-tighten
the screws to the correct tightening torque
(11 Nm).
Dismantling
Mod. 2054/2055
Remove the screws (A) and (B), and the
cover over the oil pump.
Remove the screws which hold the cylin-
der to the crankcase.
NOTE!
Four screws. The fifth screw (A) holds the
crankshaft’s bearing housing fixed in the
crankcase when the cylinder is lifted off.
 Loading...