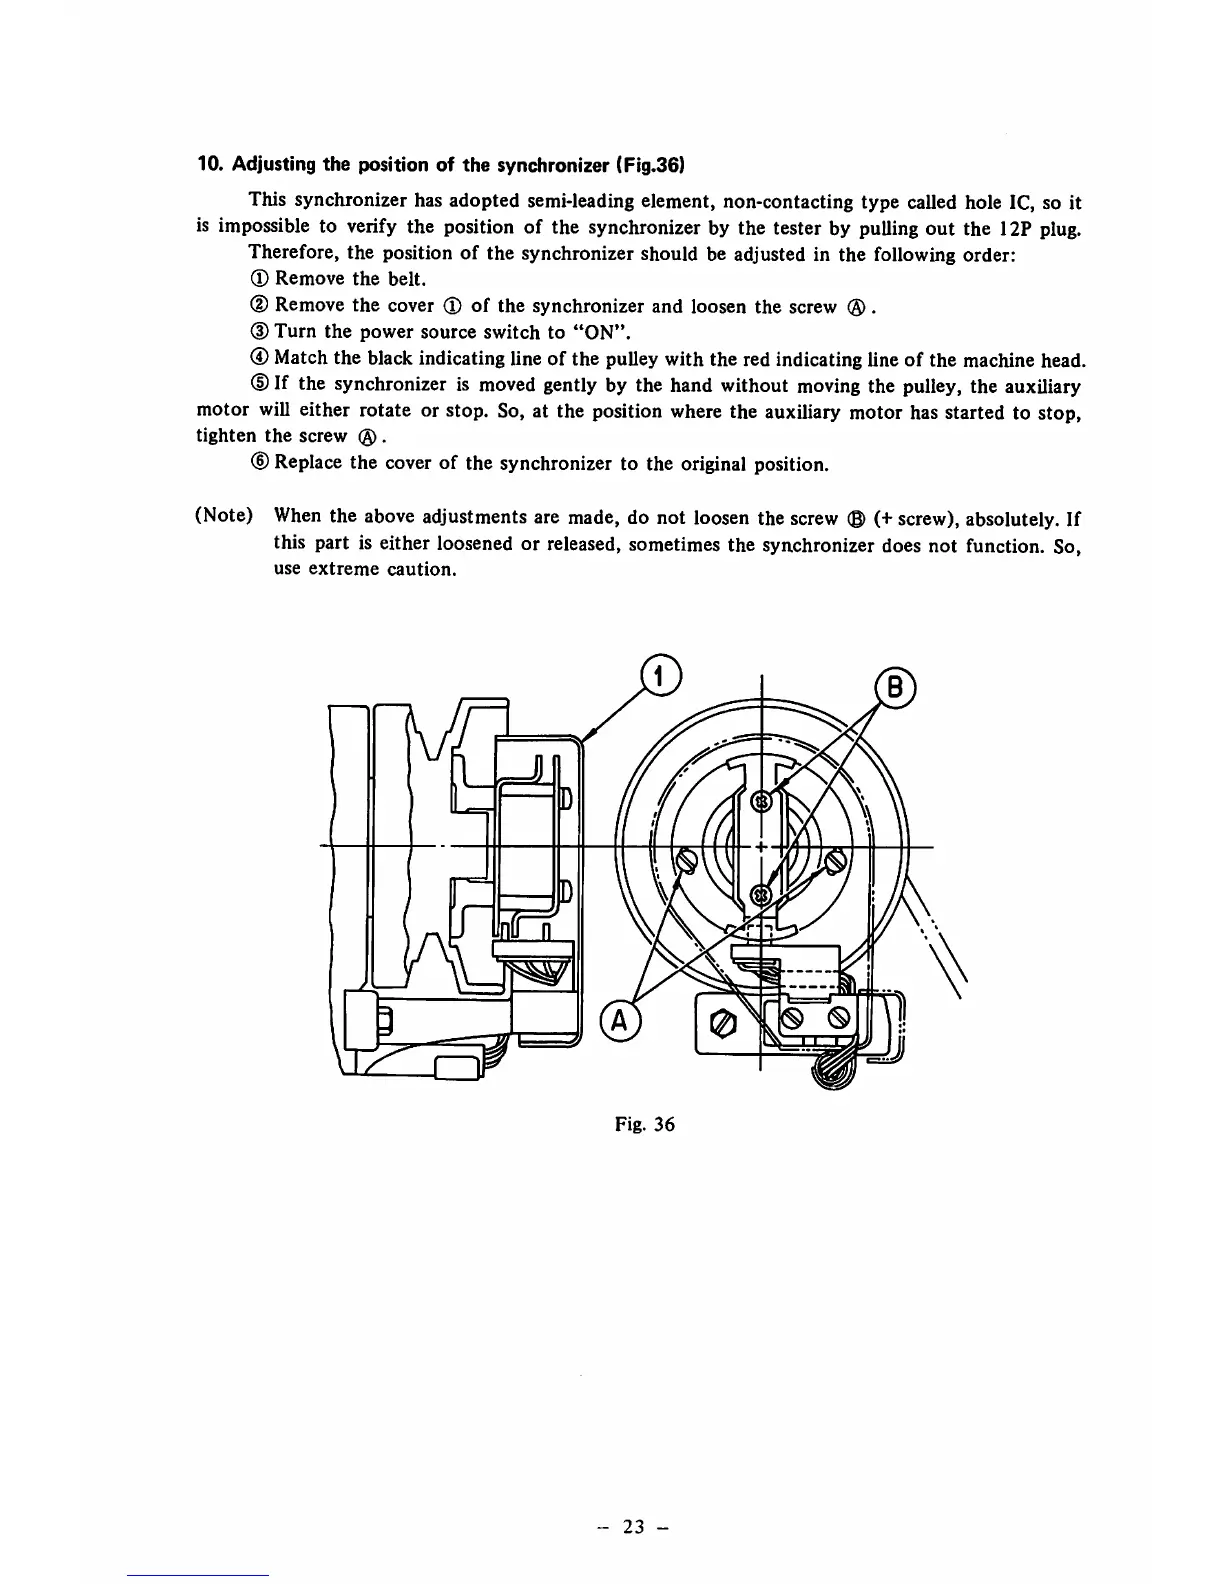
10. Adjusting
the
position of
the
synchronizer (Fig.36)
This synchronizer has adopted semi-leading element, non-contacting type called hole IC, so it
is impossible to verify the position of the synchronizer by the tester by pulling out the 12P
plug.
Therefore, the position of the synchronizer should be adjusted in the following order:
®
Remove
the
belt.
(D
Remove the cover ® of the synchronizer and loosen the screw
®.
(DTurn
the power source switch to
"ON".
®
Match
the
black
indicating lineof the
pulley
with the redindicating lineof the
machine
head.
(D
If the
synchronizer
is
moved
gently
by the
hand
without
moving
the
pulley,
the
auxiliary
motor will either rotate or stop. So, at the position where the auxiliary motor has started to stop,
tighten
the
screw
®.
(D
Replace
the
cover
of the synchronizer to the
original
position.
(Note)
When
the
above
adjustments
are
made,
do not
loosen
the
screw
(©
(+
screw),
absolutely.
If
this part is either loosened or released, sometimes the synchronizer does not function. So,
use
extreme
caution.
0
0
Fig.
36
-
23
-