–
38
–
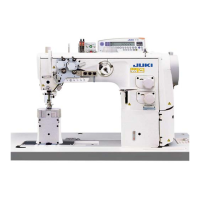
• PLC-1710, PLC-1760 • PLC-1710-7, PLC-1760-7, PLC-1760L
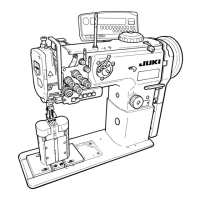
13.糸巻き糸案内の取り付け
/ INSTALLING THE BOBBIN WINDER THREAD GUIDE /
INSTALLIEREN DER SPULERFADENFÜHRUNG /
POSE DU GUIDE-FIL DU BOBINEUR /
MODO DE INSTALAR LA AGUJA DE HILO DE LA BOBINADORA DE BOBINA /
INSTALLAZIONE DEL GUIDAFILO DELL’AVVOLGIBOBINA /
绕线导线器的安装
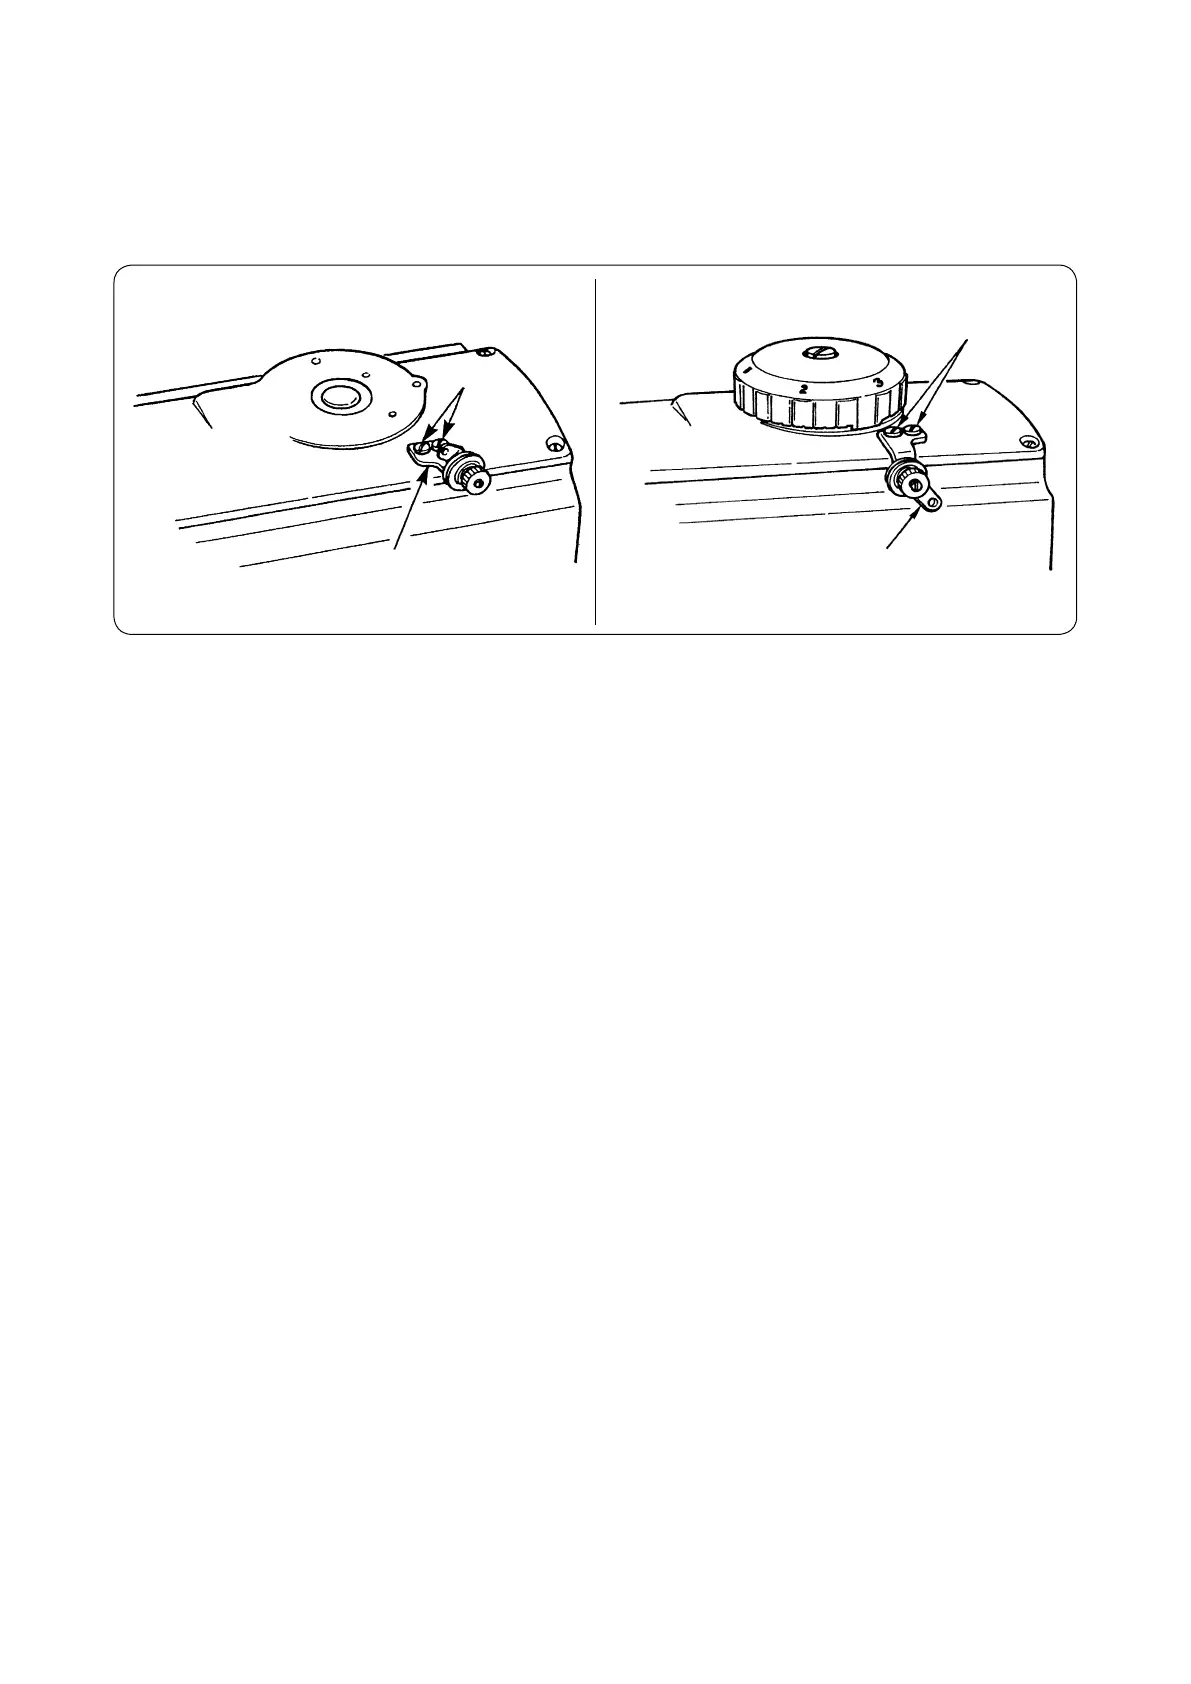
1) 糸巻き糸案内
1
を止めねじ
2
でトップカバーに取り付けます。
PLC-1710、PLC-1760 は、糸案内が左上を向くように、PLC-1710-7、PLC-1760-7、PLC-
1760L は、糸案内が右下を向くようにします。
2) 位置の調節は、「14.下糸の巻き方」を参考にしてください。
1) Attach bobbin winder thread guide
1
to the top cover using screws
2
.
For the PLC-1710 and PLC-1760, attach the thread guide so that it is facing to the upper left, and for the PLC-1710-7,
PLC-1760-7 and PLC-1760L, so that it is facing to the lower right.
2) Adjust the position of the thread guide referring to “14. WINDING A BOBBIN”.
1) Die Spulerfadenführung
1
mit den Schrauben
2
an der Oberabdeckung befestigen.
Für PLC-1710 und PLC-1760 ist die Fadenführung so anzubringen, dass sie nach links oben gerichtet ist, und für
PLC-1710-7, PLC-1760-7 und PLC-1760L, dass sie nach rechts unten gerichtet ist.
2) Die Position der Fadenführung gemäß “14. BEWICKELN EINER SPULE” einstellen.
1) Poser le guide-fi l du bobineur
1
sur le couvercle supérieur à l’aide des vis
2
.
Pour les PLC-1710 et PLC-1760, fi xer le guide-fi l de façon qu'il soit tourné vers le côté supérieur gauche et pour les
PLC-1710-7, PLC-1760-7 et PLC-1760L, de façon qu'il soit tourné vers le côté inférieur droit.
2) Régler la position du guide-fi l comme il est indiqué sous “14. BOBINAGE D’UNE CANETTE”.
1) Coloque la guía
1
del hilo de la bobinadora de bobina en la cubierta superior usando los tornillos
2
.
Para PLC-1710 y PLC-1760, coloque la guía del hilo de modo que quede mirando hacia la izquierda superior, y para
el PLC-1710-7, PLC-1760-7 y PLC-1760L de modo que quede mirando hacia la parte inferior derecha.
2) Ajuste la posición de la guía del hilo consultando “14. MODO DE BOBINAR UNA BOBINA”.
1) Attaccare il guidafi lo dell’avvolgibobina
1
al coperchio superiore tramite le viti
2
.
Per le PLC-1710 e PLC-1760, attaccare il guidafi lo in modo che esso sia volto in alto a sinistra, e per le PLC-1710-7,
PLC-1760-7 e PLC-1760L, in modo che esso sia volto in basso a destra.
2) Regolare la posizione del guidafi lo facendo riferimento al par “14. AVVOLGIMENTO DELLA BOBINA”.
Ⴏܬઋර
2
ϣನན֤ནఝ
1
τሔ֥ۉഏè
84+ ދ 84+ ֤֬ནఝӛསഏ١ 84+84+ ދ 84+4 ֤֬ནఝӛསႾ༶١è
ןࢲ໑ᇉ ౯Ҝý ֿན֬ನ١ٌþè
1
2
2
1
 Loading...