–
42
–
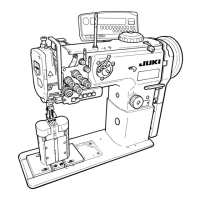
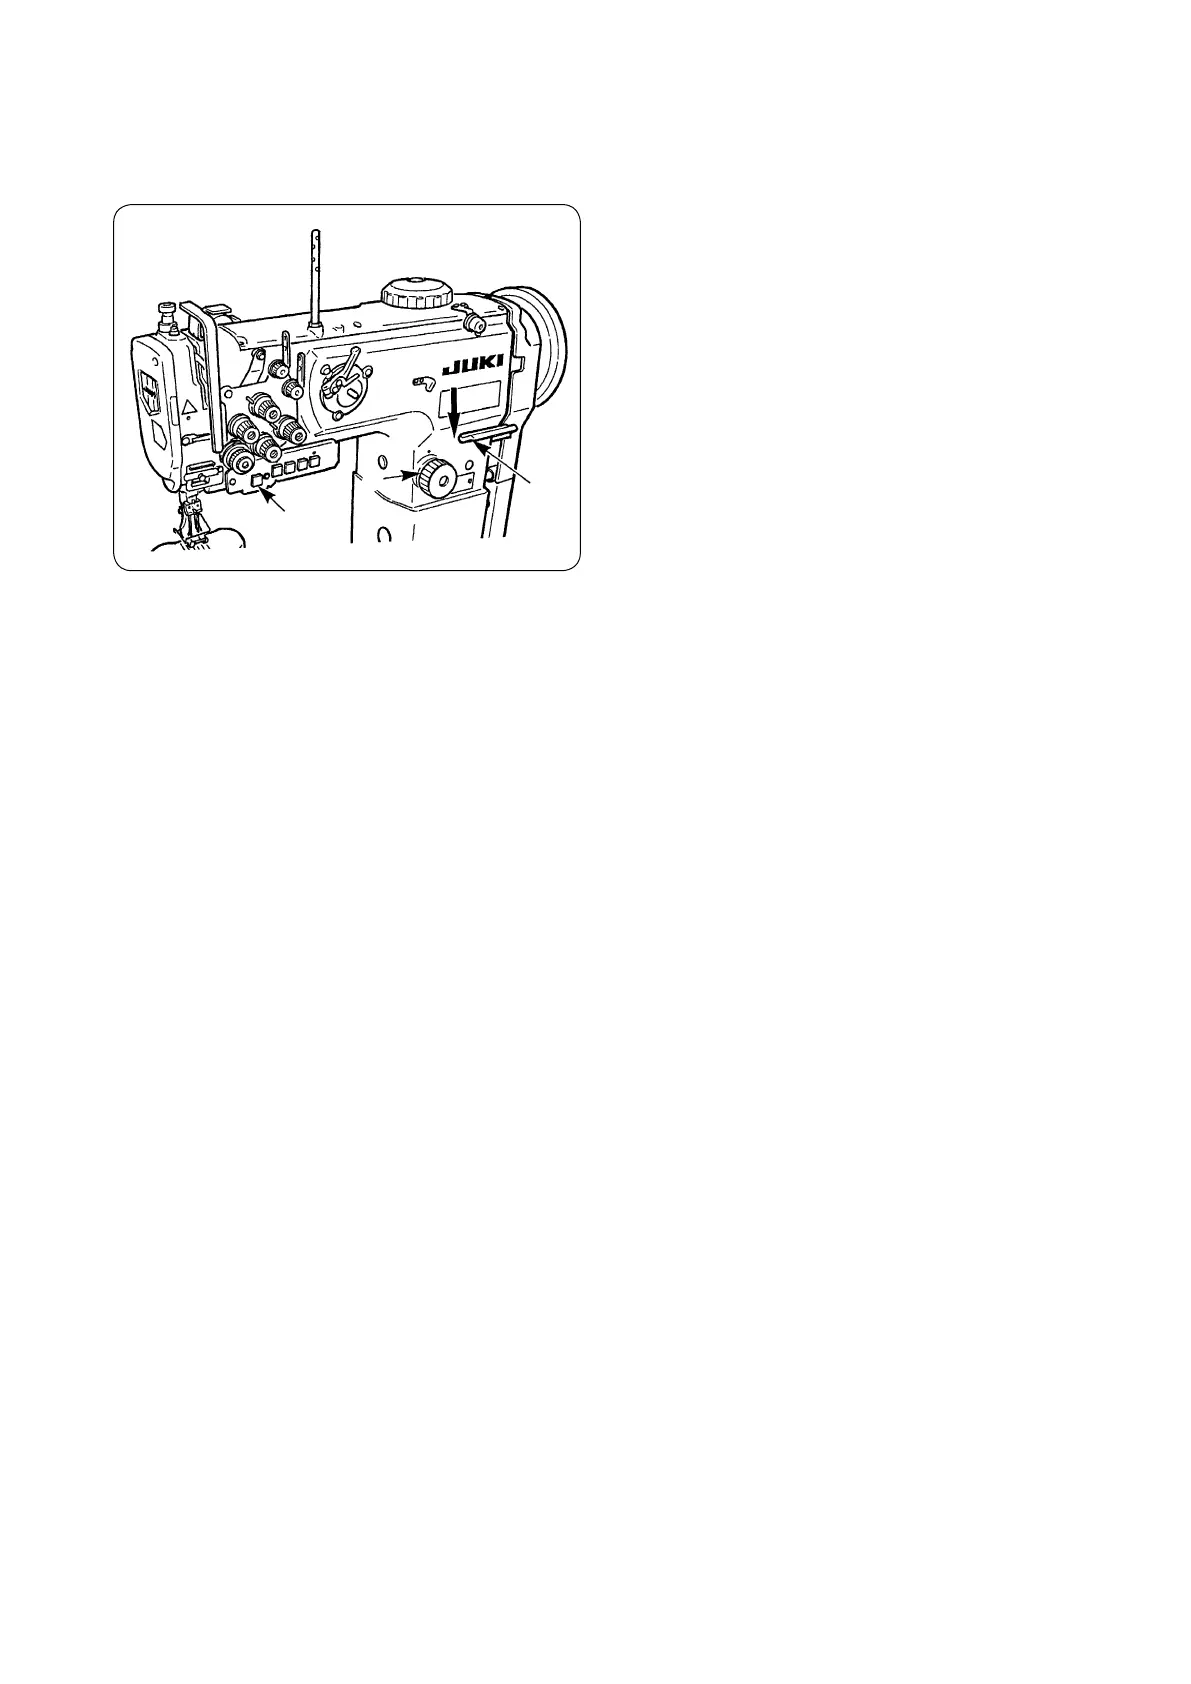
16.縫い目長さの調節
/ ADJUSTING THE STITCH LENGTH /
EINSTELLEN DER STICHLÄNGE / REGLAGE DE LA LONGUEUR DES POINTS /
MODO DE AJUSTAR LA LONGITUD DE PUNTADA /
REGOLAZIONE DELLA LUNGHEZZA DEL PUNTO /
缝迹长度的调节
送り調節ダイヤル
1
を左(右)に回して希望する
数字が上にくるようにして合いマークに合わせま
す。
(1)返し縫い
1) 送りレバー
2
を下に押します。
2) 押している間は返し縫いができます。
3) 手を離せば元に戻り、正送りとなります。
(2)ワンタッチ手動返し縫い
(PLC-1710-7、PLC-1760-7)
1) タッチバックスイッチ
3
を押します。
2) 押している間は返し縫いができます。
3) 手を離せば元に戻り、正送りとなります。
Das Stichlängenrad
1
nach links (oder rechts) drehen, bis die gewünschte Zahl oben liegt und auf die Markierung ausg-
erichtet ist.
(1) Rückwärtsnähen
1) Den Nährichtungshebel
2
niederdrücken.
2) Rückwärtsstiche werden ausgeführt, solange der Hebel gedrückt gehalten wird.
3) Wird der Hebel losgelassen, führt die Nähmaschine wieder Vorwärtsstiche aus.
(2) Manuelles Schnellschalt-Rückwärtsnähen (PLC-1710-7, PLC-1760-7)
1) Den Rückwärtsnähschalter
3
drücken.
2) Rückwärtsstiche werden ausgeführt, solange der Hebel gedrückt gehalten wird.
3) Sobald der Hebel losgelassen wird, läuft die Nähmaschine wieder in Vorwärtsrichtung.
Turn stitch dial
1
counterclockwise (clockwise) so that the number corresponding to the desired stitch length is brought
to the top until the marking spot is reached.
(1)
Reverse feed stitchng
1) Press down reverse feed control lever
2
.
2) Reverse feed stitches are made as long as you keep pressing the lever down.
3) Release the lever, and the machine will run in the normal feed direction.
(2) Manual one-touch reverse feed stitching (PLC-1710-7, PLC-1760-7)
1) Press touch-back switch
3
.
2) Reverse feed stitches are made as long as you keep pressing the lever down.
3) Release the switch, and the machine will run in the normal feed direction.
En tournant le cadran des points
1
dans l’un ou l’autre sens, amener le numéro correspondant à la longueur des points
désirée en regard de l’index (en haut).
(1) Exécution de points arrière
1) Abaisser le levier de commande d’entraînement arrière
2
.
2) Des points arrière sont exécutés tant que l’on maintient le levier abaissé.
3) Relâcher le levier. L’entraînement s'effectue à nouveau dans le sens normal.
(2) Exécution de points arrière manuelle “One-touch” (PLC-1710-7, PLC-1760-7)
1) Appuyer sur l’interrupteur Touch-back
3
.
2) Des points arrière sont exécutés tant que l’on maintient l’interrupteur enfoncé.
3) Relâcher l’interrupteur. L’entraînement s’effectue à nouveau dans le sens normal.
1
2
3
 Loading...