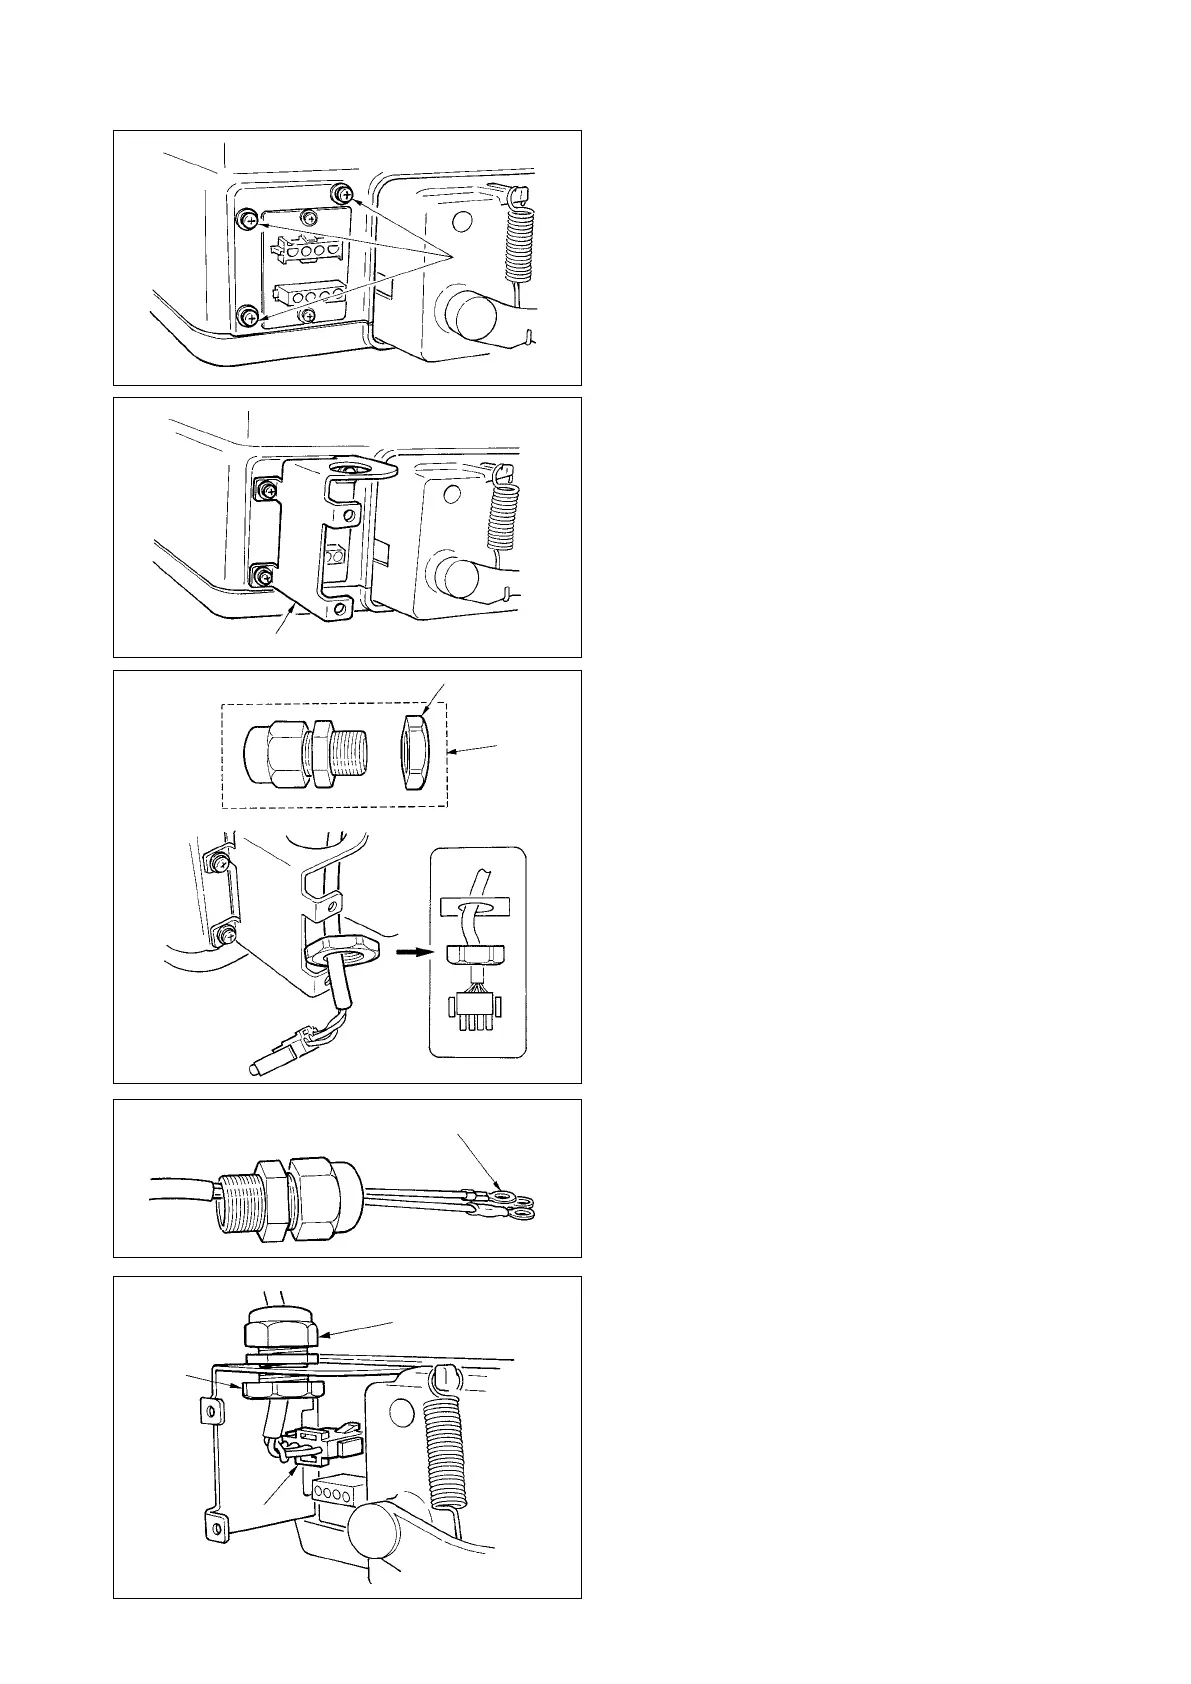
Crimp style terminal section
[ For CE specications only ]
1) Remove three screws
1
located on the side of
the control box.
2) Set power source cover installing plate
2
sup-
plied with the unit as accessories to the control
box main unit with the three screws which have
been removed.
3) Remove nut section
4
from cord bush
3
sup-
plied with the unit as accessories.
4) After checking the direction of the nut, pass the
nut through the power source cord supplied with
the unit as accessories.
(Caution) Note that the at face of the nut should
face the power source cover installing
plate side.
5) Pass the terminal of the power source cord
through the hole from the inside of the power
source cover installing plate.
6) Pass the cord bush, while paying attention to the
direction, through the power source cord from the
power source cord terminal side.
7) Insert connector
5
of the power source cord to
the connector (top) of the control box.
(Caution) Securely insert the connector while paying
attention to the direction.
8) Tighten nut
4
and securely x the cord bush to
the installing plate.
9) Clamp section
b
of the cord bush and securely
x it to the cord.
1
2
3
4
b
4
5

 Loading...


