– 3 –
ENGLISH
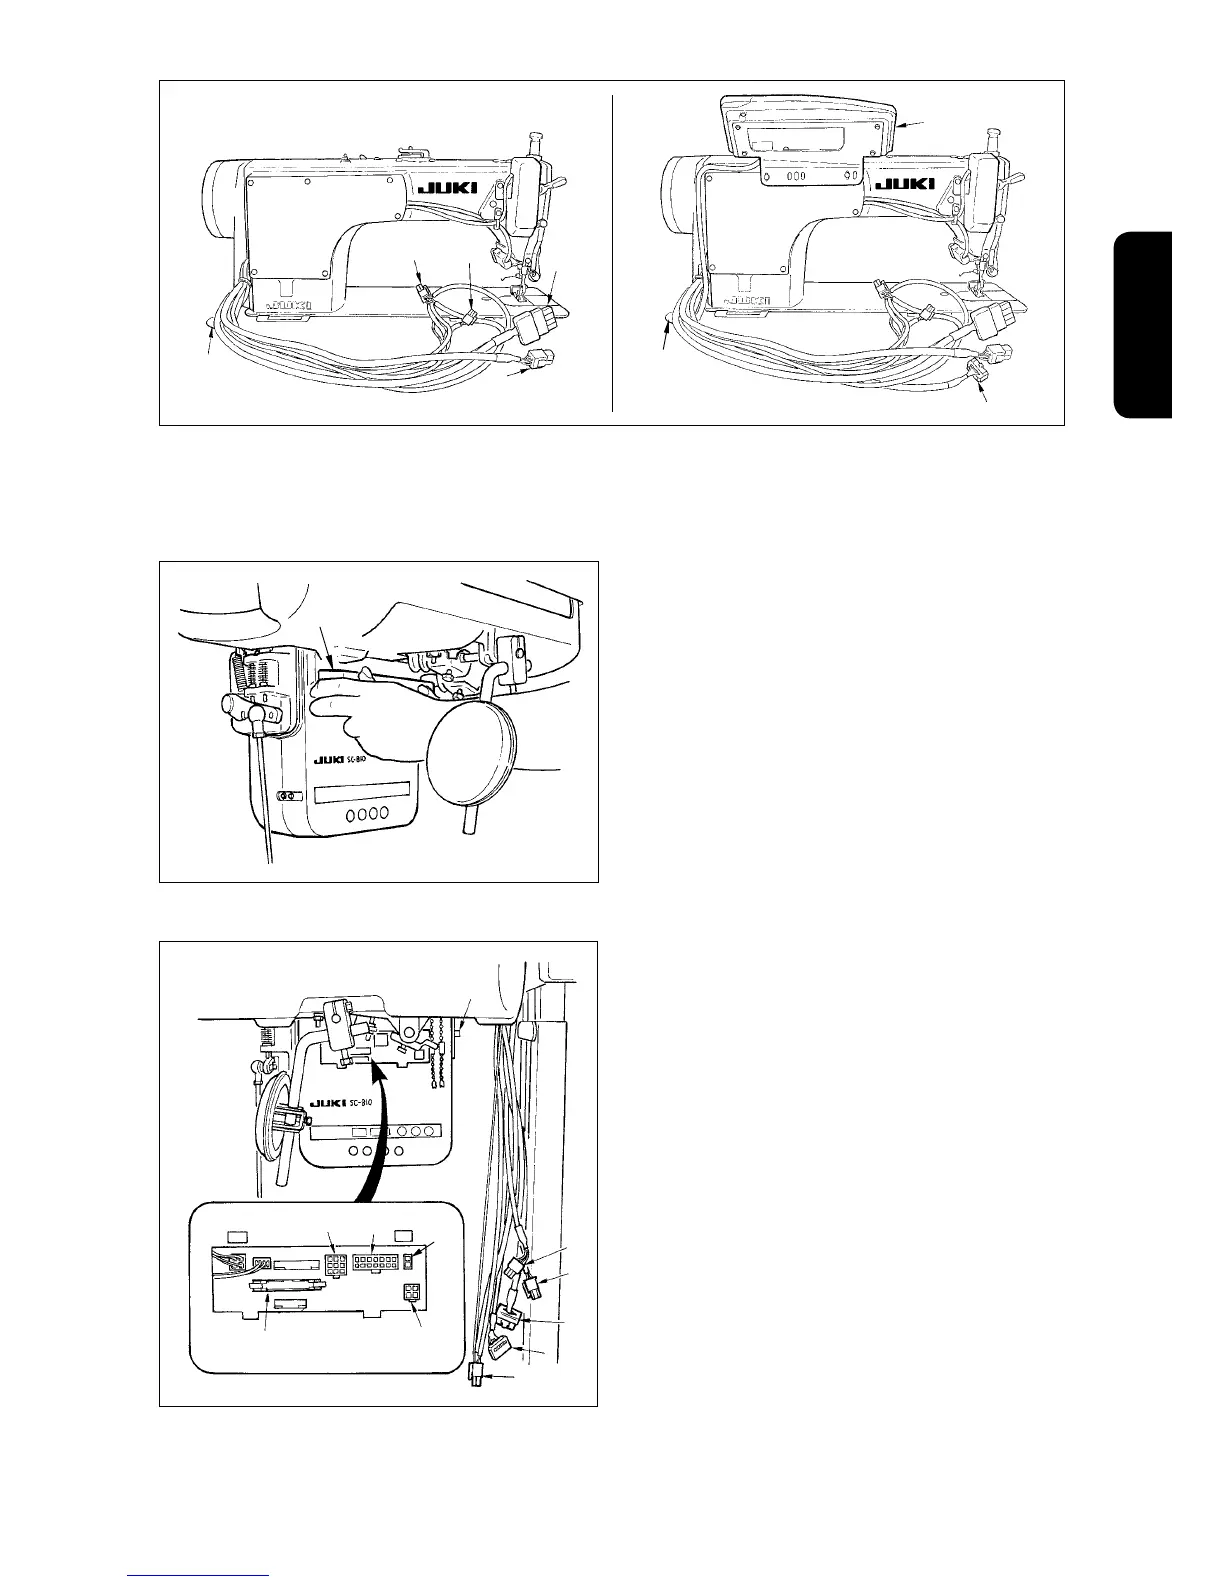
2) Pressing down the protrusion on the top surface
of connector cover
3
, open the connector cover
toward you.
1) Pass cords
1
of the thread trimming solenoid, reverse-stitching solenoid, etc. and the cord from the mo-
tor through hole
A
in the table to route them down under the machine table.
3) Connect 14P code
3
coming from the machine
head to connector
8
(CN36).
4) When the optional AK device is attached, con-
nect 2P connector
4
coming from the AK device
to connector
7
(CN37).
5) Connect connector
5
coming from the motor to
connector
9
(CN30) on the circuit board.
3
(Caution) 1. When using the AK device, set it after
conrminghowtoselecttheauto-lifter
function. (Refer to page 25.)
2. Be sure to securely insert the respec
-
tive connectors after checking the in-
serting directions since all connectors
have the inserting directions.
(When using a type with lock, insert the
connectors until they go to the lock.)
The sewing machine is not actuated un
-
less the connectors are inserted prop-
erly. In addition, not only the problem
of error warning or the like occurs, but
also the sewing machine and the con-
trol box are damaged.
1
!4
4
6
8
9
!5
3
2
5
7
1
A
1
1
A
2
1
1