Part 2: Install a Fan Module (If It Is Not Installed)
NOTE: The fan module slots are installed on the rear panel of the switches.
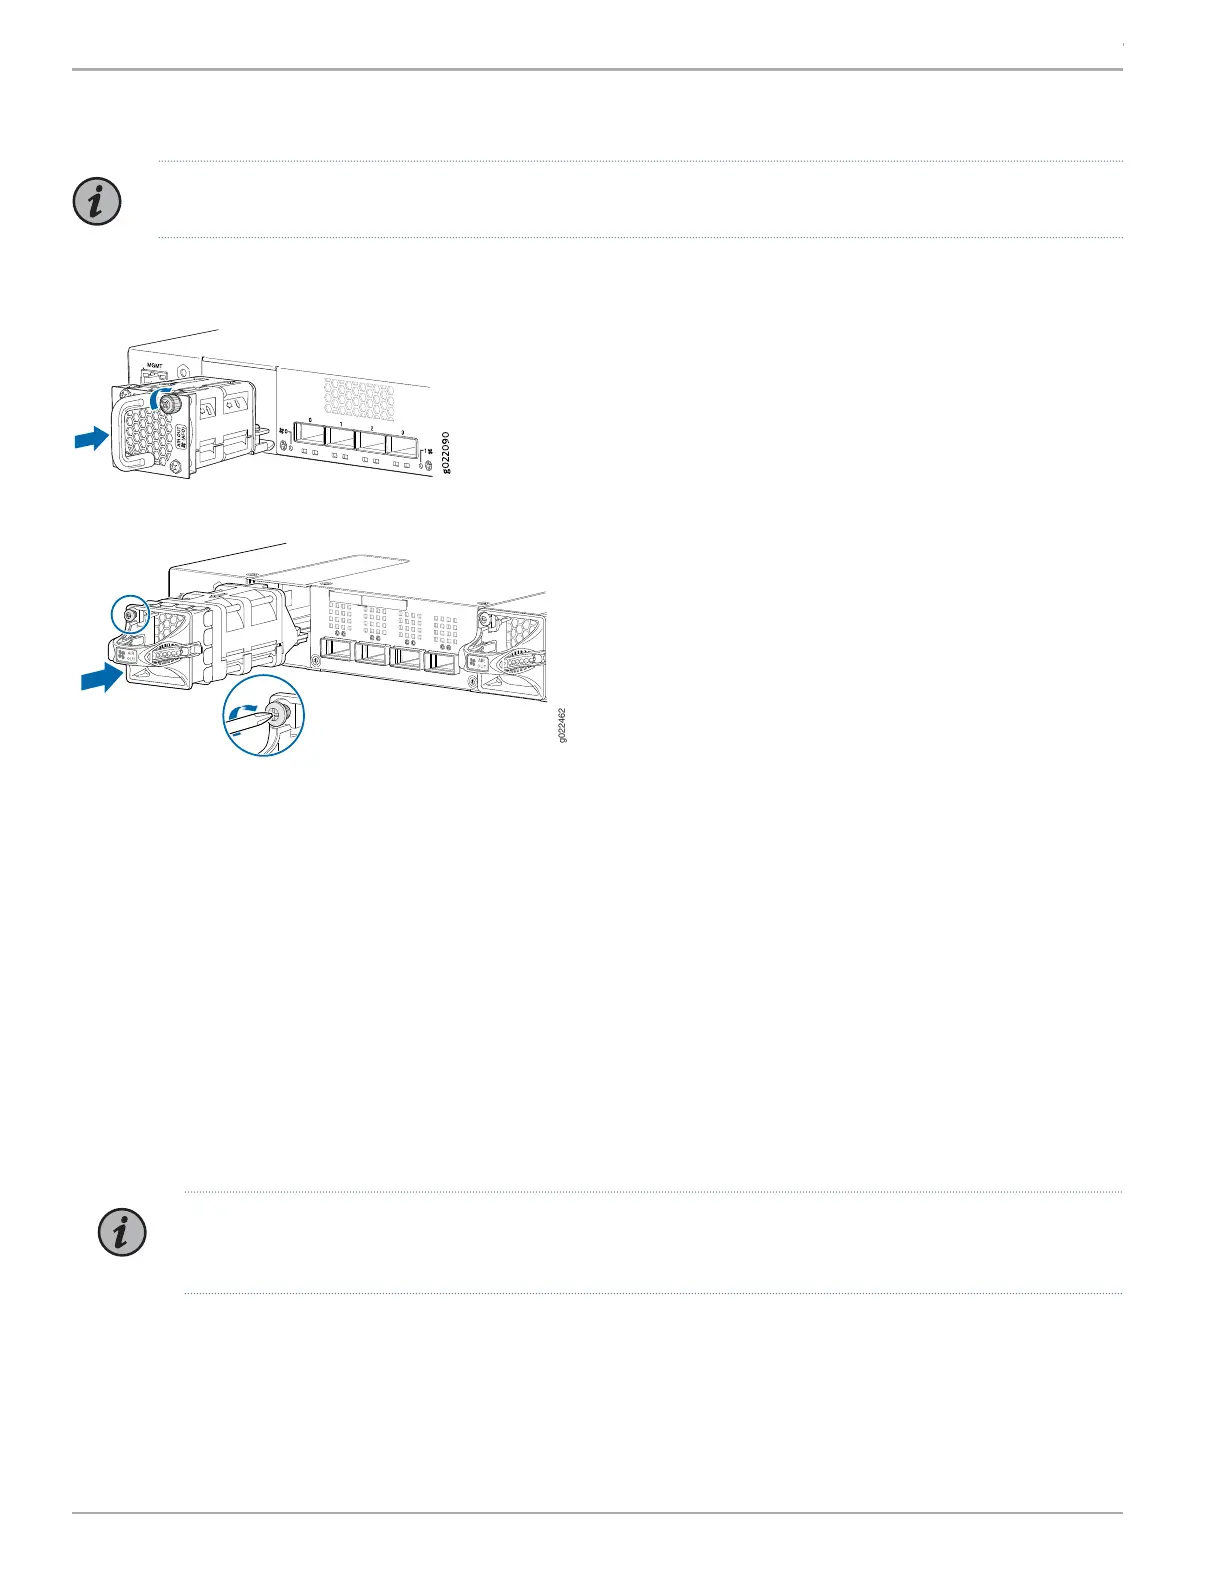
To install a fan module (see Figure 4 and Figure 5):
Figure 4: Installing a Fan Tray in EX4300 Switches Except EX4300-48MP and EX4300-48MP-S
Figure 5: Installing a Fan Tray in EX4300-48MP and EX4300-48MP-S
1. Remove the fan module from its bag.
2. Hold the handle of the fan module with one hand and support the weight of the module with the other hand. Place the fan
module in the fan module slot on the rear panel of the switch and slide it in until the fan module is fully seated.
3. Tighten the captive screws on the faceplate of the fan module by using your fingers. If you are unable to tighten the screws
by using your fingers, use the screwdriver.
Part 3: Mount the Switch on Two Posts of a Rack
You can mount the switch on two posts of a 19-in. rack or cabinet by using the mounting brackets provided with the switch. Two
persons are required for this procedure. To mount the switch on two posts of a rack:
1. Place the rack or cabinet in its permanent location, allowing adequate clearance for airflow and maintenance, and secure it
to the building structure.
NOTE: While mounting multiple units on a rack, mount the heaviest unit at the bottom and mount the other units
from the bottom to the top in decreasing order of weight.
2. Position the mounting brackets along the side panels of the chassis, aligning them with the front panel side, the rear panel
side, or with the center of the side panels depending on how you want to mount the switch. For example, if you want to
front-mount EX4300 switches except EX4300-48MP and EX4300-48MP-S switches, align the brackets along the front of
the side panel (see Figure 6). If you want to front-mount an EX4300-48MP or EX4300-48MP-S switch, align the brackets
17.5 mm offset from the front panel (see Figure 7 and Figure 8).
Copyright © 2018, Juniper Networks, Inc.4
EX4300 Switch Quick Start