Connect Power to a DC Router with Normal-Capacity Power Supplies
1. Ensure that the voltage across the DC power source cable leads is 0 V and that there
is no chance that the cable leads might become active during installation.
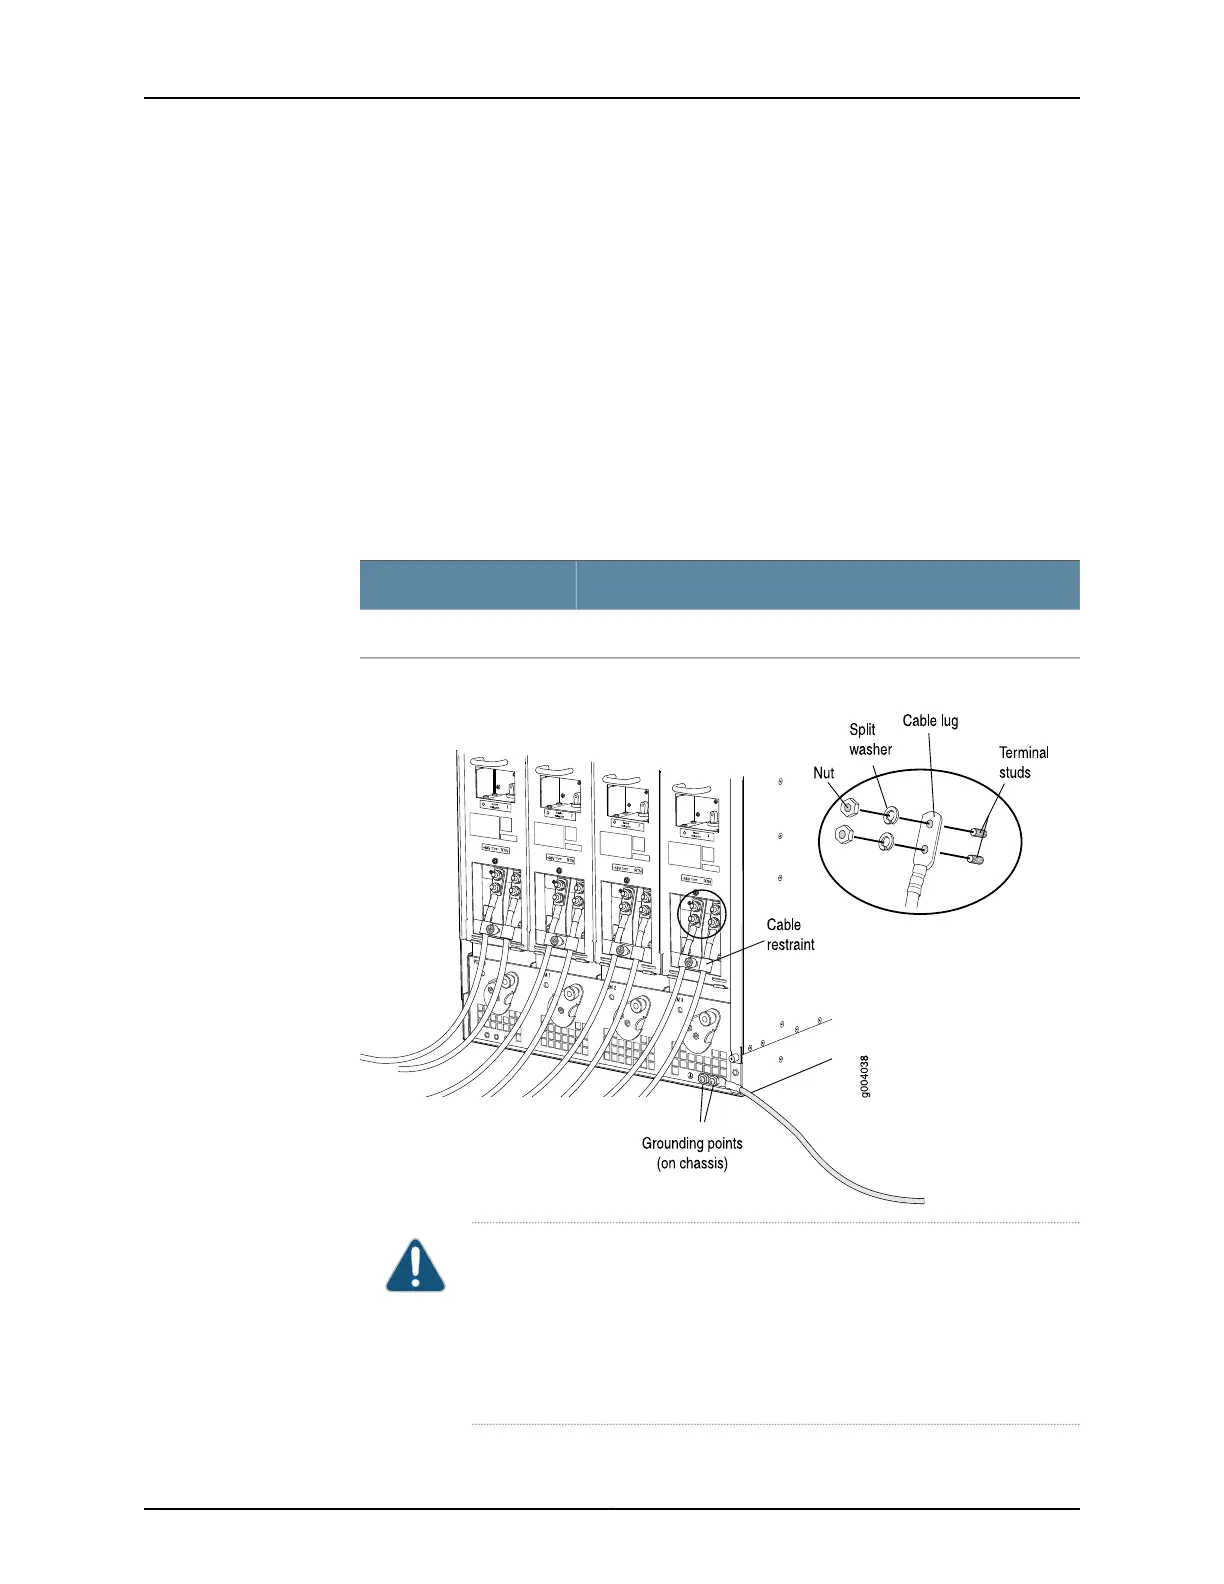
2. Secure the power cable lugs to the terminal studs, first with the split washer, then
with the nut. Apply between 23 lb-in. (2.6 Nm) and 25 lb-in. (2.8 Nm) of torque to
each nut. Do not overtighten the nut. (Use a 7/16-in. [11 mm] torque-controlled driver
or socket wrench.)
a. Attach the positive (+) DC source power cable lug to the RTN (return) terminal.
b. Attach the negative (–) DC source power cable lug to the –48V (input) terminal.
Table 2: MX960 DC Power System Input Voltage
SpecificationItem
Operating range: –40 to –72 VDCDC input voltage
Figure 10: Connect Ground and Power Cables
CAUTION: Ensure that each power cable lug seats flush against the surface
of the terminal block as you are tightening the nuts. Ensure that each nut
is properly threaded onto the terminal stud. The nut should be able to spin
freely with your fingers when it is first placed onto the terminal stud.
Applying installation torque to the nut when improperly threaded may
result in damage to the terminal stud.
Copyright © 2015, Juniper Networks, Inc.20
MX960 3D Universal Edge Router Quick Start