[edit]
root# set system services ssh root-login allow
root# set security zones security-zone untrust interfaces ge-0/0/0.0 host-inbound-traffic system-services ssh
5. Configure the hostname.
[edit]
root# set system host-name host_name
6. That’s it! The initial configuration is complete. Commit the configuration to activate the changes on the SRX.
[edit]
root# commit
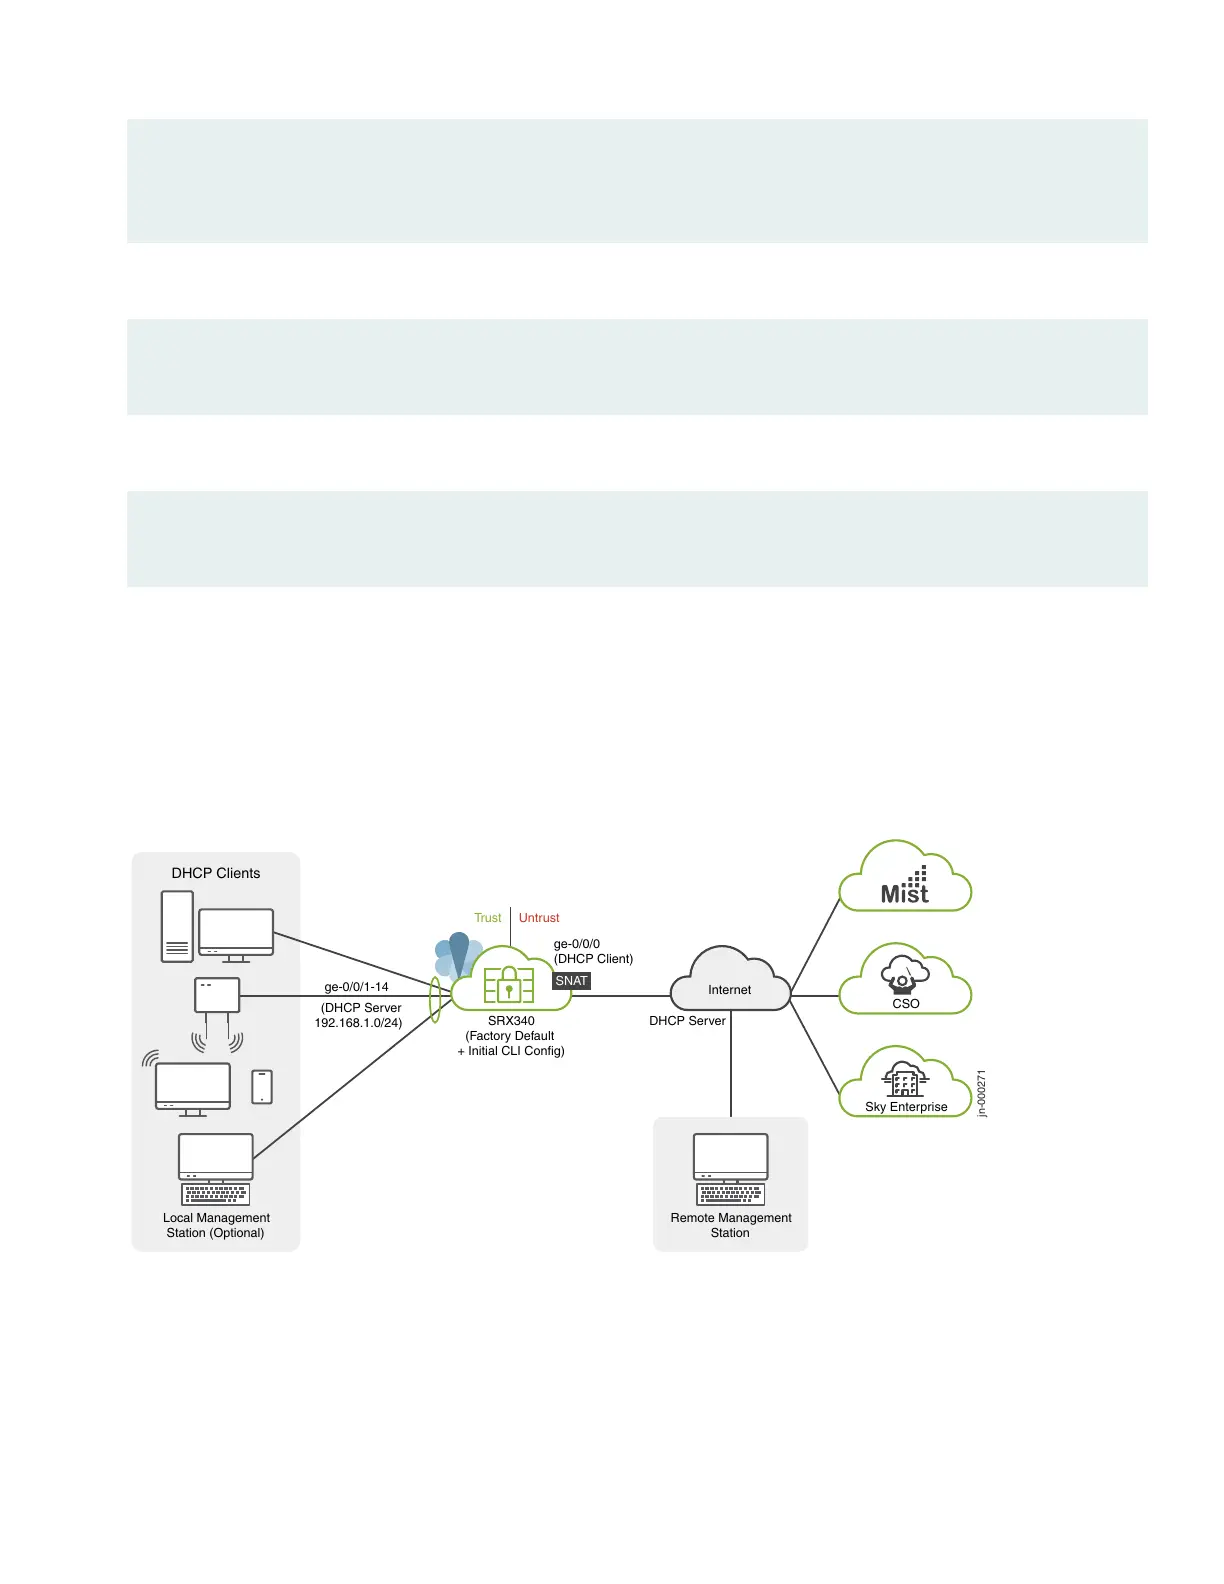
Congratulations! Your SRX is Up and Running
Your SRX340 is now online and providing secure Internet access to devices attached to the LAN ports. You can manage
the device locally and remotely, using the Junos CLI, J-Web, or a cloud based provisioning service. Here's what your
network looks like:
jn-000271
Sky Enterprise
Remote Management
Station
SRX340
(Factory Default
+ Initial CLI Config)
DHCP Clients
Internet
CSO
DHCP Server
UntrustTrust
ge-0/0/0
(DHCP Client)
SNAT
(DHCP Server
192.168.1.0/24)
Local Management
Station (Optional)
ge-0/0/1-14
A few things to keep in mind about your new SRX340 branch network:
•
You access the SRX CLI or J-Web user interface locally using the 192.168.1.1 address. To access the SRX remotely,
specify the IP address assigned by the WAN provider. Simply issue a show interfaces ge-0/0/0 terse CLI command to
confirm the address in use by the WAN interface.
•
The management interface is configured as a DHCP server for the 192.168.1.0/24 subnet.
9