How to Set Up Your SRX550 High Memory Services Gateway
3
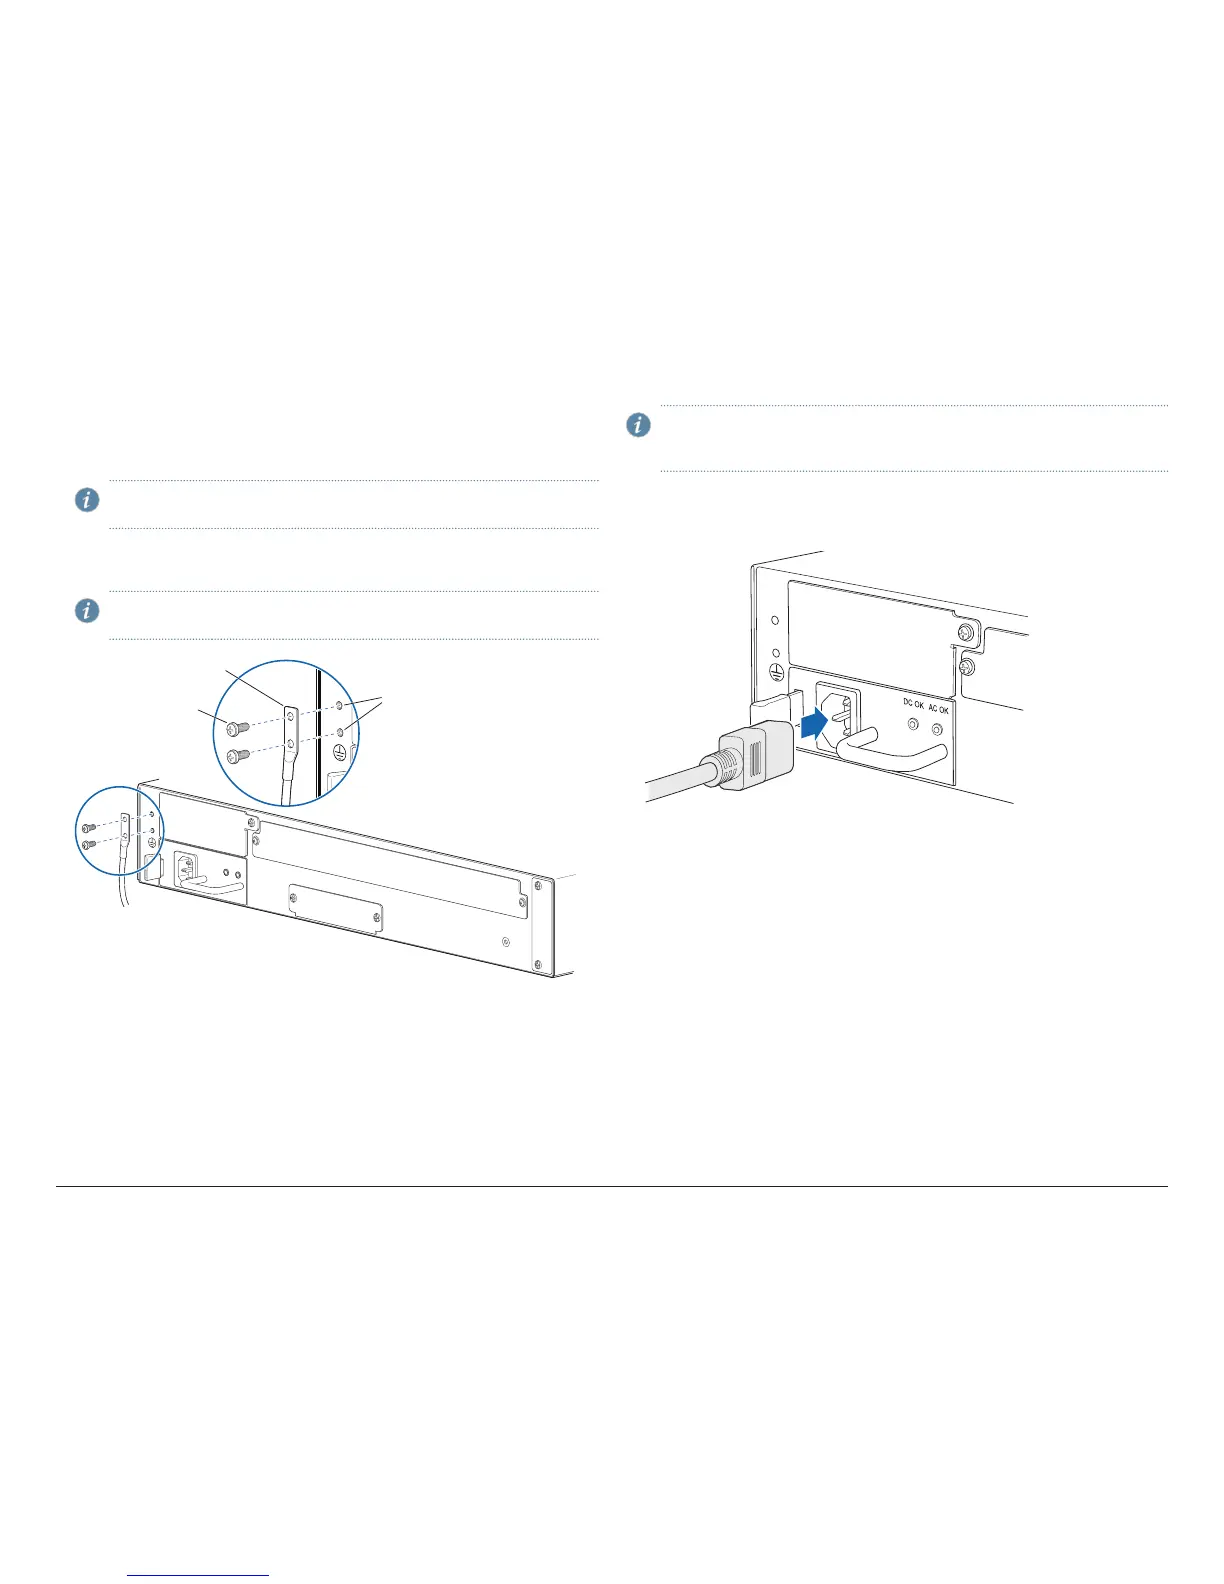
Connect the Grounding Cable
1. Connect the grounding cable to a proper earth ground.
2. Place the grounding cable lug over the grounding point on the upper rear of
the chassis.
NOTE: A licensed electrician must attach a cable lug to the grounding
cable. A cable with an incorrectly attached lug can damage the device.
3. Secure the grounding cable lug to the grounding point with the screws. Apply
between 6 in.-lb (0.67 Nm) and 8 in.-lb (0.9 Nm) of torque to the screws.
NOTE: The device should be permanently connected to ground during
normal operation.
100-240V~10A MAX
50~60 HZ
DC OK
AC OK
Grounding screw
(M3 screw)
lug
Grounding
point
g007820
Power On the Device
NOTE: Before connecting the device to the power supply, attach an ESD
strap to an ESD point and place the other end of the strap around your
bare wrist.
1. Connect the power supply adapter to the power supply point on the device
and to a power source. We recommend using a surge protector. You must
allow the device between five and seven minutes to boot after you power it on.