CH-X400/CH-X450
1-10
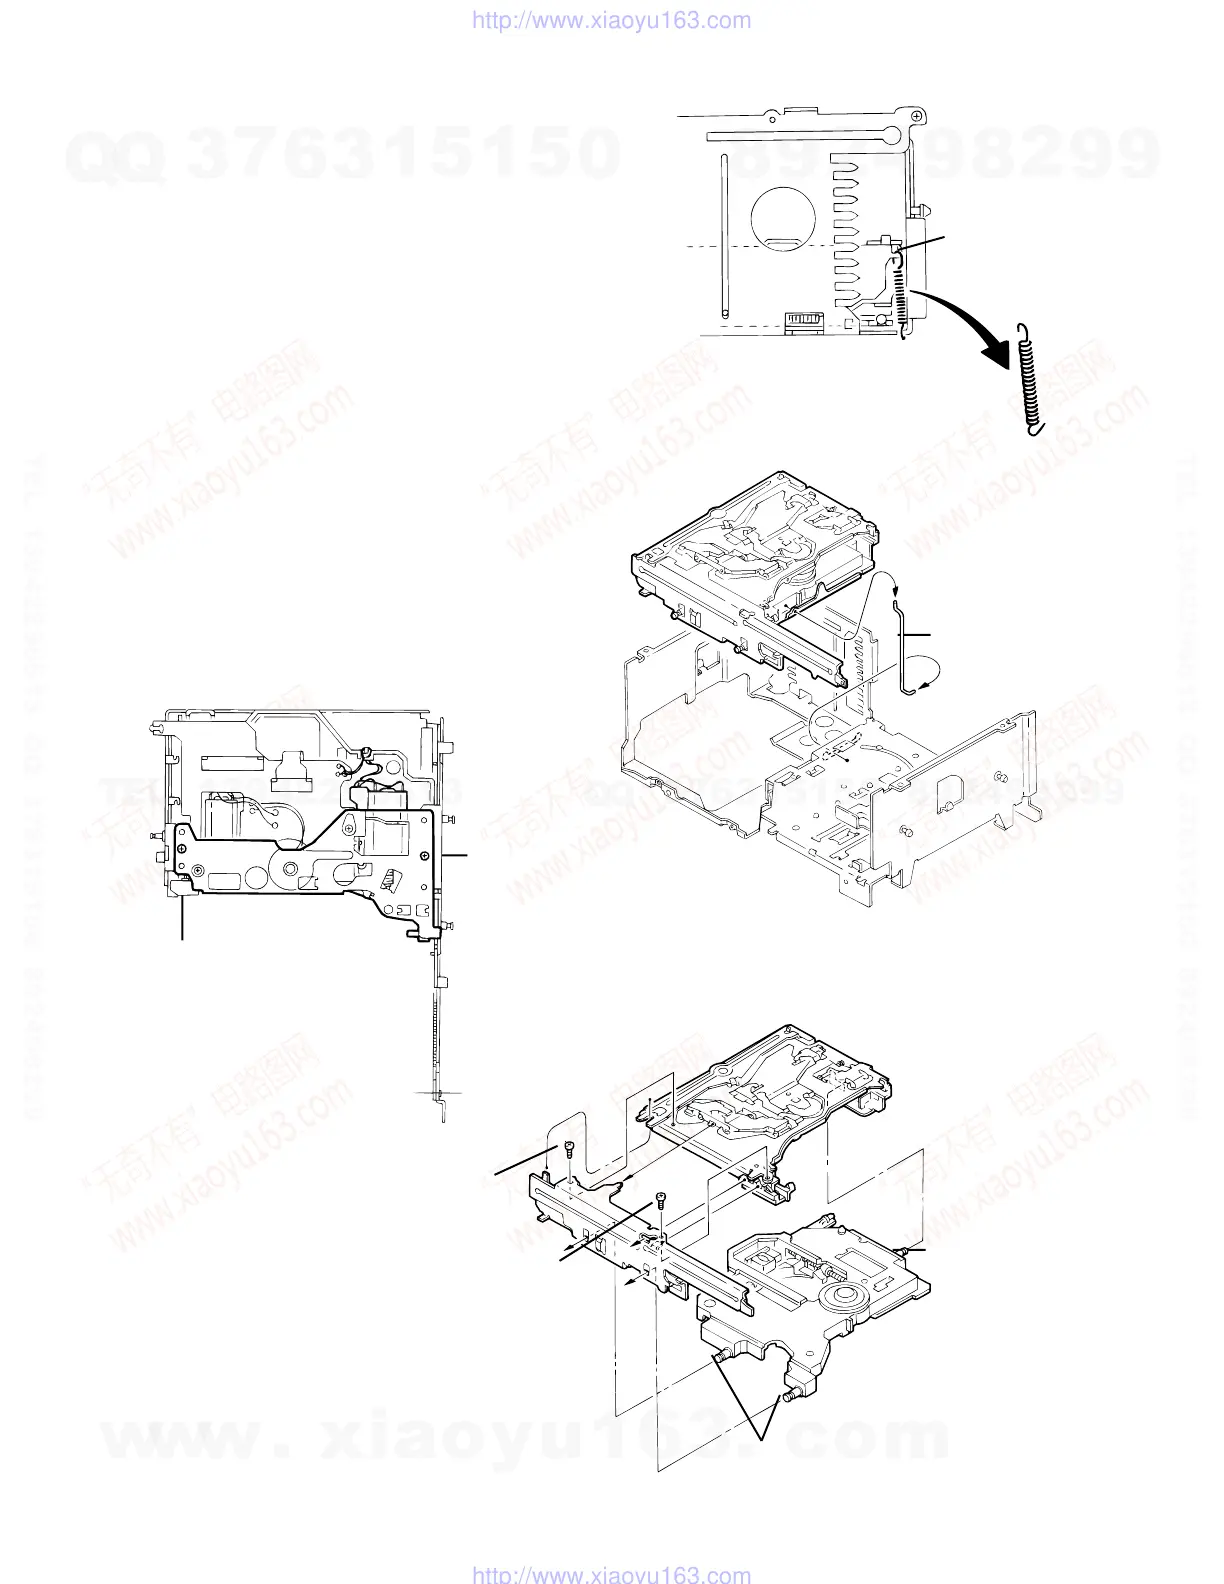
Lifter unit
1. Unhook the elevator spring located on the front side of the
unit.
(Be sure to first unhook the spring from the lifter side as
shown in the upper part of the diagram.)
2. Lift the lifter unit upward, then remove the lower rod to
remove the lifter unit from the chassis.
Lifter bracket
1. Remove the two lifter bracket fixing screws (4) located on the
back of the lifter unit.
2. Remove the lower rod.
Side bracket and traverse mechanism
1. Remove the two side bracket unit fixing screws (5) to
disconnect the side bracket unit from the lifter unit.
2. Remove the three shafts on the traverse mechanism
assembly from the lifter unit.
For reassembling, refer to the reassembling
procedures.
Fig. 19
Fig. 20
Fig. 21
Fig. 22
Unhook this
part first
Proper
orientation
Lift up the lifter unit
Lower rod
Remove from the
lifter unit
Remove from the
lifter unit
5
5
4
4
w
w
w
.
x
i
a
o
y
u
1
6
3
.
c
o
m
Q
Q
3
7
6
3
1
5
1
5
0
9
9
2
8
9
4
2
9
8
T
E
L
1
3
9
4
2
2
9
6
5
1
3
9
9
2
8
9
4
2
9
8
0
5
1
5
1
3
6
7
3
Q
Q
TEL 13942296513 QQ 376315150 892498299
TEL 13942296513 QQ 376315150 892498299
http://www.xiaoyu163.com
http://www.xiaoyu163.com
 Loading...