ENGLISH
wÐdŽwÐdŽ
wÐdŽwÐdŽ
wÐdŽ
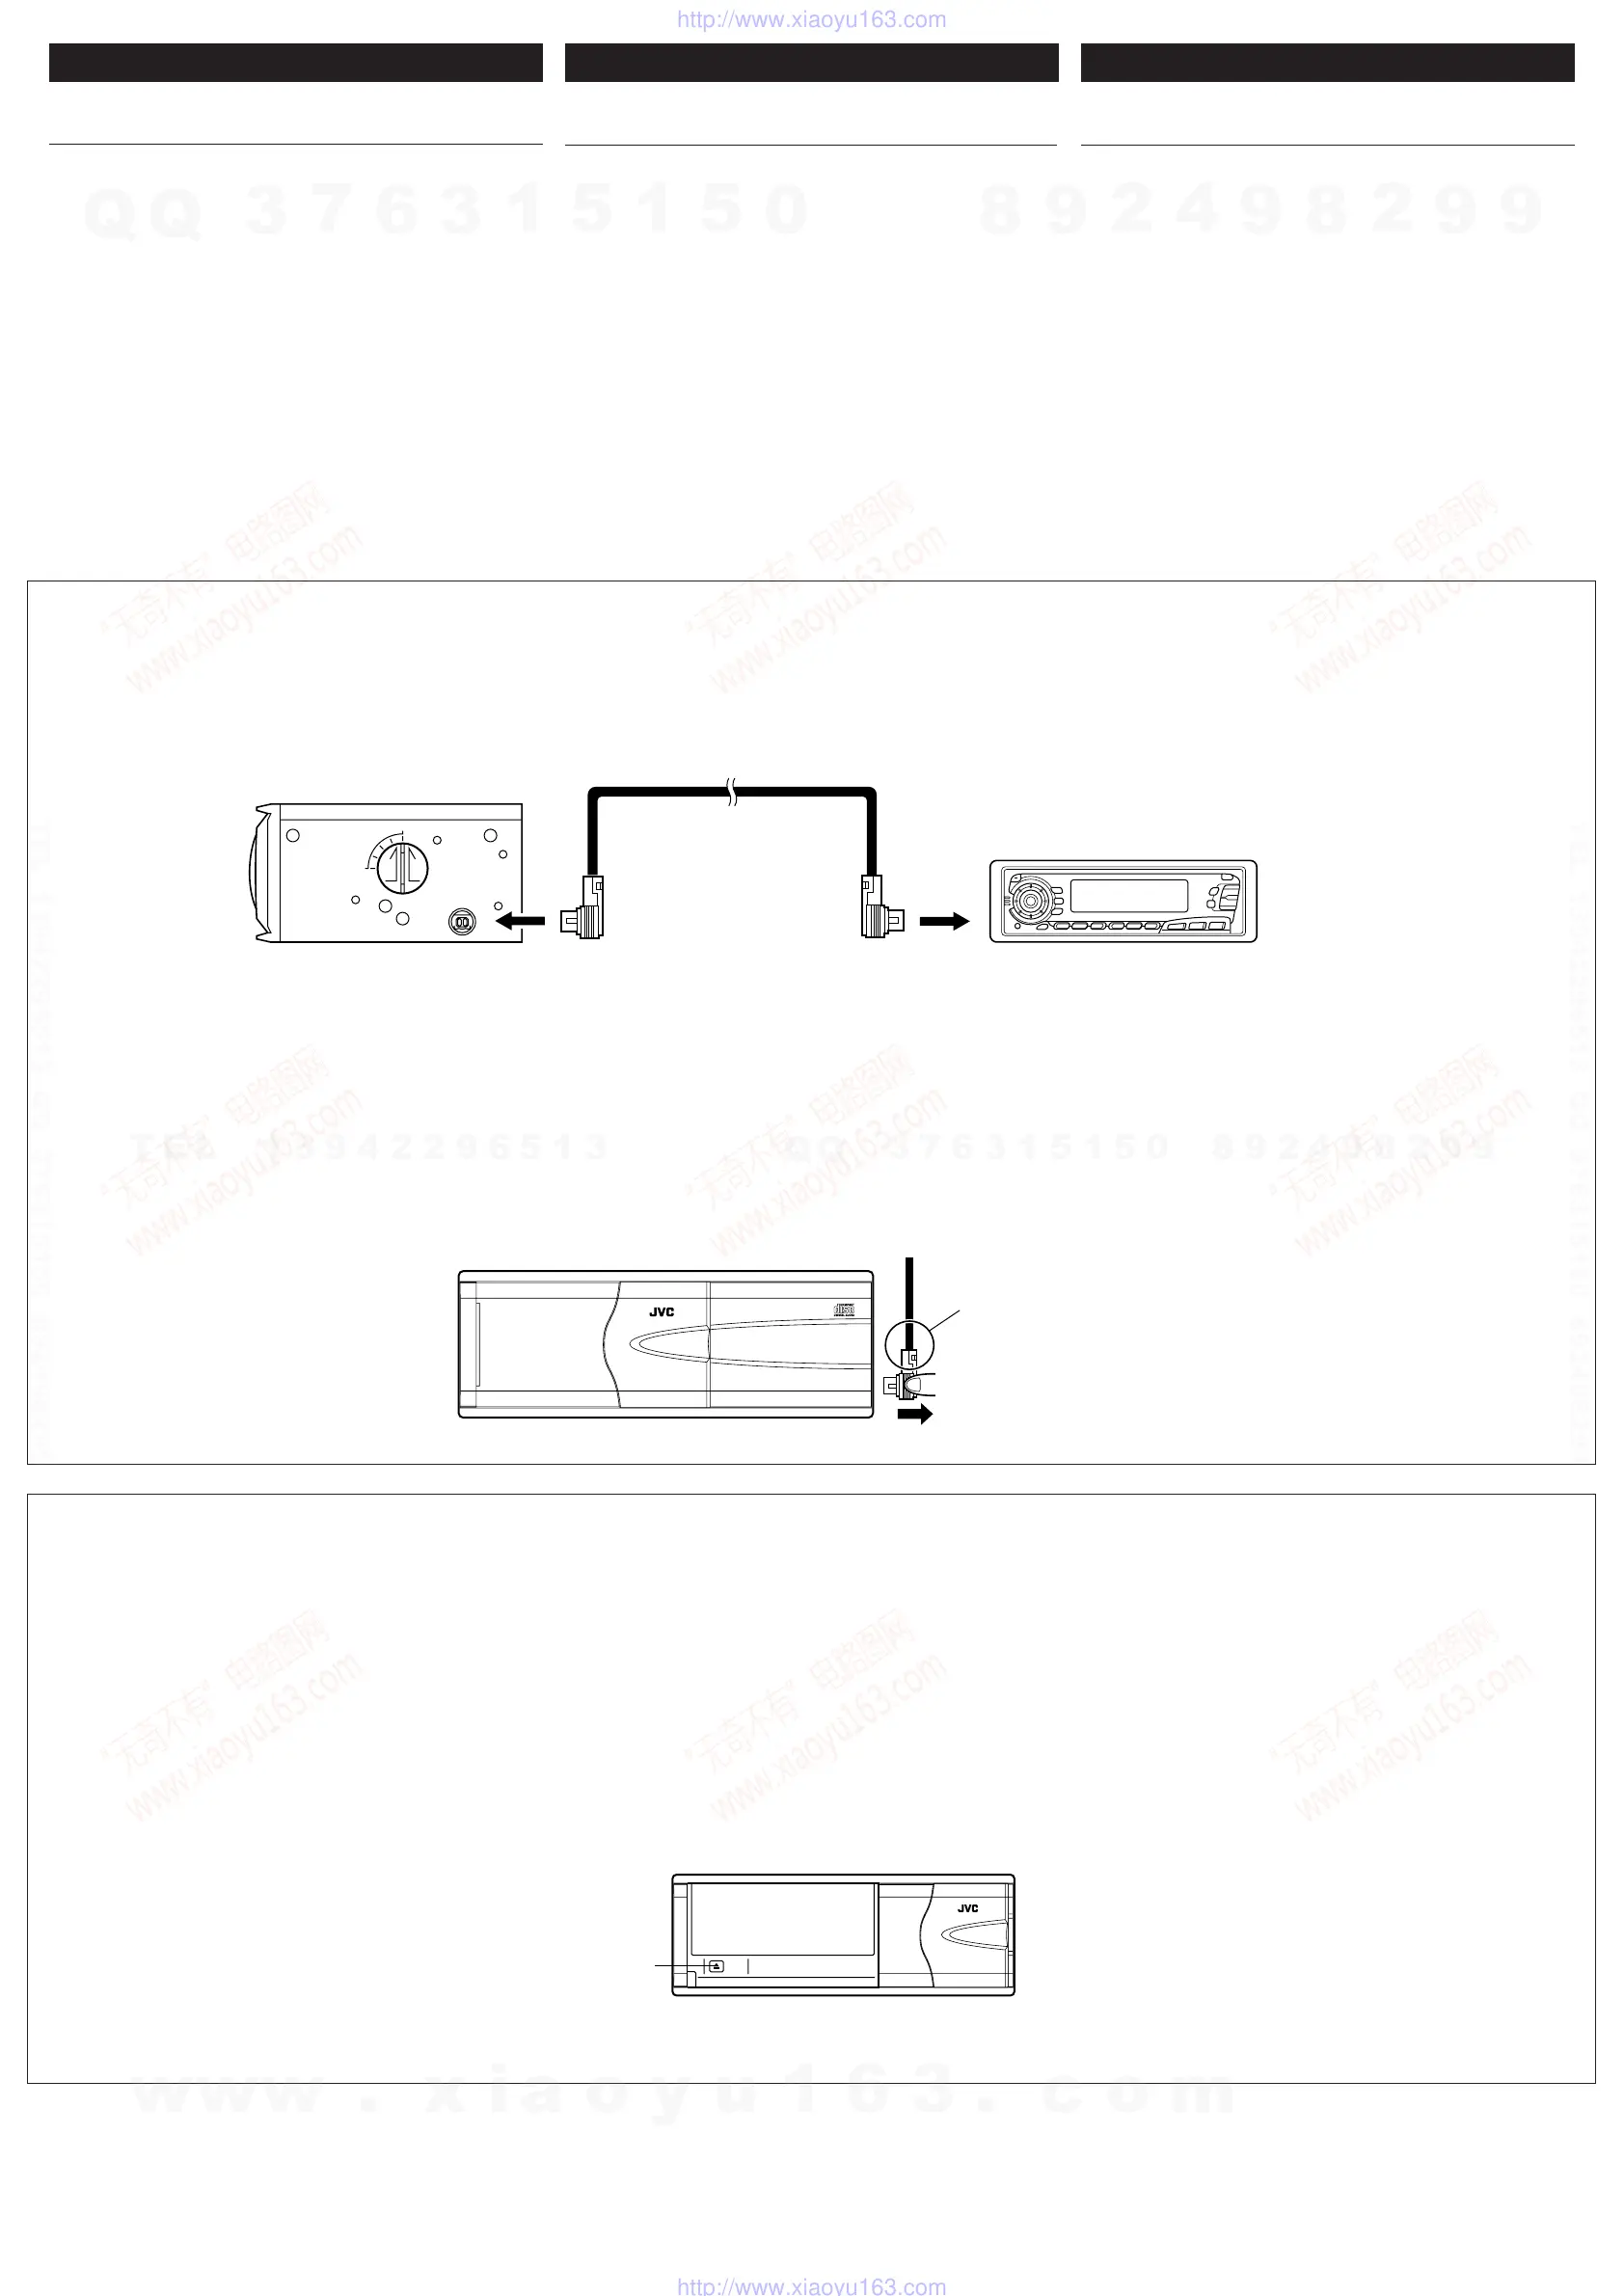
ELECTRICAL CONNECTIONS
• This changer can be connected to JVC KD-MX, KD-SX or KS-
FX series receivers that include a Changer Control function.
For more information, consult your nearest JVC car audio dealer.
• To prevent short circuits from occurring, while making
connections, keep the battery’s negative terminal
disconnected.
We recommend that you make all electrical connections (see
Fig. f) before installing the unit. If you are not sure of your ability
to correctly install this unit, have it installed by a qualified service
technician.
Note:
This unit is designed for 12 V DC, negative ground. If your vehicle
does not have a 12 V negative ground electrical system, you need
a voltage inverter which can be bought from a JVC car audio dealer.
• Be sure to ground this unit to the car’s chassis.
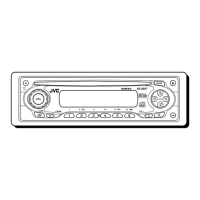
When connecting to JVC
KD-MX/KD-SX/KS-FX
series receivers
WKÝ s ö³I²*« l qOu²« bMŽ WKÝ s ö³I²*« l qOu²« bMŽ
WKÝ s ö³I²*« l qOu²« bMŽ WKÝ s ö³I²*« l qOu²« bMŽ
WKÝ s ö³I²*« l qOu²« bMŽ
JVC
KD-MX/KD-SX/KS-FX
WOzUÐdNJ« öOu²«WOzUÐdNJ« öOu²«
WOzUÐdNJ« öOu²«WOzUÐdNJ« öOu²«
WOzUÐdNJ« öOu²«
•b³*« «c¼ qOuð sJ1
Ò
WKKÝ s ö³I²*« l ‰JVC KD-MXË«
JVC KD-SX Ë« JVC KS-FXb³LK j³{ WHOþË vKŽ Íu²% w²«
Ò
Ɖ
WdA qOË »d« dA²Ý« ¨d¦« UuKF qł« sJVChB²
Æ…—UOK WOðuB« …eNłôUÐ
•
·d?Þ „d?ð« ¨ö?O?u?²?« q?LŽ ¡UMŁ« dz«ËbUÐ dOBIð ÀËbŠ lM*·d?Þ „d?ð« ¨ö?O?u?²?« q?LŽ ¡UMŁ« dz«ËbUÐ dOBIð ÀËbŠ lM*
·d?Þ „d?ð« ¨ö?O?u?²?« q?LŽ ¡UMŁ« dz«ËbUÐ dOBIð ÀËbŠ lM*·d?Þ „d?ð« ¨ö?O?u?²?« q?LŽ ¡UMŁ« dz«ËbUÐ dOBIð ÀËbŠ lM*
·d?Þ „d?ð« ¨ö?O?u?²?« q?LŽ ¡UMŁ« dz«ËbUÐ dOBIð ÀËbŠ lM*
ÆôuBH VU« W¹—UD³«ÆôuBH VU« W¹—UD³«
ÆôuBH VU« W¹—UD³«ÆôuBH VU« W¹—UD³«
ÆôuBH VU« W¹—UD³«
d?E?½«® W?O?zU?Ðd?N?J?« ö?O?u?²?« l?O?L?ł q?L?F?Ð `BM½
q?Jý q?Jý
q?Jý q?Jý
q?Jý fq?³? ©
“UN'« VOdð vKŽ pð—bI s bQ²« ÂbŽ WUŠ w Æ“UN'« VOdð
5???O???M?? ’U????ýô V??O??d??²??« U??O??K??L??Ž „d??ð« ¨W??×??O??×?? …—u??B??Ð
ƉU:« «c¼ w 5B²Ë
∫WEŠö∫WEŠö
∫WEŠö∫WEŠö
∫WEŠö
d?ýU?³? w?zU?Ðd?N? —U?O?ð W?D?Ý«u?Ð q?L?F?O? “UN'« «c¼ rL bIDC±≤
w?zU?Ðd?N? ÂU?E?½ p?K?²?9 ô pð—UOÝ Ê« WUŠ w ÆVUÝ i¹—Qð ¨Xu
dýU³ —UO²Ð VUÝ i¹—QðDC¨WODu ‰u× v« ÃU²% ¨Xu ±≤
W?—U? W?O?ðu?B?« «—U?O??« …eNł« qOË s ‰u;« «c¼ ¡«dý sJ1Ë
JVCÆ
•Æ…—UO« qJO¼ l “UN'« ©qOuð® i¹—Qð s bQð
• Listening to CDs
This unit does not have operation buttons to play CDs. CD
operations can be performed using the JVC CD changer
controller, etc. connected to this unit.
For CD operations, refer to the Instructions of the CD Changer
Controller.
•
W−b*« U½«uDÝô« v« ŸUL²Ýô« W−b*« U½«uDÝô« v« ŸUL²Ýô«
W−b*« U½«uDÝô« v« ŸUL²Ýô« W−b*« U½«uDÝô« v« ŸUL²Ýô«
W−b*« U½«uDÝô« v« ŸUL²Ýô«CDs
—“« “UN'« «c¼ pK²1 ôuDÝô« v« ŸUL²Ýö qOGAð —«W−b*« U½«
CDsu?D?Ýô« q?OGAð UOKLŽ W¹œQð sJ1 Æ W−b*« W½«CDu?Ð WDÝ«
b³0 rJײ*« ‰ULF²Ý«
Ò
u?DÝô« ‰b³ ‰ W−b*« W½«CD—U W JVC¨
Æ“UN'« «c¼ l ‰uu*« ¨a«
u?D?Ýô« q?O?G?Að UOKLF—« ¨W?−b*« W½«q?O?G?A?ð U?LOKFð v« lł
b³0 rJײ*«
Ò
uDÝô« ‰ W−b*« W½«.CD
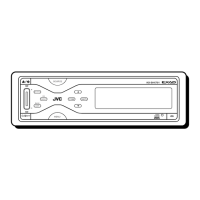
COMPACT DISC CHANGER
CH-X1000
EJECT
0 EJECT button
ëdšô« —“0 EJECT
• After installation and connection...
When loading the magazine for the first time into the CD
changer, press and hold the 0 EJECT button for a few
seconds to reset the unit.
Normally do not press and hold the 0 EJECT button.
Note:
You may also need to reset the unit in the following case.
• When the power supply is interrupted such as for replacement
of the car’s battery.
• When the unit dose not function correctly.
•
ÆÆÆ qOu²«Ë VOd²« bFÐÆÆÆ qOu²«Ë VOd²« bFÐ
ÆÆÆ qOu²«Ë VOd²« bFÐÆÆÆ qOu²«Ë VOd²« bFÐ
ÆÆÆ qOu²«Ë VOd²« bFÐ
b³ qš«œ vËô« …dLK Êe<« ‰Ušœ« bMŽb³ qš«œ vËô« …dLK Êe<« ‰Ušœ« bMŽ
b³ qš«œ vËô« …dLK Êe<« ‰Ušœ« bMŽb³ qš«œ vËô« …dLK Êe<« ‰Ušœ« bMŽ
b³ qš«œ vËô« …dLK Êe<« ‰Ušœ« bMŽ
ÒÒ
ÒÒ
Ò
W−b*« W½«uDÝô« ‰ W−b*« W½«uDÝô« ‰
W−b*« W½«uDÝô« ‰ W−b*« W½«uDÝô« ‰
W−b*« W½«uDÝô« ‰CD
¨¨
¨¨
¨
ëd??šô« —“ v?K?Ž j?G?C?« l?ÐU?ðË j?G?{« ëd??šô« —“ v?K?Ž j?G?C?« l?ÐU?ðË j?G?{«
ëd??šô« —“ v?K?Ž j?G?C?« l?ÐU?ðË j?G?{« ëd??šô« —“ v?K?Ž j?G?C?« l?ÐU?ðË j?G?{«
ëd??šô« —“ v?K?Ž j?G?C?« l?ÐU?ðË j?G?{«0 EJECT
s?? Ê«u?Ł …b?F? s?? Ê«u?Ł …b?F?
s?? Ê«u?Ł …b?F? s?? Ê«u?Ł …b?F?
s?? Ê«u?Ł …b?F?
Æ“UN'« j³{ …œUŽ« qł«Æ“UN'« j³{ …œUŽ« qł«
Æ“UN'« j³{ …œUŽ« qł«Æ“UN'« j³{ …œUŽ« qł«
Æ“UN'« j³{ …œUŽ« qł«
ëdšô« —“ vKŽ jGC« lÐU²ðË jGCð ô …œUŽ0 EJECTÆ
∫WEŠö∫WEŠö
∫WEŠö∫WEŠö
∫WEŠö
ÆWOU²« ôU(« w “UN'« j³{ …œUŽô ÃU²% Ê« UC¹« sJ1
•W¹—UDÐ dOOGð bMŽ q¦ WOzUÐdNJ« WUDK qB ‰uBŠ WUŠ w
Æ…—UO«
•ÆW×O× …—uBÐ qLF¹ ô “UN'« Ê« WUŠ w
• How to remove the cord
Pull the plug by holding it firmly as in the figure.
•
pK« Ÿe½ WOHOpK« Ÿe½ WOHO
pK« Ÿe½ WOHOpK« Ÿe½ WOHO
pK« Ÿe½ WOHO
ÆqJA« w UL WLJ× …—uBÐ tJ WDÝ«uÐ fÐUI« V×Ý«
COMPACT DISC CHANGER
12–DISC
CH-X450
Fig. f
qJý qJý
qJý qJý
qJýf
H
V
To JVC CD changer controller
«v «*²×Jr 0³b
Ò
‰ «ôÝDu«½W
«*b−W
CD W—UJVC
8-pin cord (supplied)
©“UN'« l od® ”uÐœ ‡ ∏ pKÝ
• !"#$%&'()*+,- JVC KD-MX, KD-SX
KS-FX !"# $%&'()*+,-./01234
JVC !"#$%&'
• !"#$%&'()*+,-./01234
!"#$%&'()*+,-./01+234567
. f !"#$%&'()*+,-./0123
!"#$%&
!"#$%&'() 12 !"#$%&'()*+,
12 !"#$%&'()*+,-./01234/
!" JVC !"#$%&'
• !"#$%&'()*+,-.//01
8 !
JVC !"#$"%&
• !"#$%&
!"#$%&'()*+,- !"./01 (0 EJECT)
!"#$%&'(
!"#$%&'()* (0 EJECT)
!"#!$%&"'()*+,
• !"#$%&'()*+
• !"#$%&'(
.f
JVC
KD-MX
,
KD-SX
KS-FX
!
• !"#
!"#$%&
(0 EJECT)
!"#
•
!"# $%&'()*$% '(+,-./0
JVC !"#$%&'()*+,-./012
!"#$%&'()& !*+,-./0123
Do not hold this portion.
ÆrI« «c¼ p9 ô
Install.CH-X450[U]/3rd 3/25/05, 6:09 AM4
w
w
w
.
x
i
a
o
y
u
1
6
3
.
c
o
m
Q
Q
3
7
6
3
1
5
1
5
0
9
9
2
8
9
4
2
9
8
T
E
L
1
3
9
4
2
2
9
6
5
1
3
9
9
2
8
9
4
2
9
8
0
5
1
5
1
3
6
7
3
Q
Q
TEL 13942296513 QQ 376315150 892498299
TEL 13942296513 QQ 376315150 892498299
http://www.xiaoyu163.com
http://www.xiaoyu163.com
 Loading...