CH-X400/CH-X450
1-8
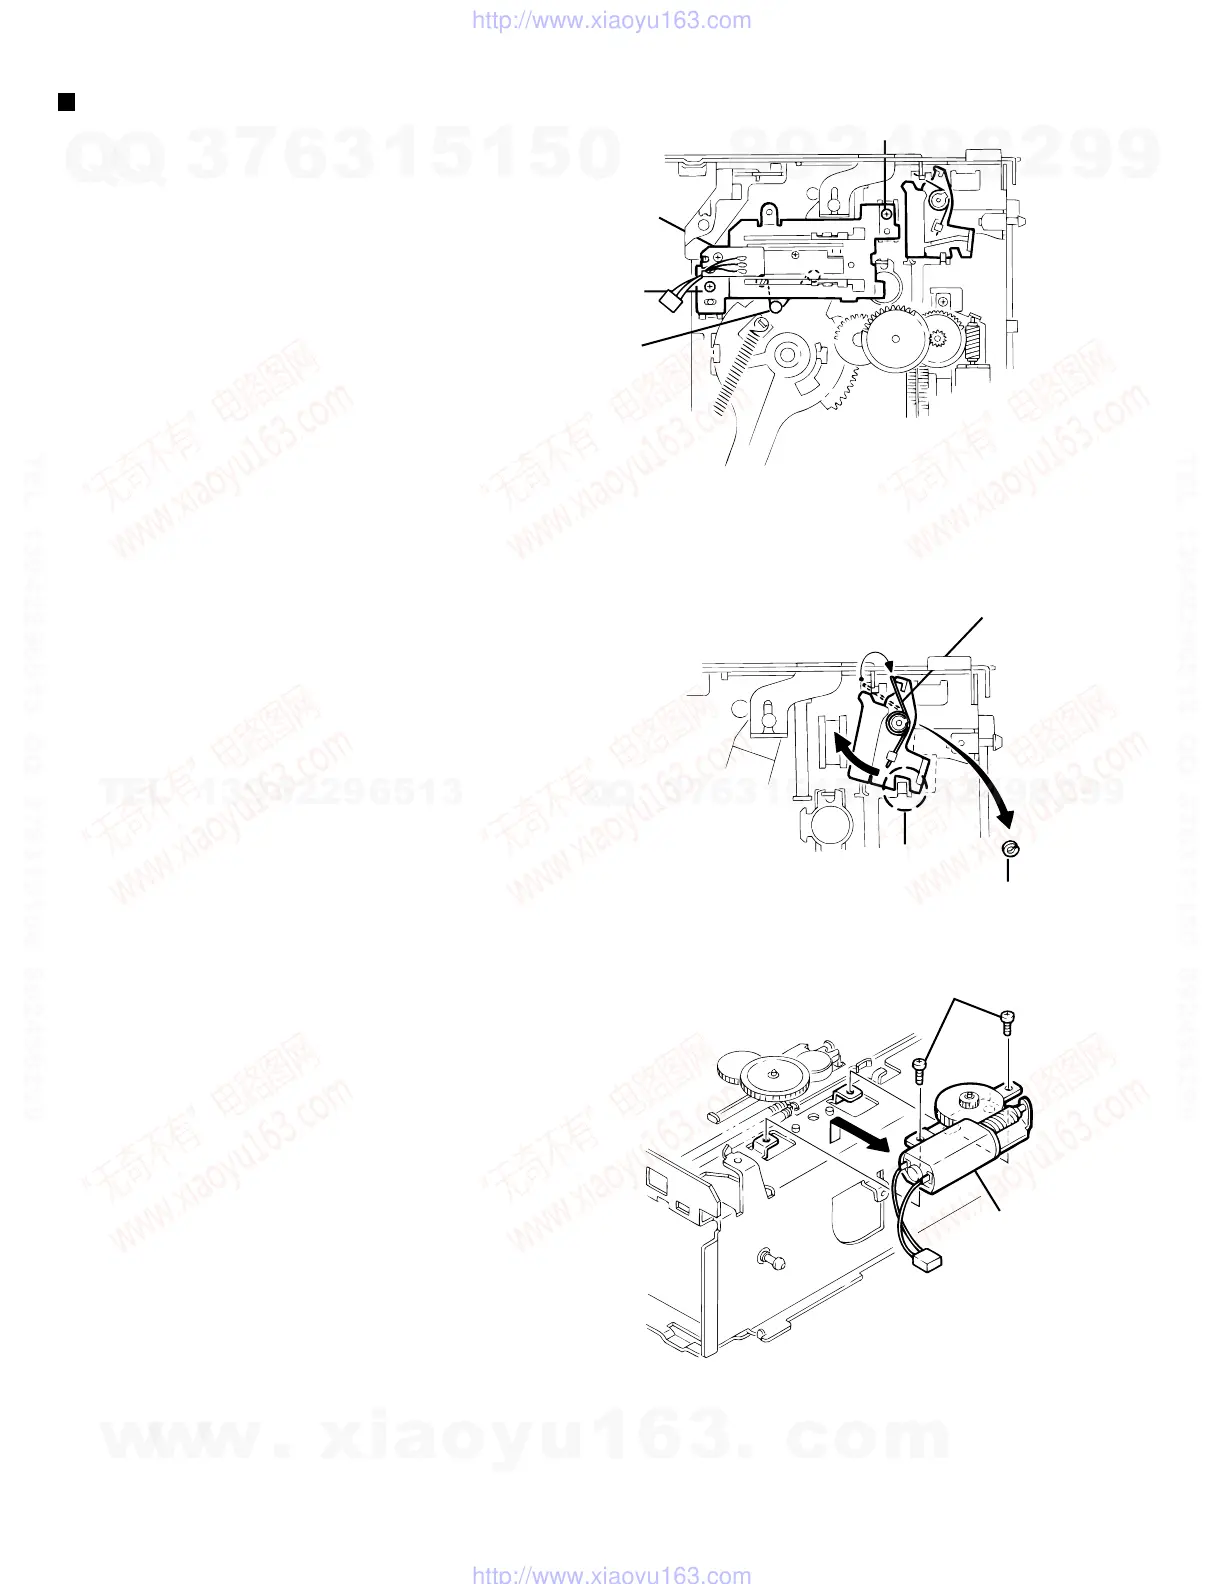
Fig. 12
Fig. 13
Fig. 14
Sensor
assembly
1
1
a
Rear
Magazine lock spring
Poly-washer (b)
c
Positioning
motor assembly
2
Changer mechanism section
Sensor assembly unit
1. Remove the two screws (1) securing the sensor assembly
unit.
2. Unhook the springs on the back of the sensor assembly unit
from the holes on the chassis.
Magazine lock arm
1. Remove the magazine lock spring from the front side of the
chassis.
2. Remove the poly-washer (b) securing the magazine lock arm.
3. Turn the magazine lock arm in the direction of the arrow until
the notch is at the "C" position to remove it from the chassis.
Positioning motor assembly
1. Remove the two screws (2) securing the positioning motor.
2. Slightly lift the positioning motor assembly to remove it from
the two burrs on the chassis.
w
w
w
.
x
i
a
o
y
u
1
6
3
.
c
o
m
Q
Q
3
7
6
3
1
5
1
5
0
9
9
2
8
9
4
2
9
8
T
E
L
1
3
9
4
2
2
9
6
5
1
3
9
9
2
8
9
4
2
9
8
0
5
1
5
1
3
6
7
3
Q
Q
TEL 13942296513 QQ 376315150 892498299
TEL 13942296513 QQ 376315150 892498299
http://www.xiaoyu163.com
http://www.xiaoyu163.com
 Loading...