Why JVC DT-V1710CG has no power?
- TTanya HarrisAug 21, 2025
If your JVC Monitor isn't powering on, ensure the power plug is firmly inserted. Also, verify that the main power switch is turned on.
Why JVC DT-V1710CG has no power?
If your JVC Monitor isn't powering on, ensure the power plug is firmly inserted. Also, verify that the main power switch is turned on.
How to troubleshoot JVC DT-V1710CG with no power supply?
If your JVC Monitor has no power, make sure to firmly insert the power plug and turn the main power switch to the ON position.
What to do if my JVC DT-V1710CG Monitor has no picture with the power on?
If your JVC Monitor turns on but shows no picture, ensure the signal cable is firmly connected. Verify that the connected component is powered on and set to output correctly. Select the correct input using the INPUT SELECT buttons. Check that the input signal format corresponds to the installed input card format. You can also follow the procedures in “Self-check Indications.”
How to fix wrong color on JVC DT-V1710CG?
To correct the color on your JVC Monitor, first set the picture adjustment knob to the standard (centered) position or perform “reset” in “PICTURE SUB ADJ.” to set each item of picture adjustment to the standard value. You can also perform “reset” in “COLOR TEMP./BAL.” to set each item to the standard value. Try pressing the SCREENS CHECK button on the front panel repeatedly to return the screen to normal. Ensure each signal cable is firmly connected and select the appropriate INPUT SELECT button based on the signal type (A/C/E for component, B/D/F for RGB).
How to adjust picture on JVC Monitor if it is unnatural?
To fix an unnatural picture on your JVC Monitor, adjust the CONTRAST or BRIGHT picture adjustment knobs. Alternatively, adjust “CONTRAST” or “BRIGHT” in “PICTURE SUB ADJ.” within the SET-UP MENU.
How to correct irregular colour on JVC DT-V1710CG?
To fix irregular color on your JVC Monitor, move the device away from the monitor. Press the DEGAUSS button on the front panel to degauss the screen. For maximum effect, wait more than 30 minutes after degaussing.
How to fix wrong color display on JVC DT-V1710CG Monitor?
If the colors on your JVC Monitor appear wrong, try the following: 1. Set each picture adjustment knob to the standard (centered) position, or set each picture adjustment item in [PICTURE SUB ADJ.] in the screen to Standard (00) (or use the [reset] function). 2. Set each [COLOR TEMP./BAL.] item in the screen to Standard (000) (or use the [reset] function). 3. Ensure each signal cable is firmly connected. 4. Select INPUT A/C/E when the component signal is input, or select INPUT B/D/F when the RGB signal is input.
What to do if JVC DT-V1710CG shows an unnatural picture?
If the picture on your JVC Monitor looks unnatural, adjust the CONTRAST or BRIGHT picture adjustment knobs. Alternatively, adjust the [CONTRAST] or [BRIGHT] item in [PICTURE SUB ADJ.] in the screen.
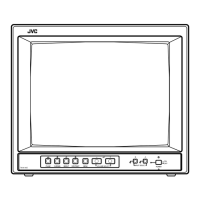
How to resolve irregular color display on JVC DT-V1710CG?
If you notice irregular colors on your JVC Monitor, move the device away from the monitor. Press the DEGAUSS button on the front panel to degauss the screen, waiting more than 30 minutes for maximum effect.
How to fix JVC DT-V1710CG Monitor with no sound?
If you're not getting any sound from your JVC Monitor, make sure the audio cable is correctly connected. Also, ensure the connected component is set up correctly. Adjust the speaker volume using the VOLUME buttons.
Screen Size | 17 inches |
---|---|
Resolution | 1280 x 1024 |
Aspect Ratio | 5:4 |
Color System | NTSC, PAL |
Brightness | 250 cd/m² |
Contrast Ratio | 1000:1 |
Display Colors | 16.7 million |
Input Connectors | DVI-D |
Covers critical safety warnings, general precautions, handling, and screen burn prevention.
Explains the function of front panel buttons and indicators (1-11).
Details additional front panel buttons and indicators (12-18), including status display.
Explains connection interfaces for various optional input cards (Component, Video, SDI, HD SDI).
Step-by-step guide for installing optional input cards into the monitor slots.
Explains the MAIN MENU, SETUP MENU structures and the buttons used for menu navigation.
Details how to display menus, adjust settings, and use sub-menu and reset functions.
Explains the SETUP MENU structure and how to navigate and adjust settings.
Provides solutions for common issues like no power, no picture, no sound, and wrong color.