28
1
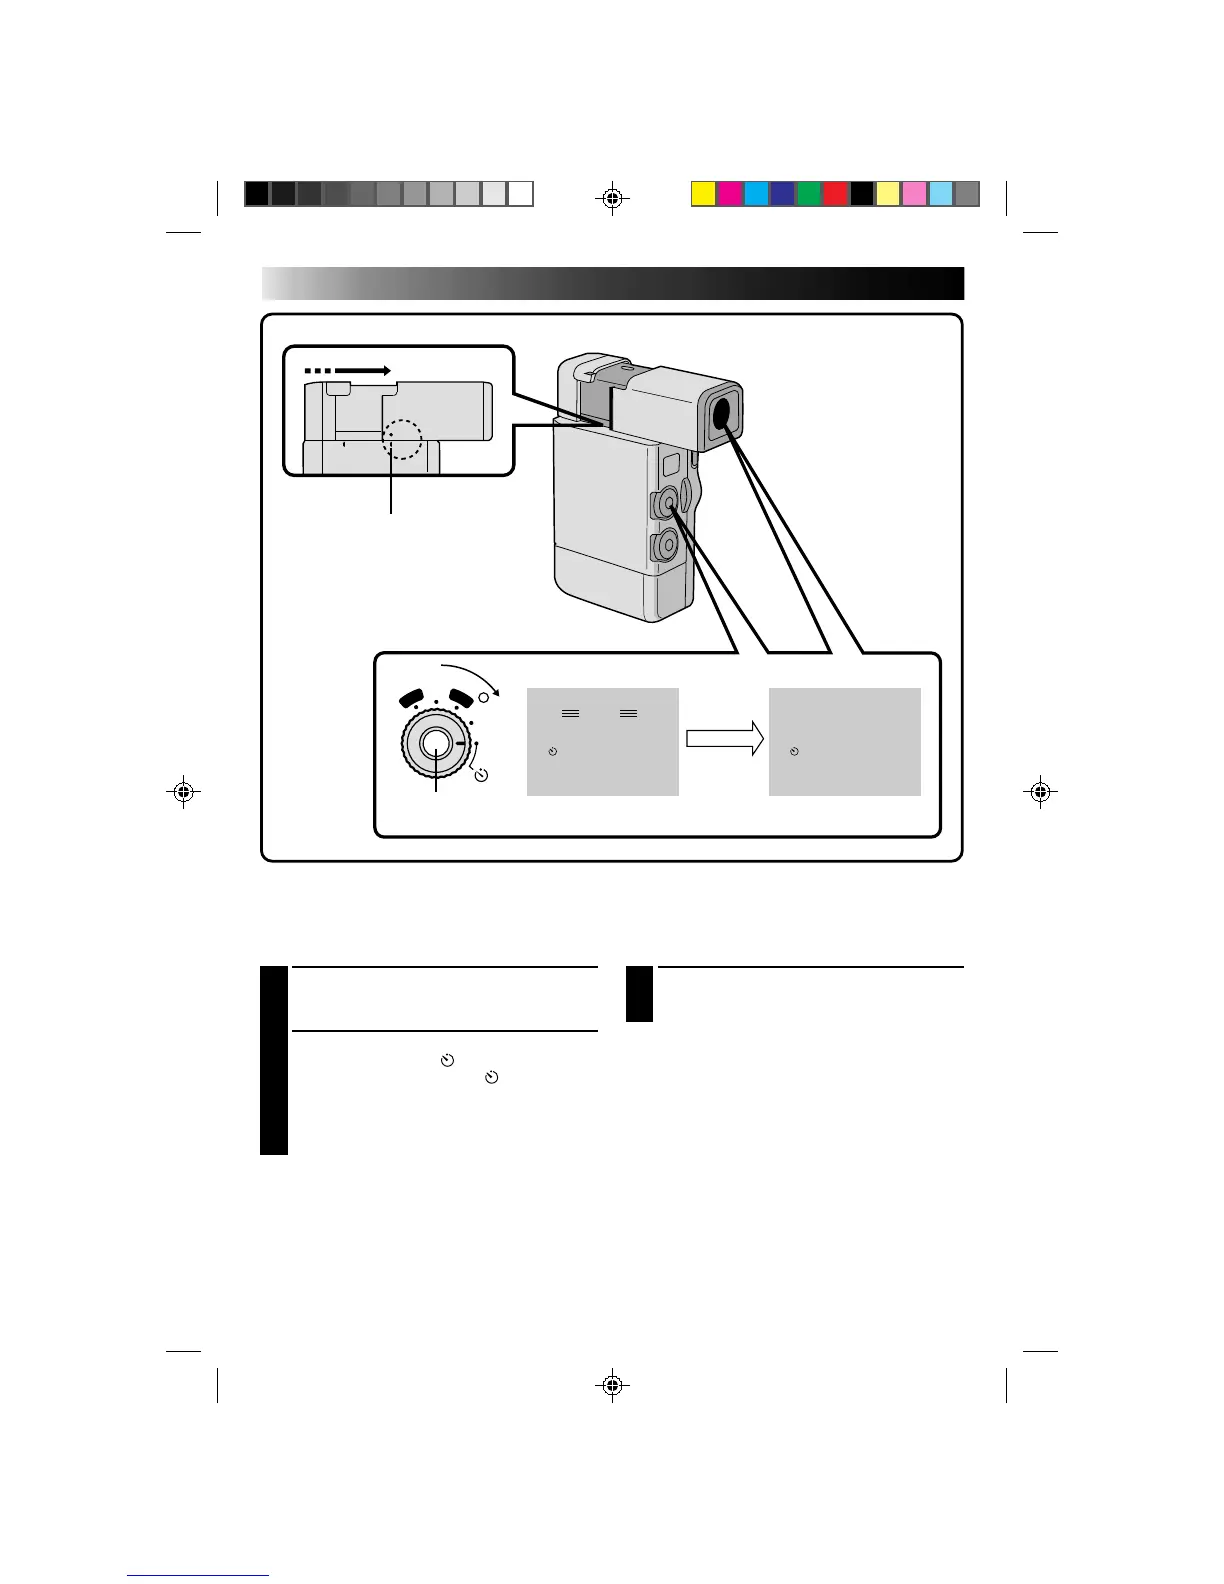
PULL OUT VIEWFINDER
Align its mark to “STANDBY”. The lens cover
opens automatically.
2
SELECT MODE
Set the Power Dial to “ ” and press
RECORDING START/STOP. “ ” appears in
the viewfinder, and the tally lamp lights and
begins blinking 15 seconds before recording
starts. When the lamp stops blinking, recording
begins.
3
END RECORDING
Press RECORDING START/STOP and set the
Power Dial to the “REC” or “OFF” position.
To Take A Snapshot In The Self-Timer Mode . . .
..... in step 2, press SNAPSHOT instead of
RECORDING START/STOP. After 15 seconds, a
6-second still with the shutter sound effect and
a white border is recorded. After that, the
camcorder enters the RECORD/STANDBY
mode.
Self-Timer
Once the camcorder is set, you (or whomever is operating the camcorder) can get into the scene, putting the
final touch on a memorable picture.
OFF
5S
REC
PLAY
– – –
F . AUTO
PAUSE
REC
F . AUTO
VIEWFINDER
STANDBY
RECORDING
START/STOP BUTTON
After 15 sec.
DURING RECORDING
RECORDING
Advanced Features (Cont.)