40 EN
OFFFADER/ IPE
AM AEPROGR
ACAMER
LMANUA
MSYSTE
DSC
END
AYDISPL
C
AN E
W
W
.BAL
RE NEON SC L CD / TV
UAOT
IMETDATE /
T I ME CODE
CLOCK
ADJ .
–
–
–
FF
O
25 ’01
CED
30
PM
:5
NRETUR
TYQUA L I
VGA
FINE
–
–
EELREC CTS –
NRETUR
MODESNAP
ODEREC M SP
I
12
BTMODESOUND
ZOOM
UPGAIN
–
–
–
–
–
40
x
LFUL
AGC
NRETUR
DIS –
ON
OFF
BEEP
MELODY
NO
TALLY
DE O
–
–
– 60
MMODE
S
O
UND
I –
MIC
CAM ERSET
NRETUR
FADER/ W I P E
AM AEPROGR
ACAMER
LMANUA
MSYSTE
DSC
END
AYDISPL
C
AN E
W. BAL
IMAGE SIZE
N
Display
Menu Screen
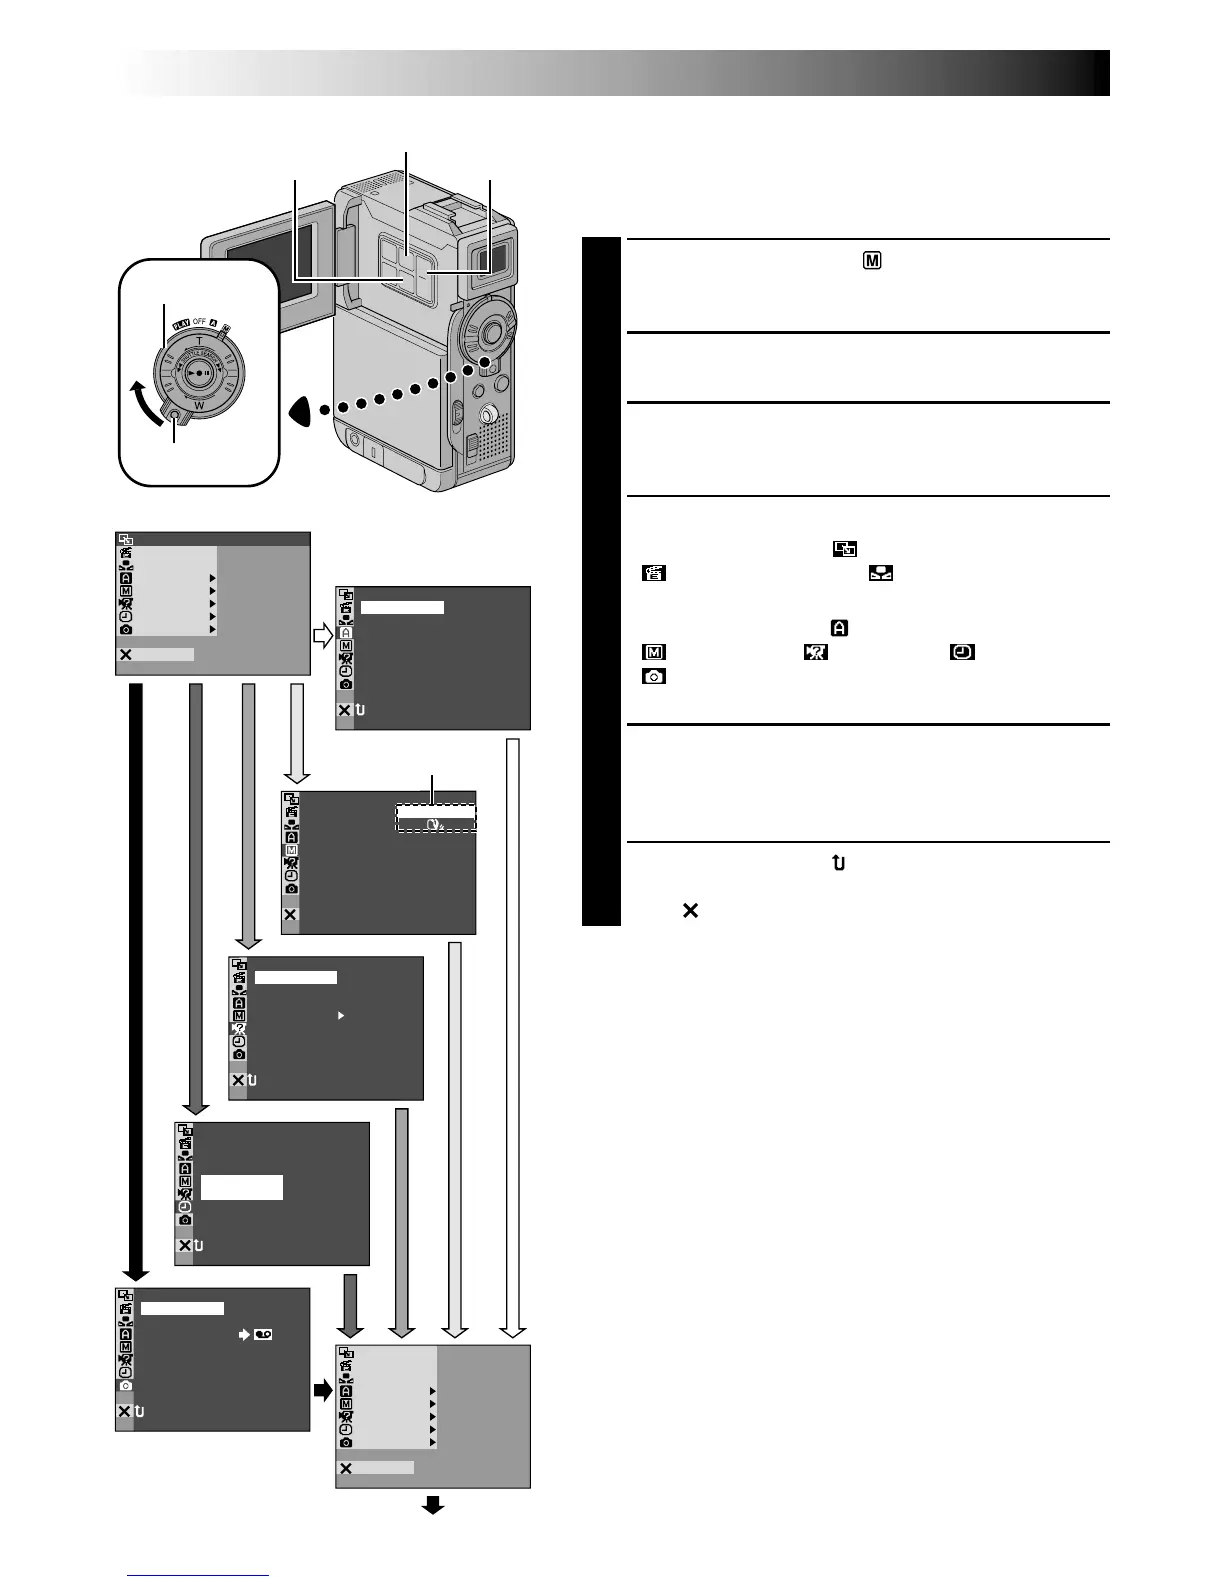
USING MENUS FOR DETAILED ADJUSTMENT
For Recording Menu
This camcorder is equipped with an easy-to-use,
on-screen menu system that simplifies many of the more
detailed camcorder settings ( pg. 41 – 43).
1
Set the Power Switch to “ ” while pressing down
the Lock Button located on the switch. Open the
LCD monitor fully or pull out the viewfinder fully.
2
Press MENU. The Menu Screen appears.
3
Press + or – to select the desired function icon, and
press SET/SELECT. The selected function menu
appears.
4
Function menu setting depends on the function.
If you have selected “ WIPE/FADER”,
“ PROGRAM AE” or “ W. BALANCE” . . .
…see pg. 41.
If you have selected “
CAMERA”,
“ MANUAL”, “ SYSTEM”, “ DISPLAY” or
“ DSC”. . .
…go to step 5.
5
Press + or – to select the desired function and press
SET/SELECT. The Sub Menu appears.
Then, press + or – to select the parameter, and press
SET/SELECT. Selection is complete.
6
Press + or – to select “ RETURN” and press SET/
SELECT twice. The Menu Screen closes.
•The icon represents “END”.
Sub Menu
Normal Screen
Power Switch
MENU Button
Lock Button
SET/SELECT Button
+, – Button