6
Setup
MountingtheHoodCover(Provided)
1 Alignthehoodcoverwiththegrooveontopof
theviewfinderscreenandinsertfromthetop.
2 Securewiththescrewlocatedatthecenter,
belowtheviewfinderscreen.
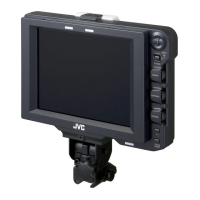
1 Loosenthepanningandtiltlockhandletoadjust
theangleoftheviewfinderandsecureitatan
appropriateangleforeasyviewing.
Memo
ItmaybedifficulttoviewtheLCDscreenatsomeangles.
Viewfromthedirectfrontangleofthescreen.
1 SetthePOWERswitchonremotecontrolunitor
camerato�ONB,todisplaytheimageonthe
viewfinder.
Memo
Dependingonthesystemenvironment,itmaytakeupto
10secondsbeforetheimageisdisplayed.
Selecttheimagetodisplayusing[INPUTSOURCE]inthe
[VIDEOFORMAT]menu.(Imagefromthecamera’s
viewfinderorthisviewfinder’s[SDIINPUT]terminal)
(A Page 11)
1 Turnthe[BRIGHT]controltoadjustthe
brightnessofthescreen.
Tobrighten,turntotheright.
2 Turnthe[CONTRAST]controltoadjustthe
contrastofthes creen.
Toincreasethecontrast,turntotheright.
3 Turnthe[PEAKING]controltoadjustthe
peaking.
Tosharpenthecontour,turntotheright.
Memo
Youcansetthefrequencybandwherethecontouris
emphasizedwiththe[PEAKING]controlin
[PEAKINGFREQ.]ofthe[SHOOTINGASSIST]menu
screen.(A Page 11)
YoucanadjustthebrightnessoftheLCDbacklightusing
[BACKLIGHT]inthe[OTHERS]menu.(A Page 12)
Whenthisviewfinderisused,itsdisplayisalwayson
regardlessofthe[LCD+VF]settinginthe[LCD+VF]menu
oftheGY-HM790series.
Note
Afterswitchingoffthepoweronthecameraorremote
controlunit,waitfor10secondsormorebeforeturningon
thepowerswitchagain.
TurningON/OFFthepowerswitchinquicksuccessionmay
causemalfunction.
Installation(continued)
AdjustingthePosition
Screw
Panning
Tilt
PanningandTiltLockHandle
DisplayingtheImages
AdjustingthePictureQuality
MENU
STATUS
BRIGHT
CONTRAST
PEAKING
1:1
FOCUS
ASSIST
5
6
4
5
6
4
[BRIGHT]Control
[CONTRAST]Control
[PEAKING]Control

 Loading...