M
monica13Aug 19, 2025
What to do if my JVC Camcorder power cannot be switched on?
- CChristopher WardAug 19, 2025
If the power cannot be switched on, connect the AC adapter correctly or charge the battery.
What to do if my JVC Camcorder power cannot be switched on?
If the power cannot be switched on, connect the AC adapter correctly or charge the battery.
Why is the indicating lamp not blinking during charging of my JVC GY-HM100U?
Check the remaining battery power. The indicating lamp stops blinking when the battery is fully charged. When charging the battery in a hot or cold environment, ensure that the temperature is within the allowable operating temperature range. Charging may stop to protect the battery if the temperature is outside the allowable range.
Why does my JVC GY-HM100U shooting stop by itself?
Shooting may stop automatically after 12 hours of continuous recording. Also, shooting may stop halfway depending on the card. Check if the card is a recommended SD card (Class 6 or higher). Try erasing the contents of the SD card (DELETE, FORMAT).
What to do if the recorded subject is too dark on my JVC Camcorder?
If the recorded subject appears too dark, try the following: * Use [Lolux]. * Set exposure to the [+] side. * For videos, set to the manual shooting mode and increase the sensitivity using the GAIN switch. * Set the GAIN switch to [AGC]. * For still pictures, set [GAIN UP] to [AUTO]. * Open up the aperture. * Lower the shutter speed.
How to fix focus that is not adjusted automatically on my JVC GY-HM100U Camcorder?
To fix focus that is not adjusted automatically: * Clean any dirt or water droplets from the lens. * If you are shooting in a dark place or shooting a subject that has no contrast between dark and light, adjust the focus manually.
What to do if the remote control does not work with my JVC GY-HM100U?
If the remote control is not working, try these steps: * Replace the battery. * Set [REMOTE] in the [CAMERA SETTINGS] menu to [ON]. The remote control may not function outdoors or under strong light conditions.
Why is there no display on the TV monitor from my JVC GY-HM100U Camcorder?
If there is no display on the TV monitor, set [DISPLAY ON TV] in the [CONNECTION SETTINGS] menu to [ON].
What to do if the color of the recorded subject looks unnatural on my JVC Camcorder?
If the color of the recorded subject looks unnatural (Reddish, bluish, etc.), depending on the lighting conditions or when there are numerous light sources in the background, set to the manual shooting mode and perform auto white balance adjustment. You can also adjust the red or blue using white paint adjustment.
What to do if I am unable to switch to the playback mode when continuous clip recording is paused on my JVC GY-HM100U Camcorder?
When the RREC icon lights up in red or the RW icon lights up in yellow, it is not possible to switch to the playback mode. To switch to the playback mode, close the clip file.
Why is my JVC GY-HM100U screen dark or whitish?
If the screen appears dark or whitish, adjust the angle and brightness of the screen. When used in cold places, the screen may appear darker. The screen may also be reaching the end of its service life, so consult authorized dealers or a JVC service center.
Details safety precautions for operating the camcorder, including electrical shock and fire hazards.
Key safety instructions to read and follow before using the camcorder.
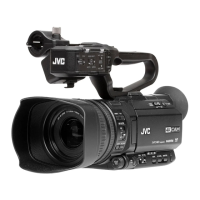
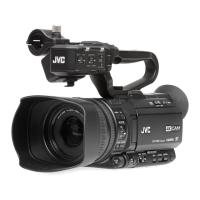
Highlights the camcorder's key features for recording, playback, and connectivity.
Lists the items included with the camcorder and details about SD cards.
Provides essential guidelines for using the device correctly and avoiding damage.
Identifies and describes the various external parts and controls of the camcorder.
Details the buttons and functions of the remote control unit.
Explains the various icons and information displayed on the camcorder's screens.
Guides on adjusting grip belt, setting up the remote control, and attaching accessories.
Details on charging the battery using the supplied charger or the camcorder.
How to check the remaining battery power and recordable time.
Steps to power on and off the camcorder, including auto power off.
Instructions for inserting SD cards into the camcorder's slots.
Guide to formatting SD cards for first-time use or when required.
Choosing between video and still picture shooting modes.
Choosing between Auto Focus and Manual Focus modes.
Configuring video file format, system, and recording mode.
Steps for taking still pictures using the SNAPSHOT button.
Steps for manually adjusting the focus of the camcorder's lens.
How to manually adjust exposure settings for optimal brightness.
Manual and automatic methods for adjusting white balance.
Manually setting shutter speed or using auto mode.
Methods for inputting audio sound using built-in or external microphones.
Settings for time code and user's bit recording.
How to switch between video and still picture playback modes.
Steps for playing back video files stored on the SD card.
How to find and select files using the date search function.
How to display detailed information about video files.
How to play back still pictures stored on the SD card.
Connecting the camcorder to a monitor via different output terminals.
How to protect files from accidental deletion using OK marks.
Methods for deleting unwanted video and still picture files.
How to copy or move files between SD card slots.
How to connect the camcorder to a PC via USB for file retrieval.
Saving and loading camcorder settings to/from an SD card.
How to reset camcorder settings to their factory defaults.
Overview of navigating and changing settings within the camcorder's menu system.
Table showing menu item availability across different operation modes.
Settings related to camera operation and image quality during shooting.
Settings for camera operation and image quality in still picture mode.
Options for file management during playback modes.
A guide to diagnosing and resolving common camcorder problems and symptoms.
Explanation of various warning messages and their corresponding actions.
Estimates for video recording time and still picture shot numbers.
Detailed technical specifications for the camcorder itself.
Technical specifications for the AC adapter unit.
Technical specifications for the remote control.
Diagrams showing the physical dimensions of the camcorder.
| Type | Professional Camcorder |
|---|---|
| Optical Zoom | 10x |
| Focus | Auto / Manual |
| Image Stabilization | Optical |
| Sensor Size | 1/3 inch |
| Effective Pixels | 1920 x 1080 |
| Lens | Fujinon |
| Aperture | f/1.6 to f/2.8 |
| White Balance | Auto, Manual, Presets |
| Video Resolution | 1920 x 1080 |
| Frame Rates | 60i, 30p |
| Audio Format | PCM, Dolby Digital |
| Recording Media | SD/SDHC card |
| Audio Input | XLR |
| Video Output | HDMI, Composite |
| Viewfinder | 0.45-inch color LCD |
| Input/Output | USB 2.0, HDMI, Composite, XLR |