EasyManua.ls Logo

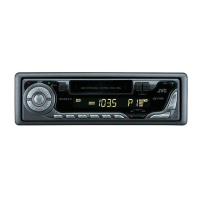
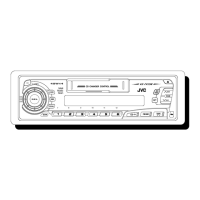
JVC KS-F190

JVC KS-F190
22 pages
To Next Page IconTo Next Page
Loading...
INSTRUCTIONS
MANUAL DE INSTRUCCIONES
MANUEL D’INSTRUCTIONS
For customer Use:
Enter below the Model No. and
Serial No. which are located on
the top or bottom of the cabinet.
Retain this information for future
reference.
Model No.
Serial No.
GET0107-001A
[J]
For installation and connections, refer to the separate manual.
Para la instalación y las conexiones, refiérase al manual separado.
Pour l’installation et les raccordements, se référer au manuel séparé.
ENGLISH
ESPAÑOL
FRANÇAIS
KS-F190
CASSETTE RECEIVER
RECEPTOR-REPRODUCTOR DE CASSETTE
RADIOCASSETTE
S.BASS
SEL
DISP
EN00.COVER.KS-F190[J]F 16/10/02, 6:03 AM3
Questions and Answers:

JVC KS-F190 Specifications

General IconGeneral
Channels4
CD PlayerYes
MP3 PlaybackYes
USB PortNo
BluetoothNo
Detachable FaceYes
Tuner TypeDigital
Screen SizeNot applicable
Anti-Theft ProtectionDetachable Face

Summary

LOCATION OF THE BUTTONS

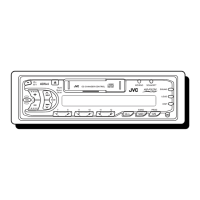
Control panel

Identifies and labels all buttons and indicators on the main unit's front panel.

BASIC OPERATIONS

Turning on the power

Instructions on how to power the unit on and notes on one-touch operation.

Select the source

Guide to choosing between FM/AM radio and cassette tape playback.

Adjust the volume

Explains how to increase or decrease the audio volume level.

Adjust the sound as you want

Details on how to adjust audio settings like bass, treble, and balance.

To turn off the power

Procedure for powering down the unit and notes on the ATT function.

RADIO OPERATIONS

Listening to the radio

How to tune into FM and AM radio stations using auto or manual search.

Searching a station automatically: Auto search

Method for automatically scanning and stopping at radio stations.

Searching a station manually: Manual search

Method for manually tuning to specific radio frequencies.

Storing Stations in Memory

FM station automatic preset: SSM

Automatically stores up to 6 strongest FM stations per band.

Storing Stations in Memory

Manual preset

Manually stores up to 6 stations for each band (FM1, FM2, FM3, AM).

Tuning in to a preset station

How to recall and listen to previously stored radio stations.

Storing Favorite Stations (EX-extra)

To tune to your favorite station

Recalls a preset station using the EX button, even when the unit is off.

TAPE OPERATIONS

Listening to a cassette

Instructions for playing Type I cassette tapes and notes on auto-reverse.

To stop play and eject the cassette

How to stop tape playback and eject the cassette.

To fast-wind a tape

How to fast-forward or rewind the cassette tape.

Select the tape direction

Controls the playback direction (forward/reverse) of the cassette tape.

SOUND ADJUSTMENTS

Turning onoff the super bass function

Enhances bass response at any volume level.

Selecting preset sound modes

Applies predefined sound profiles like BEAT, SOFT, and POP.

Adjusting the sound

Manually adjusts bass, treble, fader, balance, and volume levels.

Storing Custom Sound Adjustments

Call up sound mode for adjustment

Selects a sound mode (BEAT, SOFT, POP) to customize.

Select Bass or Treble

Chooses between adjusting bass (BAS) or treble (TRE) levels.

Adjust Bass or Treble Level

Sets the desired level for bass or treble reinforcement.

Turn Super Bass OnOff

Toggles the Super Bass function on or off for enhanced bass.

Store selected sound mode

Saves the customized sound settings into memory.

OTHER MAIN FUNCTIONS

Setting the clock

Step-by-step guide to setting the current time on the unit's display.

Detaching the Control Panel

Attaching the Control Panel

MAINTENANCE

Cleaning the Heads

Procedure for cleaning the cassette head to maintain sound quality.

Keeping the Tape Clean

Guidelines on proper storage of cassette tapes to prevent damage.

TROUBLESHOOTING

SPECIFICATIONS

INSTALLATION (IN-DASH MOUNTING)

Before mounting: Detach control panel

Step to detach the control panel before installing the unit.

Remove the trim plate

Step to remove the decorative trim plate from the dashboard.

Remove the sleeve

Step to remove the mounting sleeve from the dashboard.

Install the sleeve in the dashboard

Securing the mounting sleeve into the dashboard opening.

Fix mounting bolt and rubber cushion

Attaching the mounting bolt and cushion to the unit.

Make electrical connections

Crucial step to connect power, speakers, and antenna according to diagrams.

Slide unit into sleeve

Inserting the main unit into the dashboard sleeve until locked.

Attach trim plate

Reattaching the decorative trim plate after unit installation.

Attach control panel

Reconnecting the detachable control panel to the main unit.

Removing the Unit

Before removing, release rear section

Preliminary step to release the rear section before unit removal.

Remove control panel

First step in removing the unit: detaching the control panel.

Remove trim plate

Second step: removing the trim plate.

Slide out unit using handles

Using special handles to slide the unit out of the dashboard.

Connecting the Leads

Twist core wires when connecting

Recommended technique for preparing wires before connection.

Solder core wires securely

Recommended method for ensuring secure wire connections.

ELECTRICAL CONNECTIONS

Basic connection precautions

Safety advice and general rules for connecting the unit to the vehicle.

Speaker wiring overview

Diagrams and notes on connecting front and rear speakers.

Connecting power and speaker leads

Detailed guide to connecting power, speakers, antenna, and optional equipment.

PRECAUTIONS on Power and Speaker Connections

DO NOT connect speaker leads to car battery

Critical warning against connecting speaker wires to the car battery.

Connect ground, battery, and accessory leads correctly

Essential steps for correctly wiring power and ground connections.

Check car speaker wiring

Advice to verify vehicle speaker wiring before connecting the unit.

Ground unit to car chassis

Instructions for ensuring proper grounding of the unit to the car chassis.

Related product manuals