Do you have a question about the JVC KW-XC407 and is the answer not in the manual?
General safety guidelines regarding handling the unit and its components.
Measures to prevent damage from electrostatic discharge, especially to the laser diode.
Precautions for handling the sensitive optical pickup unit and its flexible cable.
Specific steps for handling the traverse unit when it is disassembled and reassembled.
References to specific mechanism manuals for CD and cassette components.
Steps for disassembling the main body of the unit.
Detailed instructions for removing the front panel assembly.
Procedure for removing the heat sink, including notes on reassembly.
Instructions for removing the rear bracket from the main body.
Steps to remove the bottom chassis assembly after other parts are detached.
Procedure for removing the cassette mechanism control board.
Instructions for removing the cassette mechanism assembly.
Steps to remove the function board.
Procedure for removing the middle chassis assembly.
Instructions for removing the main board from the middle chassis.
Steps for removing the CD mechanism control board.
Instructions for removing the CD mechanism assembly.
Procedure for removing the switch board, including knob removal.
Overview of adjustment procedures and required test instruments.
Details on using specific extension cords for service procedures.
General sequence of disassembly steps for service.
Instructions for entering and operating the unit's service mode.
Troubleshooting steps for issues related to the feed motor and related components.
Troubleshooting steps for focus-related issues, including lens movement and waveforms.
Troubleshooting steps for spindle motor and disk rotation issues.
Troubleshooting steps for tracking errors and RF signals.
Troubleshooting for sound output and signal processing issues.
Procedures for cleaning and maintaining the laser pickup.
Step-by-step guide for replacing the laser pickup unit.
General safety guidelines regarding unit operation and volume settings.
Safety warnings related to Class 1 laser product usage and potential radiation exposure.
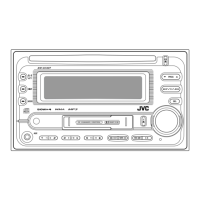
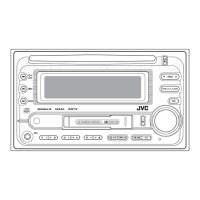
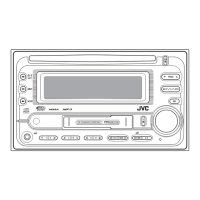
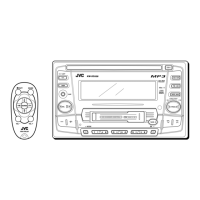
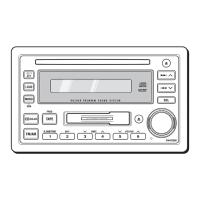
Explanation of symbols and button operation conventions used in the manual.
Guide on using the MODE button for various functions during playback.
Initial steps for operating the unit, including power, tuner, and volume adjustment.
How to disable the automatic display demonstration mode.
Instructions for setting the unit's clock time.
How to tune into radio stations and manage FM stereo/mono reception.
Methods for saving favorite radio stations using SSM or manual preset tuning.
How to select a stored radio station from memory.
Procedure for scanning available stations automatically for a short period.
How to assign custom names (titles) to stored radio stations.
Instructions for inserting and playing audio CDs and MP3/WMA discs.
How to use the unit with a compatible JVC CD changer for disc playback.
Functions like skipping tracks and prohibiting disc ejection during playback.
How to customize the information shown on the display during disc playback.
Options for repeat, random, and intro scan playback modes for discs.
Basic steps for inserting and playing cassette tapes, including auto-reverse.
Using Multi Music Scan (MMS) to locate specific songs on a tape.
Features like Dolby B NR, Blank Skip, and repeat play for tape operation.
How to choose pre-defined sound profiles for different music genres.
Manual adjustment of Fader, Balance, Loudness, and Volume settings.
How to save custom sound settings for later recall and use.
Guide to changing various system preferences like display, clock, and level meter.
Connecting and operating external devices like iPod or CD changers via the unit.
Steps to activate a SIRIUS satellite radio subscription for the unit.
Steps to activate an XM satellite radio subscription for the unit.
How to listen to SIRIUS and XM satellite radio through the unit.
How to save favorite satellite radio channels into memory presets.
How to select a stored satellite radio channel from memory.
Tips for handling CDs to ensure proper playback and prevent damage.
Instructions for cleaning cassette heads and keeping tapes clean for optimal performance.
Details on turning the unit on/off and selecting playback sources.
Information on DualDisc playback and general disc handling precautions.
Precautions for inserting discs, including size and orientation to prevent errors.
Notes on playing MP3/WMA discs, including intermittent sounds during fast-forward.
Compatibility and limitations for playing CD-R and CD-RW discs on the unit.
Conditions and limitations for playing MP3 and WMA files on the unit.
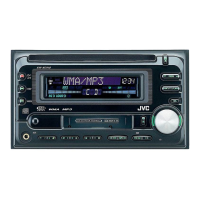
| Display Type | LCD |
|---|---|
| Bluetooth | Yes |
| Max Power Output | 50W x 4 |
| Preamp Outputs | 3 (Front, Rear, Subwoofer) |
| Radio Tuner | AM/FM |
| CD Player | Yes |
| Detachable Face | Yes |
| AUX Input | Yes |
| Wireless Remote Control | Yes |
| Subwoofer Output | Yes |
| Compatible Formats | MP3, WMA |
| USB Port | Yes, Front |