42
IMPORTANT PREPARE USE SETTING TROUBLE?
What is “T-V LINK”?
“T-V LINK” allows the TV to share information easily with a connected “T-V LINK” compatible device.
By using T-V LINK:
z You can send the channel information programmed on the TV to the “T-V LINK” compatible device, so that both
the TV and the external device have the same channel settings. When connecting a new external device,
channel information is loaded into it, allowing channel setup to be completed very quickly. For more details,
refer to the external device’s manual.
z You can easily record the TV programme you are viewing on a “T-V LINK” compatible device by using the
“Direct Rec” feature. For more details, refer to the external device’s manual.
What is “ACI” (Automatic Channel Installation)?
Some cable companies transmit a signal called “ACI” which contains information that allows TV channels to be
registered automatically on your TV.
When an ACI signal is received, “ACI Start / ACI Skip” appears in the “Auto Program” screen.
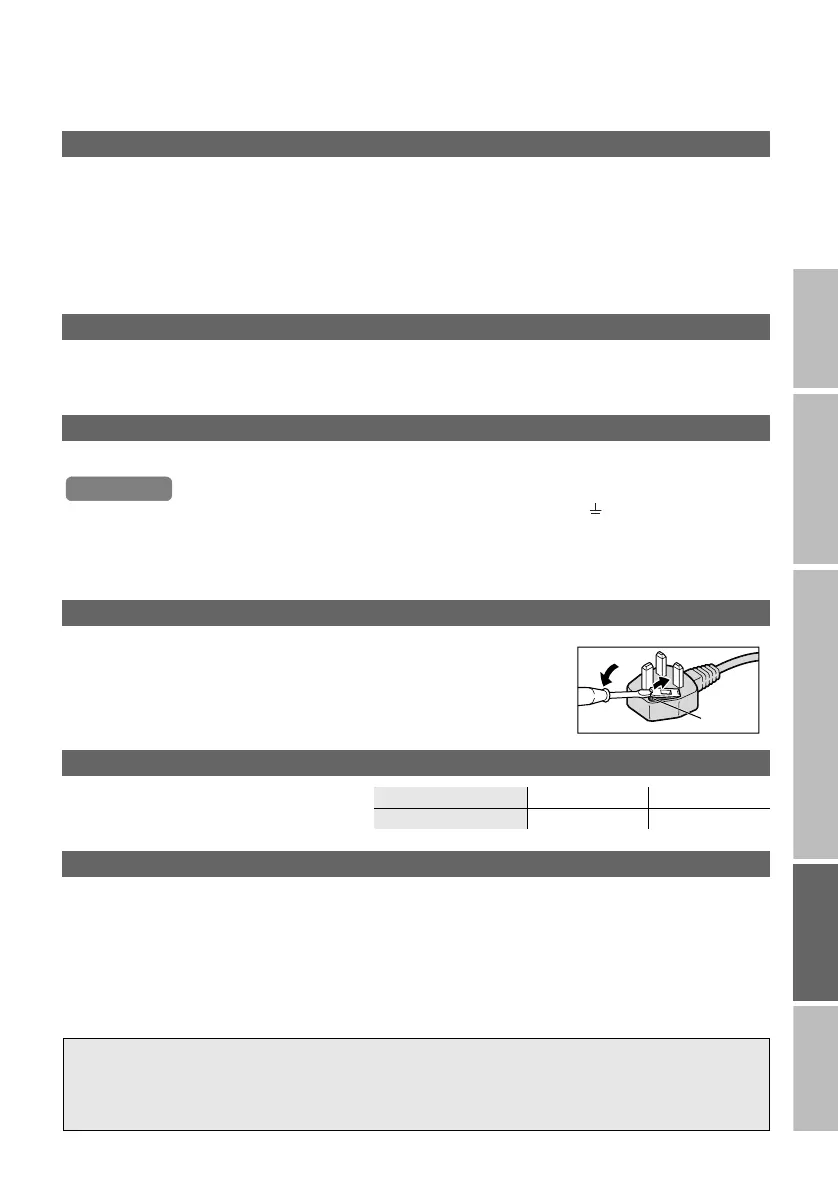
If you accidentally cut the power cord
Attach a new plug following the steps below. If in doubt, contact your local retailer.
z Never connect to the larger terminal marked with an “E”, the safety earth symbol “ ” or coloured green or
green-and-yellow.
z The wires in the mains lead on this product are coloured with the following code:
• Blue: Neutral wire (connect to the black terminal, or one marked “N”)
• Brown: Live wire (connect to the red terminal, or one marked “L”)
Change the fuse in the plug
Open the plug as illustrated on the right.
z When replacing the fuse, always use a correctly rated and approved type and
re-fit the fuse cover when finished.
If in doubt, contact your local retailer.
PC signals that can be displayed
z If the signal doesn’t appear, check that the
vertical frequency on the PC is set to “60Hz”.
Resolution 640 x 480 (VGA) 1024 x 768 (XGA)
Vertical frequency (Hz) 60.0 60.0
Connect DVI devices
Connect a DVI device to EXT-5 (HDMI) using DVI-HDMI conversion cable. Connect analogue sound output of the
DVI device to L and R terminals in EXT-4.
z Set “Audio” in “HDMI Setting” to “Analogue” or “Auto” g (P. 38)
z EXT-6 and EXT-7 inputs do not support analogue sound (EXT-4).
Important
Fuse
Technical Information
For more information, please read the separate manual (WATCHING DIGITAL
CHANNELS).
“Technical Information” (P. 21 - 22)
LT-42DV8BJ.book Page 42 Friday, July 6, 2007 11:23 AM