(No.MB623)1-11
3.1.8 Removing the REAR PANEL
(See Fig.18 to 20)
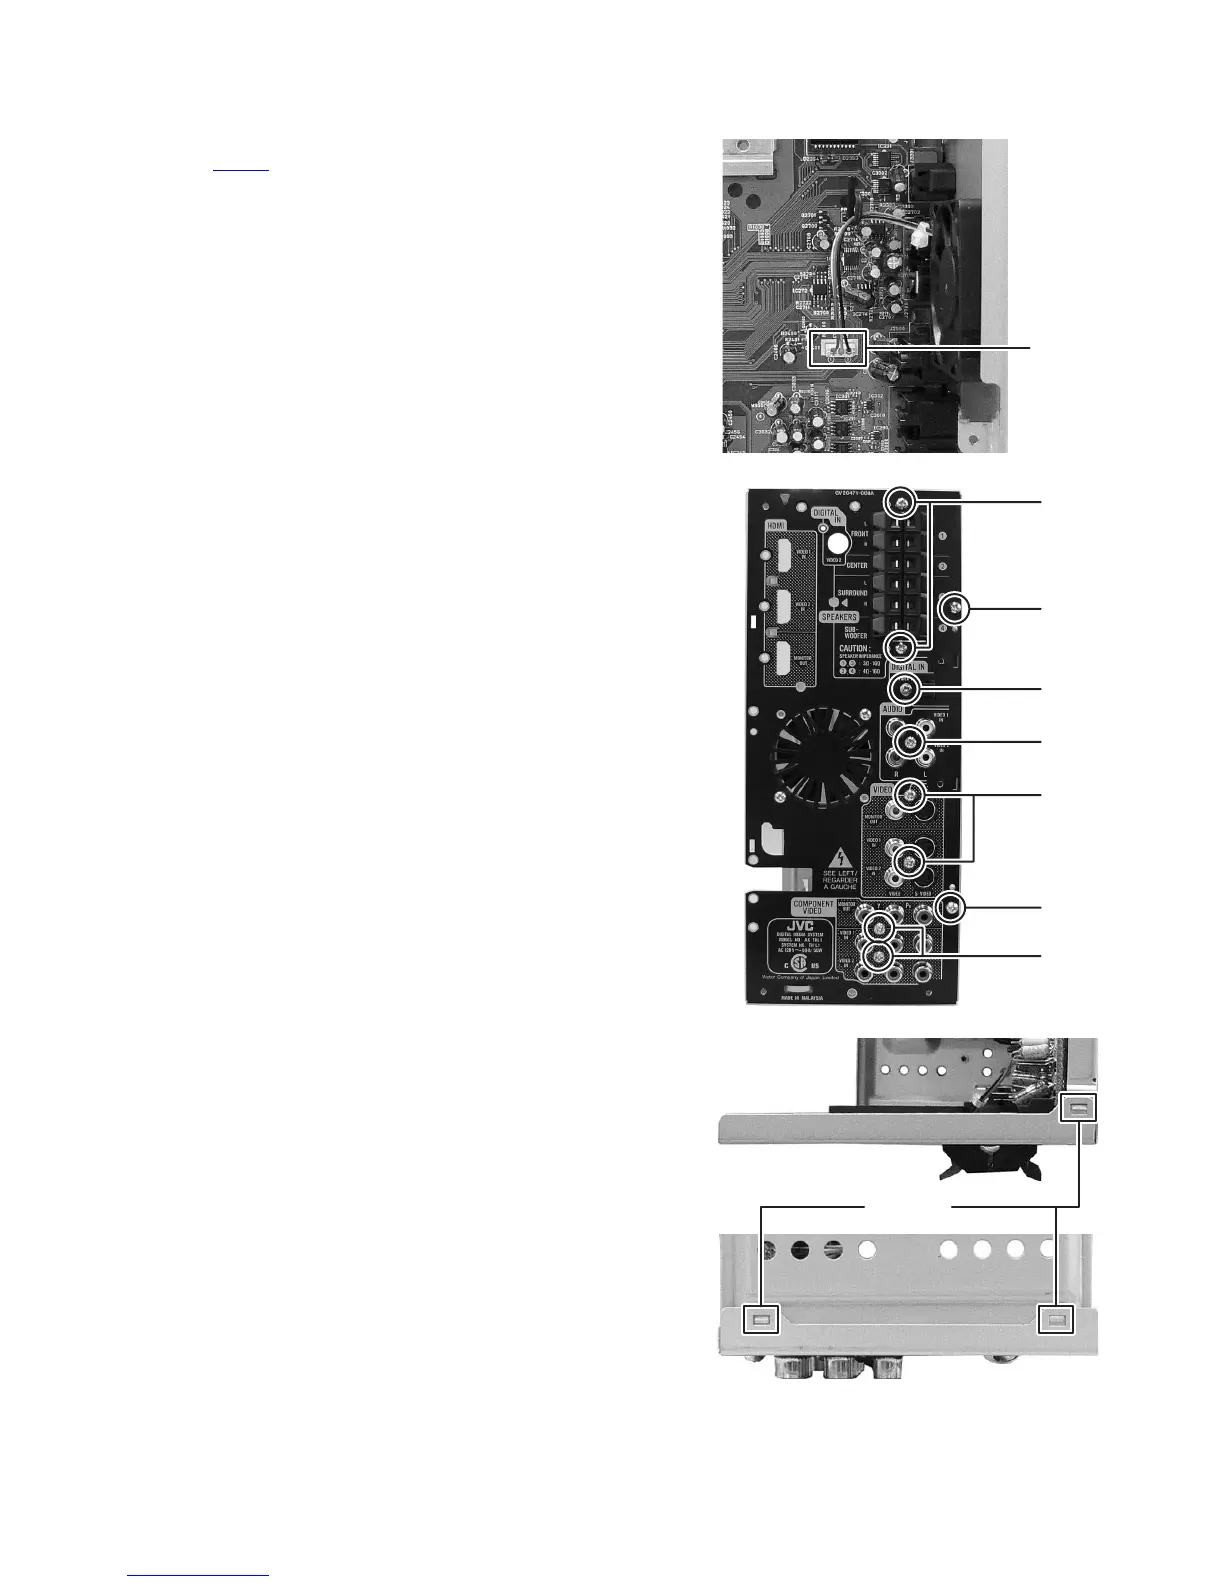
(1) Disconnect the connector wire from FAN connected to con-
nector CN209
of the MAIN BOARD assembly. (See Fig.18)
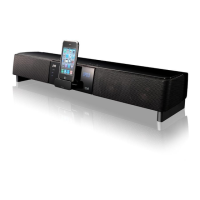
(2) Remove the two screws P attaching the SPEAKER TER-
MINAL. (See Fig.19)
(3) Remove the one screw Q attaching the VIDEO 1 jack. (See
Fig.19)
(4) Remove the one screw R attaching the AUDIO jack. (See
Fig.19)
(5) Remove the two screws S attaching the VIDEO jack. (See
Fig.19)
(6) Remove the two screws T attaching the COMPONENT
jack. (See Fig.19)
(7) Remove the two screws U attaching the REAR PANEL.
(See Fig.19)
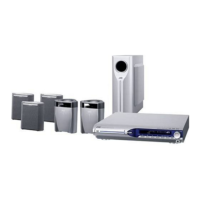
(8) Disengage three hooks b engaged top and bottom side of
REAR PANEL. (See Fig.20)
Fig.18
Fig.19
Fig.20
CN209
P
Q
R
S
T
U
U
hook b
(Top side)
(Bottom side)