TM-H140PN
Item
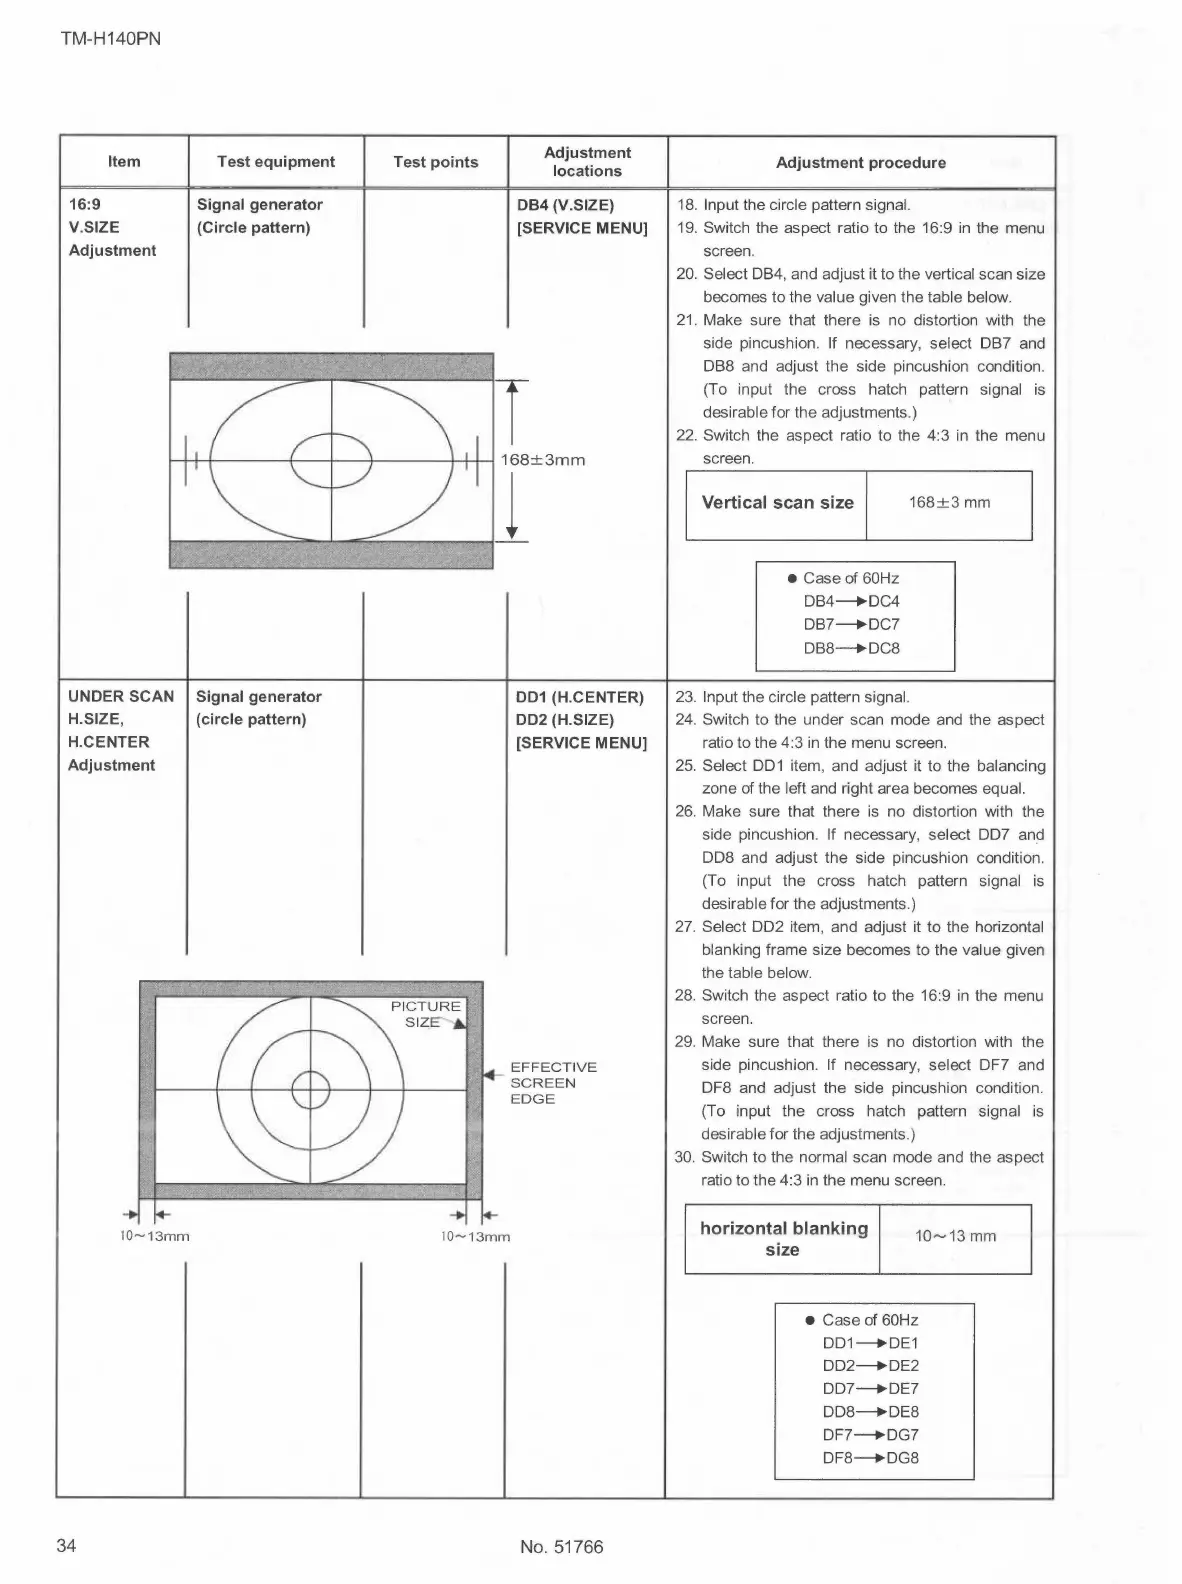
16:9
V.SIZE
Adjustment
UNDER SCAN
H.SIZE,
H.CENTER
Adjustment
10~13mm
34
Test equipment
Signal generator
{Circle pattern)
Signal generator
(circle pattern)
Test points
Adjustment
locations
0B4 {V.SIZE)
[SERVICE MENU]
I 001 (H.CENTER)
002 (H.SIZE)
[SERVICE MENU]
EFFECTIVE
SCREEN
EDGE
10~13mm
No. 51766
Adjustment procedure
18. Input the circle pattern signal.
19. Switch the aspect ratio to the 16:9 in the menu
screen.
20. Select OB4, and adjust it to the vertical scan size
becomes to the value given the table below.
21. Make sure that there is no distortion with the
side pincushion. If necessary, select DB? and
OB8 and adjust the side pincushion condition.
(To input the cross hatch pattern signal is
desirable for the adjustments.)
22. Switch the aspect ratio to the 4:3 in the menu
screen.
Vertical scan size
• Case of 60Hz
DB4---+DC4
OB7---+DC?
DB8---+DC8
23. Input the circle pattern signal.
168±3 mm
24. Switch to the under scan mode and the aspect
ratio to the 4:3 in the menu screen.
25. Select 001 item, and adjust it to the balancing
zone of the left and right area becomes equal.
26. Make sure that there is no distortion with the
side pincushion. If necessary, select 007 and
008 and adjust the side pincushion condition.
(To input the cross hatch pattern signal is
desirable for the adjustments.)
27. Select 002 item, and adjust it to the horizontal
blanking frame size becomes to the value given
the table below.
28. Switch the aspect ratio to the 16:9 in the menu
screen.
29. Make sure that there is no distortion with the
side pincushion. If necessary, select OF? and
DF8 and adjust the side pincushion condition.
(To input the cross hatch pattern signal is
desirable for the adjustments.)
30. Switch to the normal scan mode and the aspect
ratio to the 4:3 in the menu screen.
horizontal blanking
size
10~13 mm
• Case of 60Hz
DD1---+DE1
DD2---+DE2
OO7---+DE?
DD8---+DE8
DF7---+DG7
DF8---+DG8
 Loading...