English 11
22 Cushion nozzle
23 Crevice nozzle
24 "Filter" indicator lamp
25 Indicator tuft
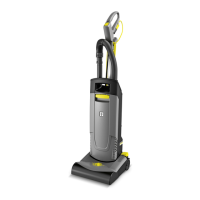
26 Roller brush
Installation
Install the loose parts for handle provided with the de-
vice before using the device for the first time.
See page 4 for illustrations
1 Handle with mains power cable
2 Handle metal tube
3 Suction pipe and suction hose
1. Open the handle adjustment.
2. Push the metal pipe of the handle into the mount all
the way to the lowest latching position (latches audi-
bly twice).
3. Insert the handle into the metal pipe and latch into
place. Take care to ensure that the mains cable is
not jammed or twisted.
4. Pull the handle to the first (uppermost) latching po-
sition.
5. Close the handle adjustment.
6. Insert the suction hose into the connection nozzle.
7. Insert the suction pipe into the mount on the device
Startup
Installing the filter bag
1. Unlock and remove the filter cover.
2. Turn the filter bag lock to the right to unlock.
3. Insert the filter bag and turn the filter bag lock to the
left to lock.
4. Fit and lock the filter cover.
Connecting the mains power cable to the
device
1. Open the cable holder at the handle.
2. Plug the mains cable provided into the socket on the
device.
3. Secure the plug connection against unintentional
unplugging using the cable holder on the handle.
Use only the mains cable provided and only replace it
with an equivalent cable in the case of damage (see
"Technical data").
Operation
Adjusting the height of the handle
The height of the handle is adjustable.
See page 4 for illustrations
1. Open the handle adjustment.
2. Move the handle up or down to set the desired
height.
3. Close the handle adjustment.
Switching on the device
1. Connect the mains plug.
2. Switch on the device at the main switch.
Electronic brush monitoring
The electronic brush monitoring continuously monitors
the function of the roller brush.
The indicator light shows the respective operating
mode:
● Off: Roller brush functioning correctly.
● Lights up orange: Incorrect fibre height setting - set
the fibre height selection knob to a lower fibre
height.
● Also lights up orange at the lowest setting: Replace
the roller brush.
Note
Visual brush inspection: The degree of wear can be de-
termined by comparing the differently coloured indicator
tufts. Replace the roller brush when the black bristles
are the same height as the red bristles.
Roller brush operation
ATTENTION
Risk of damage to the floor covering!
Do not operate the device continuously at the same
point.
1. Adjust the fibre height using the selection knob on
the brush head.
2. Perform cleaning.
Using accessories
Vacuum with the crevice nozzle and cushion nozzle.
See page 4 for illustrations
1. Pull the suction pipe out of the mount.
2. Remove the desired accessory from the storage
compartment and plug it onto the suction pipe.
3. Perform cleaning.
Suction pipe operation
ATTENTION
Risk of damage!
When vacuuming using the suction hose, allow the de-
vice to latch into position without moving so that the
brush motor switches off and does not damage the car-
pet.
Switching off the device
1. Switch off the device at the main switch.
2. Pull out the mains plug.
Cable storage
The mains cable can be stored on the device.
See page 4 for illustrations
1. Wind the mains power cable onto the winding aid.
2. Wind the mains cable around the cable hook and
handle.
3. To remove the cable, open the cable hook and re-
move the cable from the handle.
Transport
몇 CAUTION
Failure to observe the weight
Risk of injury and damage
Be aware of the weight of the device during transporta-
tion.
1. Wind the mains cable around the cable storage.
2. Carry the device by the carrying handle.
3. When transporting the device in vehicles, secure it
to prevent it from slipping or overturning in accord-
ance with the respective valid guidelines.
 Loading...