14 English
Mounting the transport handle
1. Mounting the transport handle:
a Attach the transport handle on the device.
b Secure the transport handle with 4 screws.
Illustration B
Mounting the storage option for the high-
pressure gun
1. Mounting the storage option for the high-pressure
gun:
a Push the storage option for the high-pressure
gun into the holder on the device.
b Hold the storage option for the high-pressure gun
in the end position and secure it using a screw.
Illustration C
Mounting the storage for spray lances
1. Mounting the storage for spray lances:
a Push the storage option for spray lances into the
holder on the device.
b Hold the storage option for spay lances in the end
position and secure it using a screw.
Illustration D
Mounting the storage option for the high-
pressure hose / mains connection cable
1. Mounting the storage option for the high-pressure
hose / mains connection cable:
a Push the storage option for the high-pressure
hose / mains connection cable into the holder on
the transport handle.
b Hold the storage option for the high-pressure
hose / mains connection cable in the end position
and secure it using a screw.
Illustration E
Installing the water connection coupling
1. Screw the water connection coupling onto the water
connection on the device.
Illustration F
Startup
Note
Take care not to exceed the maximum permissible
mains impedance at the electrical connection point, see
Technical data.
Contact your electricity supplier in the case of any un-
certainties regarding the mains grid impedance at your
electrical connection point.
1. Place the device on a level, horizontal surface.
ATTENTION
Risk of damage during operation with wound-up
high-pressure hose!
Damage on the high-pressure hose.
Unwind the high-pressure hose completely and lay it out
without knots, loops or twists before operating the de-
vice.
2. Unwind the high-pressure hose completely and lay
it out without knots, loops, or twists.
3. Connect the high-pressure hose to the device.
a Pull up the clamp on the coupling.
b Insert the high-pressure hose into the coupling.
c Press down the clamp on the coupling.
Illustration G
4. Insert the high-pressure hose into the high-pressure
gun until it audibly clicks into place.
Illustration H
Note
Take care to ensure the correct alignment of the nipple.
5. Check the secure connection by pulling on the high-
pressure hose.
6. Plug the mains plug into a mains socket.
Water supply
For the connected load, see Technical data or type
plate.
Observe the water distribution company regulations.
ATTENTION
Risk of damage!
Damage to the device and accessories in case of con-
tamination in the water or use of salt water.
Use only clean water and no salt water.
Note
Kärcher recommends the use of an optional Kärcher
water filter.
Connection to the water line
ATTENTION
Risk of damage!
Damage to the pump when using a hose coupling with
aquastop on the water connection of the device.
Do not use a hose coupling with aquastop on the water
connection of the device.
Use a hose coupling with "aquastop" on the tap only.
1. Plug the garden hose onto the water connection
coupling.
Illustration I
2. Connect the garden hose to the water line.
3. Open the water tap completely.
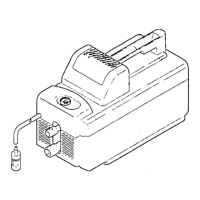
Suck water from open containers
This high-pressure cleaner with the KÄRCHER suction
hose is suitable for sucking in surface water, e.g.from
water butts or ponds (for maximum suction height, see
Technical data).
1. Unscrew the coupling on the water connection.
2. Fill the suction hose with water.
3. Screw the suction hose onto the water connection of
the device and hang it in a water source (e.g. rain
barrel).
Vent the device
1. Switch the device on "I/ON".
2. Unlock the lever of the high-pressure gun.
3. Press the lever of the high-pressure gun.
The device switches on.
4. Allow the device for run a maximum of 2 minutes un-
til the water escaping from the high-pressure gun is
free of air bubbles.
5. Release the lever of the high-pressure gun.
6. Lock the lever of the high-pressure gun.
Operation
ATTENTION
Risk of damage due to the pump running dry!
Pump damage
Switch off the device if it does not build up pressure
within 2 minutes.
Proceed according to the instructions in Troubleshoot-
ing guide.