English 15
High-pressure operation
ATTENTION
Risk of damage!
Damage to painted or sensitive surfaces if the spray dis-
tance is too short or an unsuitable spray lance is used.
Keep at least 30 cm spray distance when cleaning
painted surfaces.
Do not clean car tires, paint or delicate surfaces such as
wood with the dirt grinder.
1. Insert a spray lance into the high-pressure gun and
lock it into position by turning it 90°.
Illustration J
2. Switch the device on ("I/ON").
3. Unlock the lever of the high-pressure gun.
4. Press the lever of the high-pressure gun.
The device switches on.
Operation with detergent
DANGER
Risk of injury from detergent
Serious damage to health due to improper use of deter-
gents.
Observe the detergent manufacturer's safety data
sheet.
Wear the prescribed personal protective gear.
Note
KÄRCHER detergents guarantee trouble-free work. Ask
us for a consultation, request our catalogue and our de-
tergent information sheets.
Note
Detergents may only be added at low pressure.
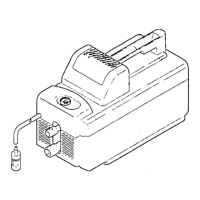
1. Pull the detergent suction hose out of the casing to
the desired length.
Illustration K
2. Hang the detergent suction hose in a container with
detergent solution.
3. Use the Vario Power spray lance.
4. Turn the spray lance all the way into the "SOFT" po-
sition.
The detergent solution is mixed with the water jet
during operation.
Recommended cleaning method
1. Spray the detergent sparingly on the dry surface and
let it work for a while (do not let it dry).
2. Rinse off the loosened dirt with the high-pressure
jet.
After operation with detergent
1. Flush the device with clear water for approx. 30 sec-
onds.
Interrupting operation
1. Release the lever of the high-pressure gun.
The device switches off when the lever is released.
The high pressure in the system is retained.
2. Lock the lever of the high-pressure gun.
Illustration L
3. Switch the device off "0/OFF" during work breaks
longer than 5 minutes.
Ending operation
몇 CAUTION
Risk of injury from escaping water under high pres-
sure!
Injuries
Only disconnect the high-pressure hose from the high-
pressure gun or the device if there is no pressure in the
system.
1. Release the lever of the high-pressure gun.
2. Close the water tap.
3. Press the lever of the high-pressure gun for 30 sec-
onds.
The pressure in the system is released.
4. Release the lever of the high-pressure gun.
5. Lock the lever of the high-pressure gun.
6. Switch off the device "0/OFF".
7. Disconnect the device from the water supply.
8. Pull the mains plug out of the outlet.
Transport
몇 CAUTION
Risk of injury or damage due to the weight of the de-
vice!
Injury and damage.
Be aware of the weight of the device during transport
and storage.
Pulling the device
1. Pull the device via the transport handle.
Transporting the device in a vehicle
1. Secure the device against slipping and tipping over.
Storage
몇 CAUTION
Risk of injury or damage due to the weight of the de-
vice!
Injury and damage.
Be aware of the weight of the device during transport
and storage.
Storing the device
1. Place the device on a level, horizontal surface.
2. Press the release button and pull off the high-pres-
sure hose from the high-pressure gun.
3. Remove the spray lance from the high-pressure
gun.
4. Stow the spray lances and the high-pressure gun in
the appropriate storage options.
5. Remove the high-pressure hose from the device.
6. Store the high-pressure hose on the device.
7. Store the mains connection cable with the mains
plug on the device.
Observe the additional notes before storing the device
for a long period of time, see Care and maintenance.
Frost protection
ATTENTION
Risk of damage!
Damage to the device and accessories due to freezing
water.
Completely empty the device and accessories after
each use.
Protect the device and accessories from temperatures
below or equal to 0 °C (32 °F).
1. Disconnect the water supply from the device.
2. Remove the high-pressure hose from the device.
3. Switch the device on ("I/ON").
4. Wait for a maximum of 1 minute until no more water
escapes from the high-pressure connection.
5. Switch off the device ("0/OFF").
6. Store the device and accessories in a frost-protect-
ed room.