PROTIG 410 / 0537 – 17© KEMPPI OY
H42 H41 H43
P42P41
3.2.5. Controls for fusion spot welding
1 Select TIG welding, Demo, 2-function operation and fusion spot welding S24.
2 Adjust welding parameters as above in point: Controls for continuous welding.
3 Go with arrow keys S27 to fusion welding point H35. Adjust spot welding time P31 with
+/- keys S28.
Spot welding is working also in 4-function position, then torch switch needs not be pressed until
at start.
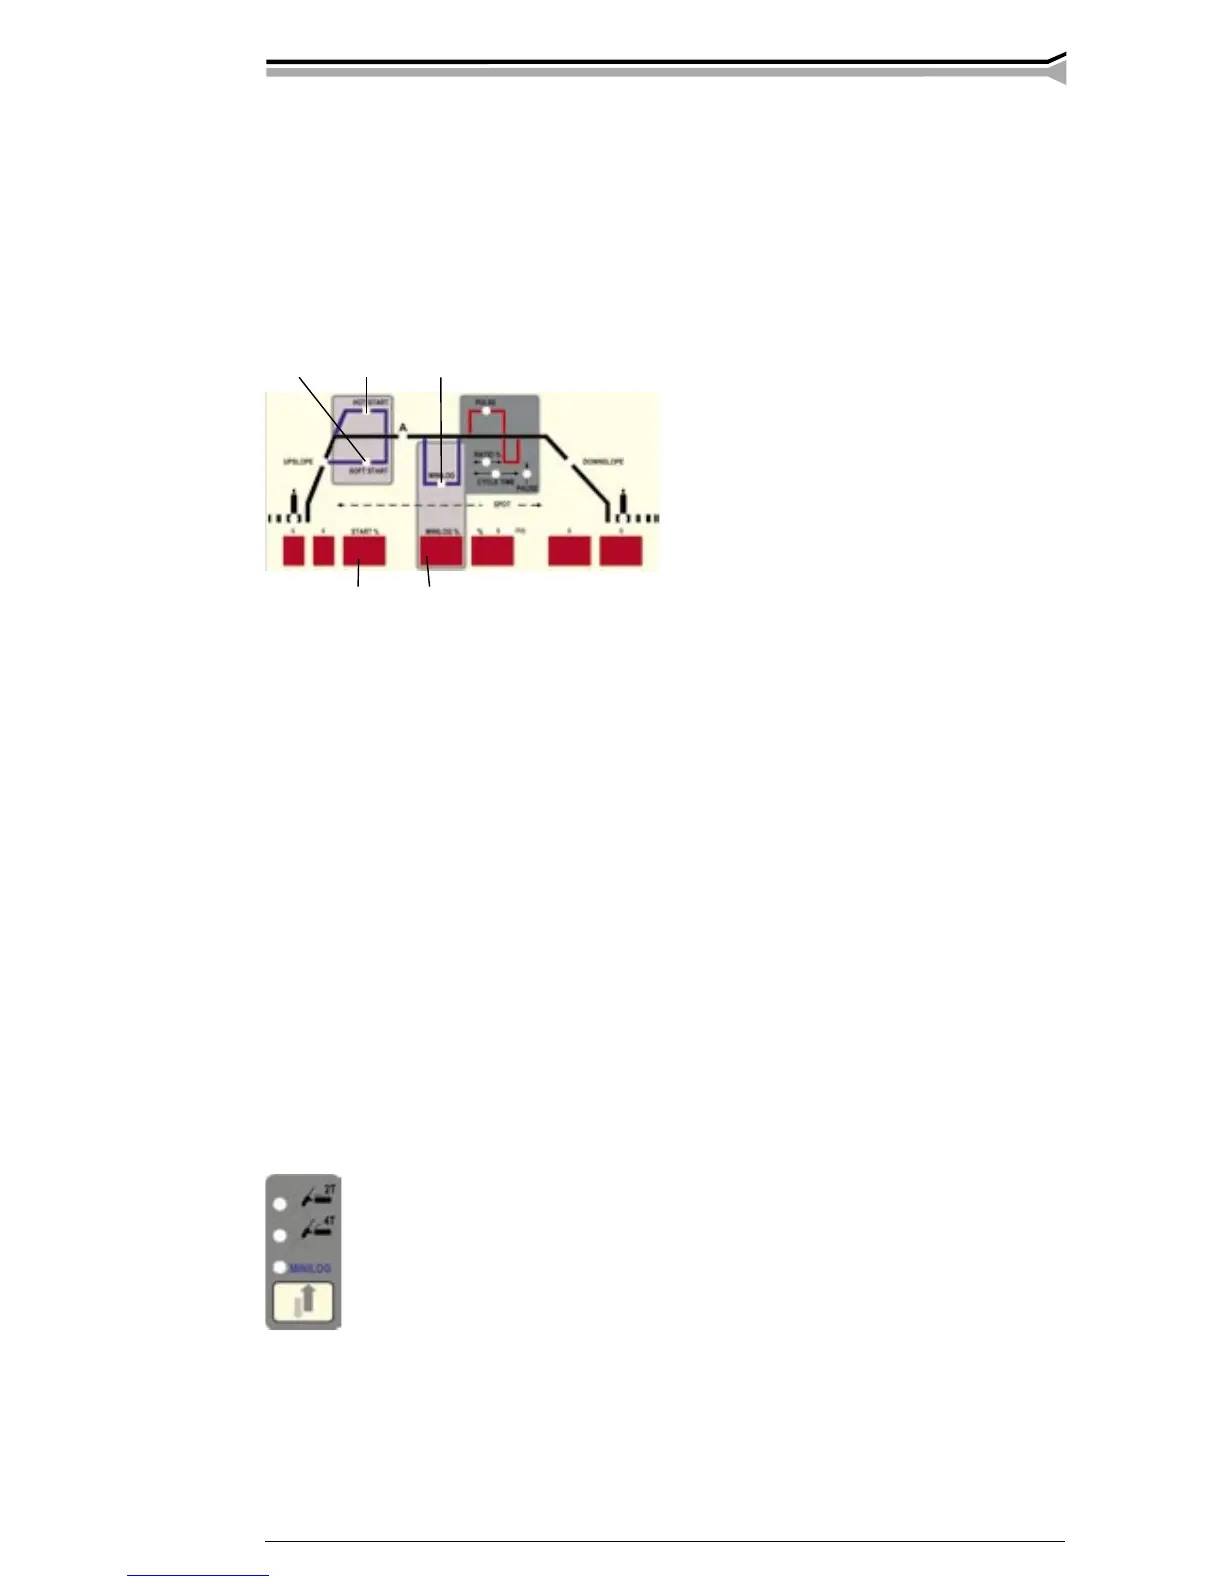
3.2.6. Minilog-operation and control for start current
Operation of Minilog is based on two pressings of different length, short and long (over
0,7 s), on torch switch.With long pressing you make first the gas to flow. When the switch is
released,you go through pre-gas time and up-slope current to start current, when lamps H41 and/
or H42 are lighted.
If start current has been adjusted onto different value from welding current, you go to welding
current with short pressing. If start current is the same as the welding current, you go directly to
welding current without any additional pressing. After that you can alternate with short pres-
sings between welding current and basic current levels.
1 Select TIG welding, Demo, Minilog operation S23 and continuous or pulsed welding.
2 Adjust the welding parameters as above in point: Controls for continuous welding.
3 You can adjust start current value with +/- keys S28 either to lower or higher value by
means or display P41. Control range for start current is approx. 30...150 % of welding cur-
rent value. When upper pilot lamp H41 is lighted, there is in display reading exceeding 100
%. When lower pilot lamp H42 is lighted, there is in display reading under 100 %.
4 Adjust basic current level H43 with +/- keys. Reading will come to display P42.
5 Stop welding with long pressing, when releasing switch you go to down-slope current and
post gas time. You can start down-slope from any point operation cycle you like.
3.2.7. Breaking down-slope operations
In 2-function position of torch switch welding current begins to slope down, when
torch switch is released. If you press the torch switch again, current begins to slope up
(in its maximum to the reference value) with the same speed as it was earlier sloping
down. With the operation the slope-down can be controlled without interfering the
down-slope time.
In 4-function and Minilog positions the respective operation can be produced by short
pressing of the torch switch. Current down-slope can also be stopped to value of that
moment by keeping the switch pressed down. When the switch is released, current
down-slope is continued until the down-slope time is at end.
 Loading...