14 – PROTIG 410 / 0537 © KEMPPI OY
1
2
H26 P23 S29
S28
S21 S22 S24 S51 P51 S27S23
P25
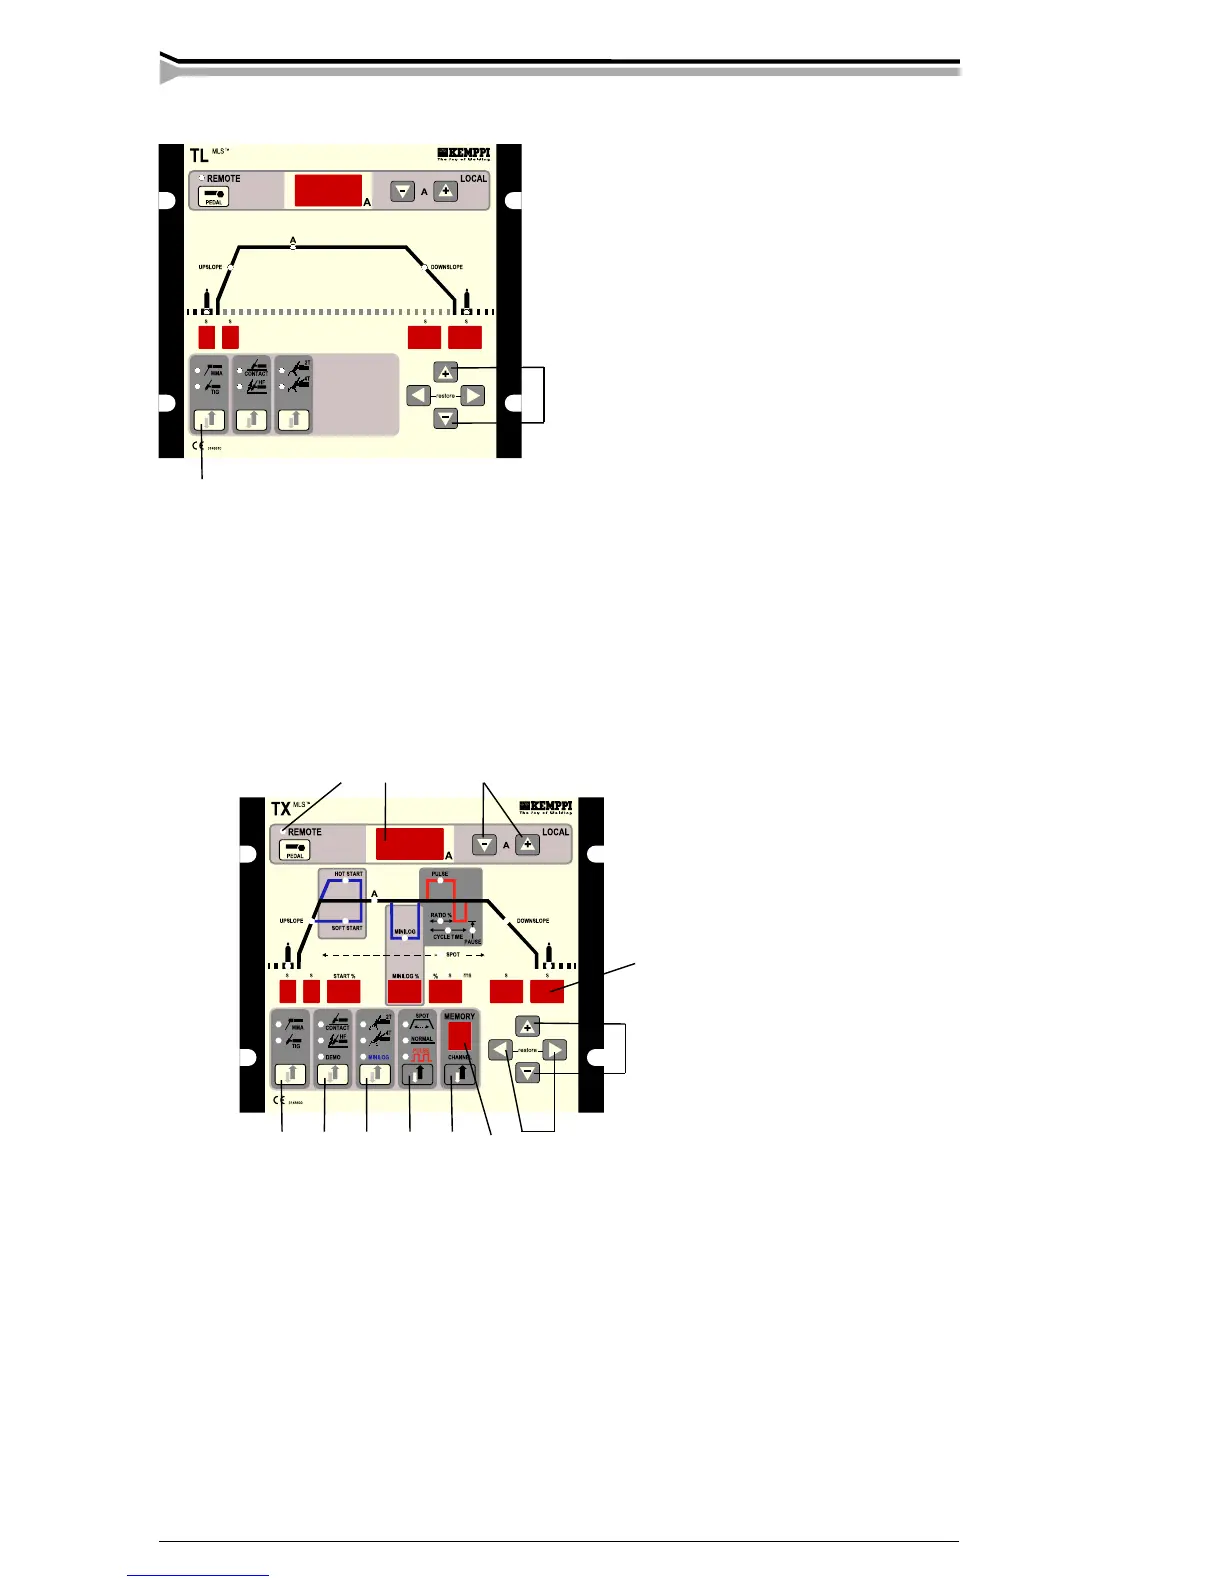
3.2. CONTROL PANEL TX 6271266
3.1.12. Controls for MMA welding
1 Select the MMA welding.
2 Adjust with the +/- keys current needed.
Set value can be seen in display P23 on no-load. At welding the display shows welding current.
When the light H26 for remote control is lighted, you can control welding current from remote
control unit R10.
Don`t forget to change polarity of welding current by changing connection of cables as shown
in figures on page 4 or 5.
Read following paragraphs in operation instructions for panel TL:
Selection of MMA/TIG welding (S21)
Selection of TIG ignition method (S22)
Selection of operation mode of torch switch (S23)
Operation of control unit (S27), (S28)
Display for post gas time (P25)
Local and remote control of welding current (H26)
Welding current display (P23)
Controls for MMA welding
 Loading...