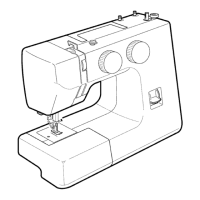
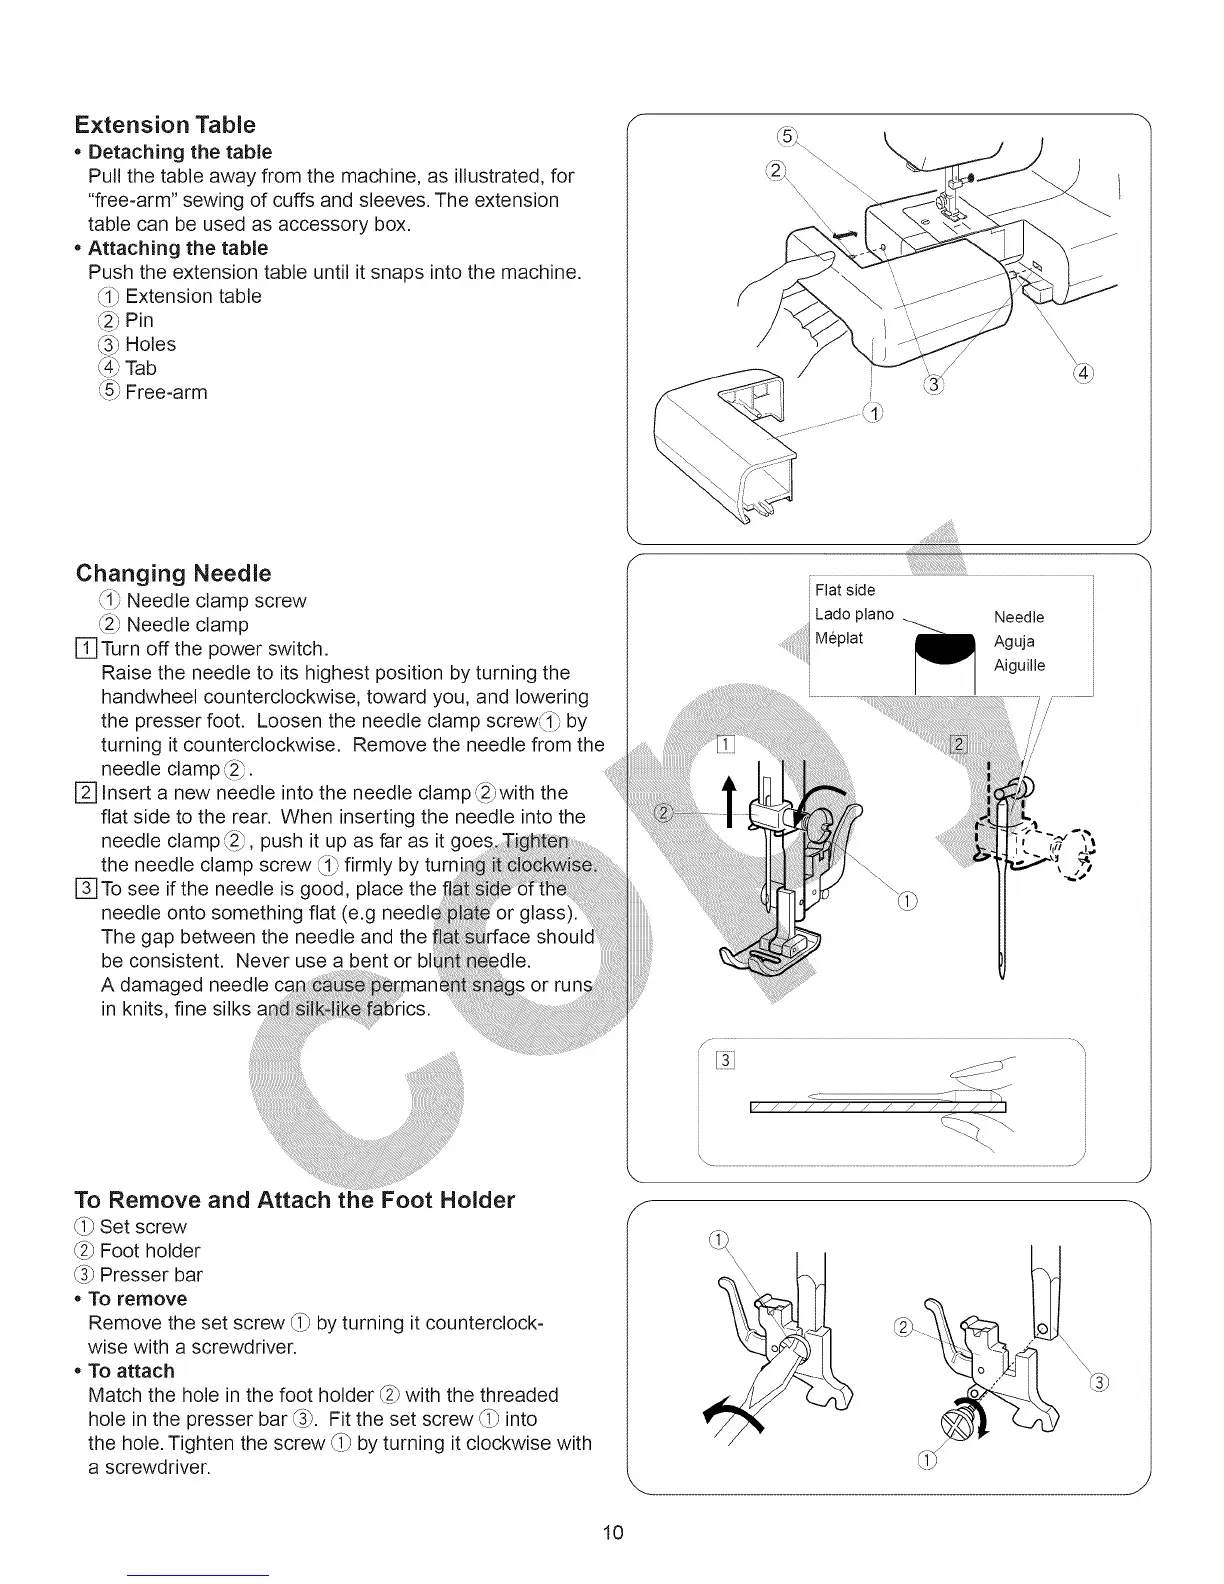
Extension Table
• Detaching the table
Pull the table away from the machine, as illustrated, for
"flee-arm" sewing of cuffs and sleeves. The extension
table can be used as accessory box.
• Attaching the table
Push the extension table until it snaps into the machine.
/\
L!; Extension table
:12)Pin
_3) Holes
(4) Tab
(&',Free-arm
\
\
\\\\
Changing Needle
f_
,!/Needle clamp screw
(2) Needle clamp
[] Turn off the power switch.
Raise the needle to its highest position by turning the
handwheel counterclockwise, toward you, and lowering
the presser foot. Loosen the needle clamp screw0_ by
turning it counterclockwise. Remove the needle from the
needle clamp (2).
[] Insert a new needle into the needle clamp _2)with the
flat side to the rear. When inserting the needle into the
needle clamp'S2), push it up as far as it goe
the needle clamp screw _1_,firmly by turn
[] To see if the needle is good, place the
needle onto something flat (e.g needk
The gap between the needle and the
be consistent. Never use a bent or
A damaged needle
in knits, fine silks
To Remove and Attach the Foot Holder
(i) Set screw
(2) Foot holder
(3) Presser bar
• To remove
Remove the set screw _i) by turning it counterclock-
wise with a screwdriver.
• To attach
Match the hole in the foot holder (2) with the threaded
hole in the presser bar (3). Fit the set screw _i) into
the hole. Tighten the screw _i) by turning it clockwise with
a screwdriver.
f
Flat side
Lado piano
.... Meplat
Needle
Aguja
Aiguille
/ // ......
,/ /'
///
J
-x
10