NOTE:
The best puncture site is on the side of fingertip, because it has the best blood supply.
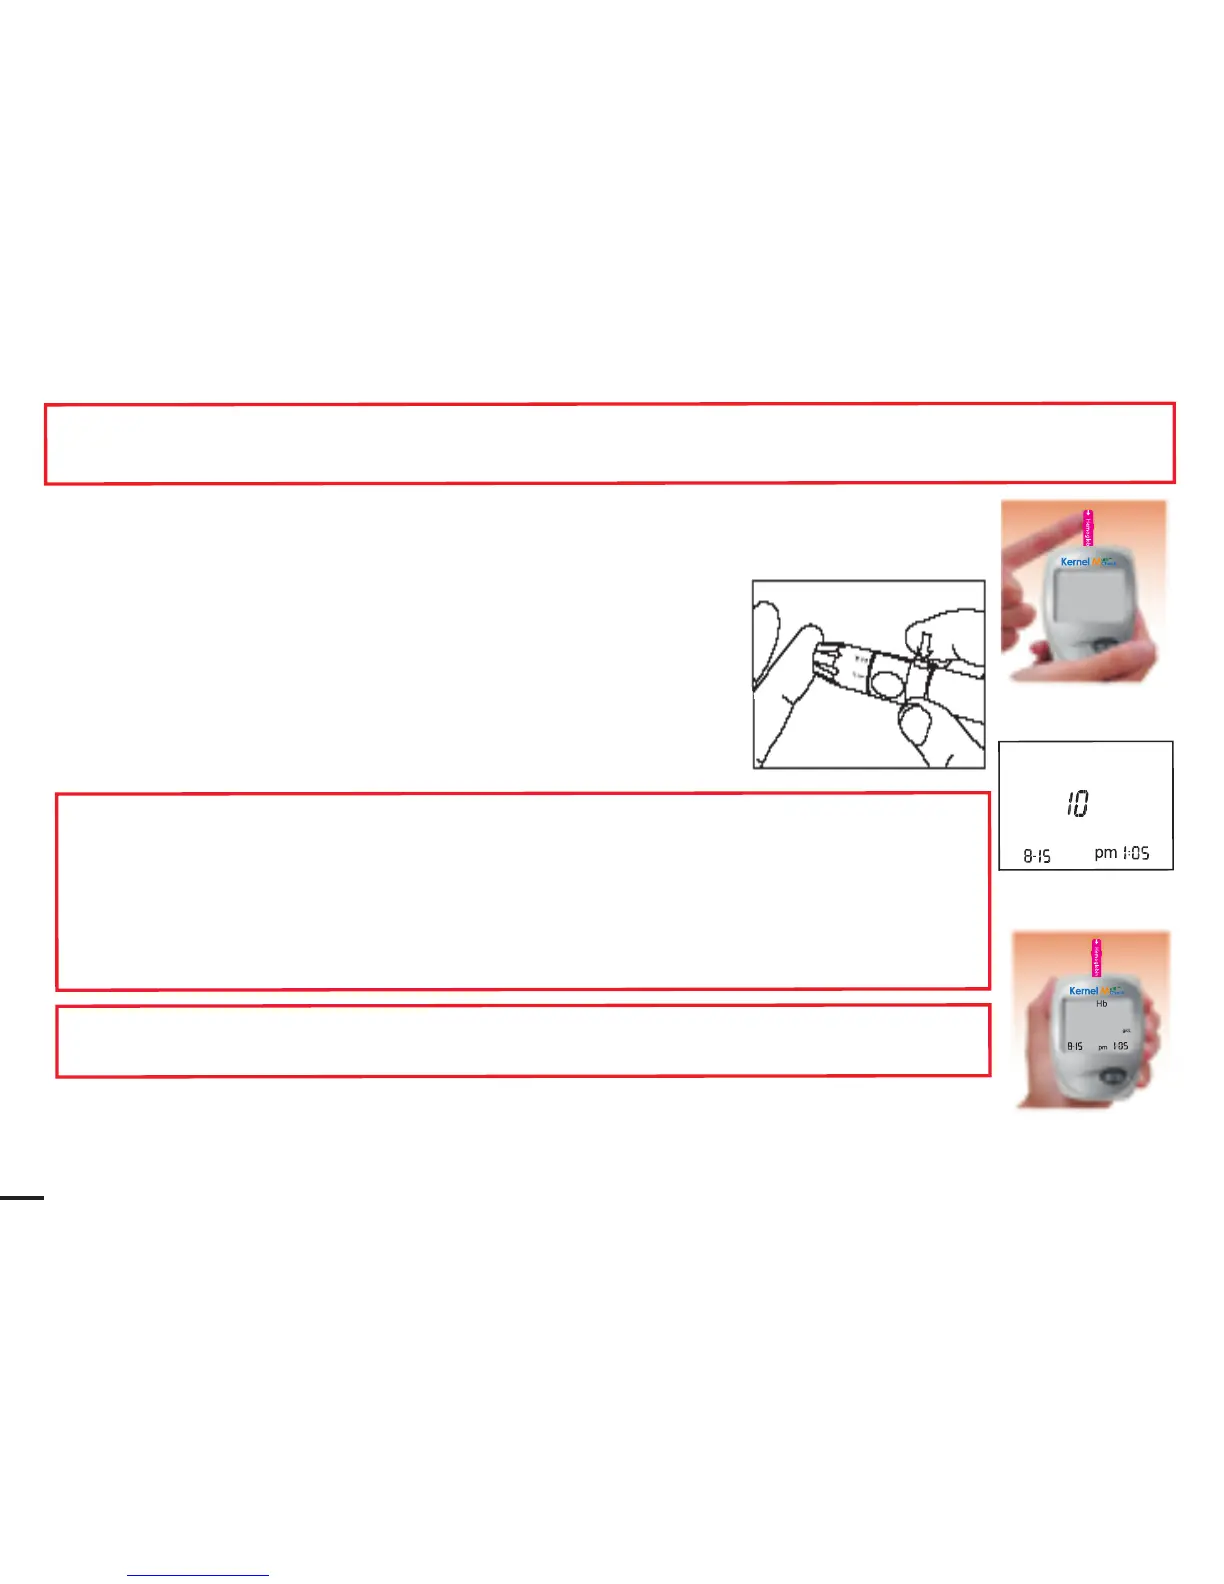
6.
Press the trigger on the puncture
r
.
7. Lift up the puncture
r
.
8.
Get a drop of blood.
9.
P
u
t
t
h
e
dro
p
o
f
bloo
d
o
n
on
e
s
id
e
o
r
t
h
e o
t
he
r
s
id
e
o
f
th
e test
strip
target
area.
The
blood
will
be
absorbed
and
cause the
target
area
to
turn
red.
The
testing
reaction
starts
when
t
h
e
m
e
t
e
r
bee
ps.
T
h
e
m
e
t
e
r
wil
l
st
a
r
t
to
c
ou
n
t
dow
n
2
0
s
ec
on
d
s
t
he
n
s
ho
w
y
ou
r
r
e
s
u
l
t
o
n
t
h
e
s
c
ree
n
.
T
he
m
e
t
e
r
stores your result in its memory automaticall
y.
NOTE:
How much blood should be applied?
A
lthoug
h
onl
y
a
small
amou
n
t
o
f
bloo
d
is
neede
d
,
it
is
ve
r
y
impo
r
t
an
t
th
a
t
y
o
u
p
u
t
enoug
h
bloo
d
o
n
you
r
t
e
s
t
s
t
ri
p
s
o
th
a
t the
entire
reaction
zone
is
covered
with
blood.
This ensures
that your meter can give accurate and
reliable results.
Cautions:
I
f
y
o
u
don
’
t appl
y
enoug
h
bloo
d
, Y
o
u might need to use a new test strip to do the test again.
10.
In
about
10
seconds,
the
screen
will
display
measured
hemoglobin value.
Record the hemoglobin value in your log book.
Hb
Hb
Hb