Mar.01 .20 15 Fri.
01/08
Alarm Numbers
(Empty)
Please input numbers
02/08
01 Zone
1PCS
Sound: On
work. STAY function needs to be set that is the defense zones of the interior
detectors should be changed to be stay zones in order to work properly. After
STAY operation, it displays and locks “STAY” icon.
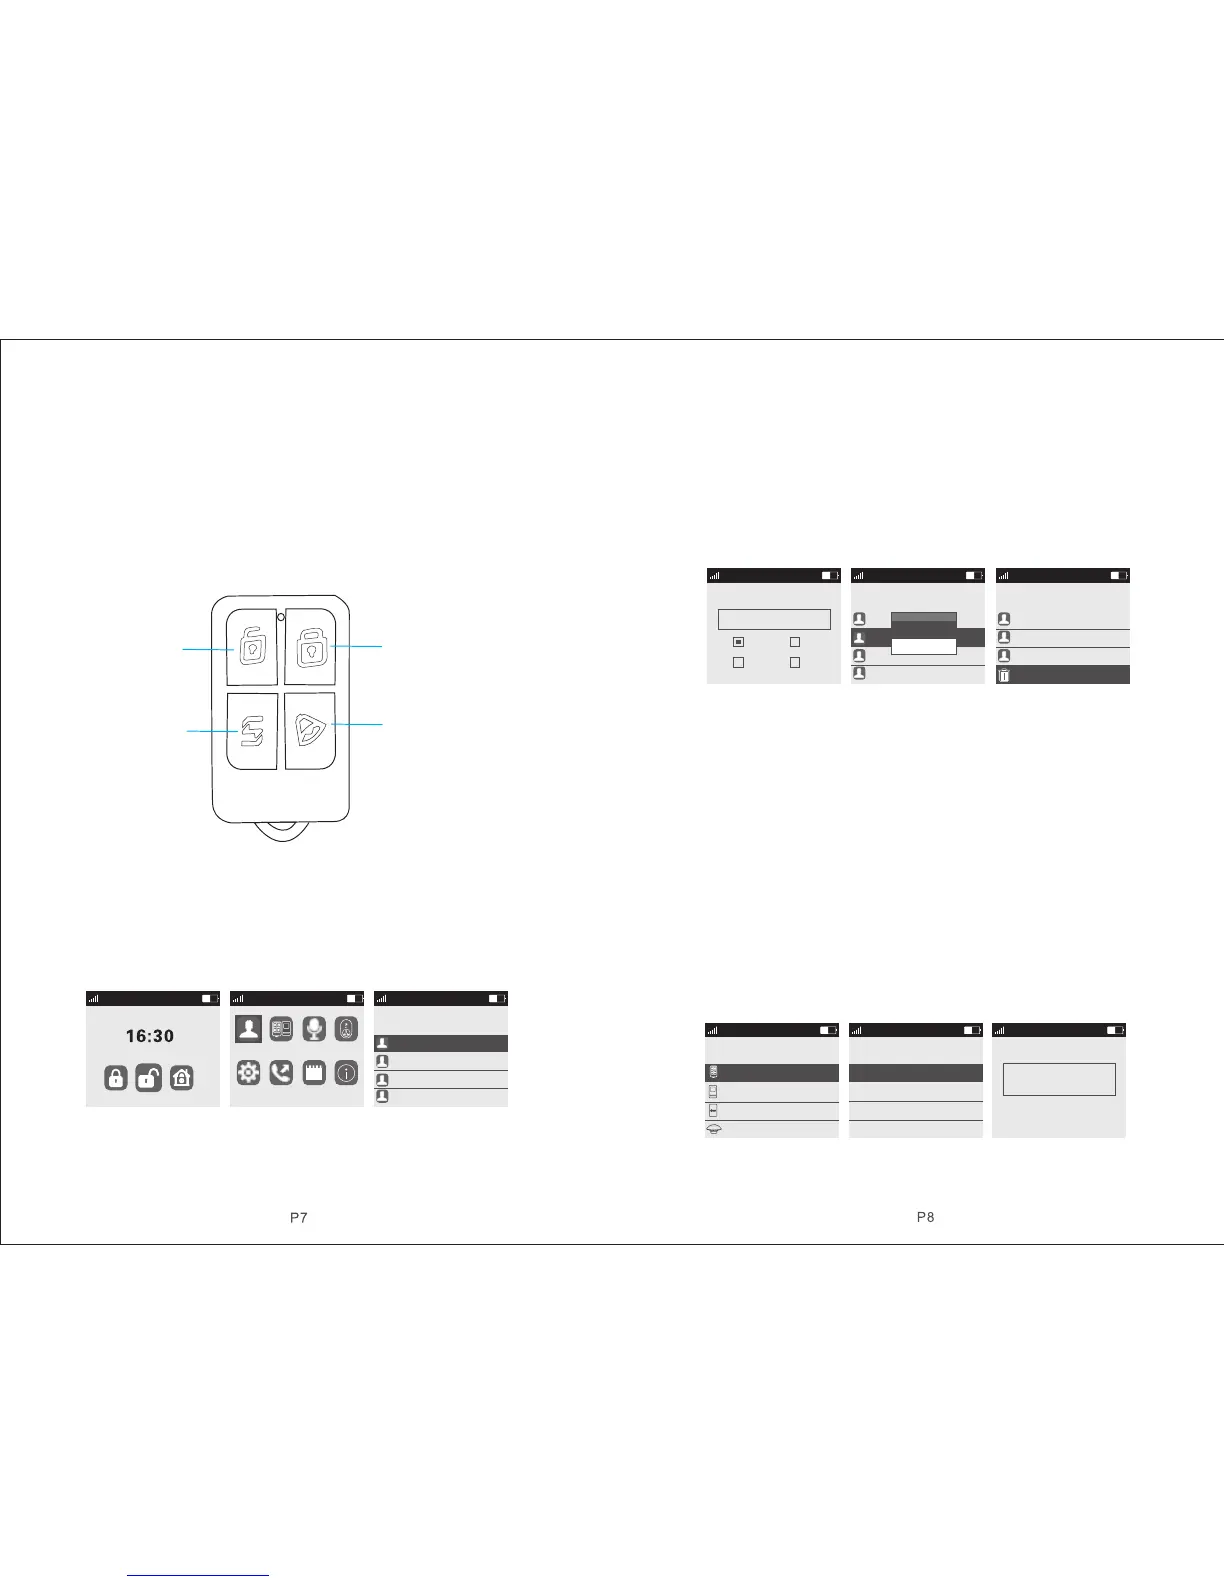
Remote Control operation: press key [STAY].
Keyboard operation: press key [ARM] twice
4.5 Emergency Alarm
When an emergency occurs, press panic key on the remote control or long press
panic key for 3s as host in standby state.
Note: if the host password keyboard protection function is turned on, the password
needs to be input before the operation to the keyboard, and the initial password
is 123456.
Disarm
Arm
Stay
Emergency
4.6 Alarm Number
Press menu key, then it displays 8 menu icons in color as shown in picture 4-2. Press
key 【UP/DOWN】to move the cursor to alarm number icon, then press key【OK】
or put in number 1 directly to enter into alarm number set page. As shown in
picture 4-3, up to 8 groups number can be set and each number can be optional
for phone, SMS, access card or CID. The maximum length of each number is 31
digits. And the set method is in below:
Picture 4-1 Picture 4-2 Picture 4-3
Group 1-6 alarm number are telephone function in factory default, and 7-8 are CID.
Note: when entering number, long press Arm key to input * , and long press Disarm
key to input # .
4.6.1 Set Alarm Number
In alarm number page, 8 groups of number can be set. Press key【UP/DOWN】to
select 1 group, then press key【OK】to enter next level menu. As shown in picture
4-4, there is a number input box in the page and the 4 functions below optional:
phone, SMS, access card, CID. Among the 4 functions, phone, SMS and access
card can be single as well as multiple choices, but the CID function is single option.
Put in the number to be set in the input box like as 13812345678, the press key
【DOWN】to move cursor to the function needed and select by pressing key menu,
then press key【OK】to save it, then press key【Back】to return to desktop.
Picture 4-4 Picture 4-5 Picture 4-6
4.6.2 Delete Alarm Number
Delete single alarm number: after entering alarm number page, press key【UP/
DOWN】to select number to be deleted, press key【OK】, host will pop up a small
menu as shown in picture 4-5. If selecting【Edit/Add】, press key menu to delete
all original numbers or change number and function;If selecting【Delete】, host
will pop up a confirmation menu, and select Yes, and then press key【OK】to
delete it.
Delete all alarm numbers: As shown in picture 4-6, there is a function delete all
at the bottom of the alarm number page, press key【UP/DOWN】to select this
function, then press key【OK】, and after confirmation menu popped up, press
key【OK】again to delete all alarm numbers.
4.7 Accessories Management
As shown in picture 4-2, press key【UP/DOWN】to move cursor to Accessories
Manage icon, then press key【OK】or input number 2 to enter accessories manage
page, as shown in picture 4-7.
Picture 4-7 Picture 4-8 Picture 4-9
CHINA MOBLLE CHINA MOBLLE
16:10 16:10 16:10
Ala rmNum A ttach ment Re co rd in g Ap pl ia nce
Sys tem Pho ne Blac kbox Abou tMe
(Empty)
(Empty)
CHINA MOBLLE
Delete all
Alarm Numbers
16:10
CHINA MOBLLE
(Empty)
(Empty)
(Empty)
Alarm Numbers
(Empty)
(Empty)
(Empty)
16:10
CHINA MOBLLE
16:10
CHINA MOBLLE
Call
RFID CID
SMS
16:11
CHINA MOBLLE
16:10
CHINA MOBLLE
16:10
CHINA MOBLLE
Attachment
Remote
Detector
RFID
Wireless Sir en
Remote
02 Zone
03 Zone
04 Zone
1 PCS
0 PCS
0 PCS
0 PCS
Sound on
Sound on
Sound on
Sound on
01 Zone Remote
Have added:
Total:
Please trigg er rem ote
1 PCS
1 PCS
(Empty)
(Empty)
Edit / Add
Delete
 Loading...