Chapter 6 31
Frequency Response (Flatness)
Procedure
Procedure
1. Zero and calibrate the power meter and power sensor as described in the
power meter operation manual.
2. Configure the equipment as shown in Figure 6-1.
NOTE Connect the power splitter to the signal analyzer input using the appropriate
adapter. Do not use a cable.
3. Assure the signal analyzer’s built-in auto alignment has been performed
within the last 24 hours.
4. Press Mode, Spectrum Analyzer, Mode Preset on the signal analyzer, and
press Preset on the synthesized sweeper.
5. Set up the synthesized sweeper by pressing:
CW, 50, MHz
Power level, –4, dBm
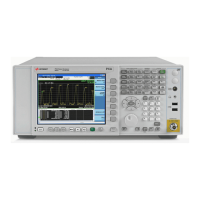
6. Set up the signal analyzer by pressing:
Input/Output, More, Freq Ref In, External
FREQ Channel, Center Freq, 50, MHz
SPAN X Scale, Span, 50, kHz
AMPTD Y Scale, Ref Level, 0, dBm
7. Adjust the synthesized sweeper output power for a power meter reading
of –10 dBm ±0.1 dB.
8. On the signal analyzer, press Single.
9. Press the Peak Search key on the signal analyzer to position the marker on
the peak of the signal.
10.Refer to Table 6-1, “Frequency Response (Flatness) Results.” Enter the
amplitude of the signal displayed on the signal analyzer into the Meas
Amp
column of Table 6-1.
11.Enter the power meter reading into the Power
Meter
column of Table 6-1.
12.Tune the synthesized sweeper and signal analyzer to the next frequency
listed in Table 6-1.
13.Enter the power sensor calibration factor into the power meter.
14.For frequencies 3.6 GHz and above, press AMPTD Y Scale, then Presel
Center to center the preselector filter for an optimum amplitude
measurement.
15.Repeat step 7 through step 14 and complete the remainder of Table 6-1
for the frequency range of your analyzer.
 Loading...


