10
Hub
®
Seating - Ganger Kit
Assembly Instructions
Assemble units as described herein only. To do otherwise
may result in instability. All screws, nuts and bolts must be
tightened securely and must be checked periodically after
assembly. Failure to assemble properly, or to secure parts
may result in assembly failure and personal injury.
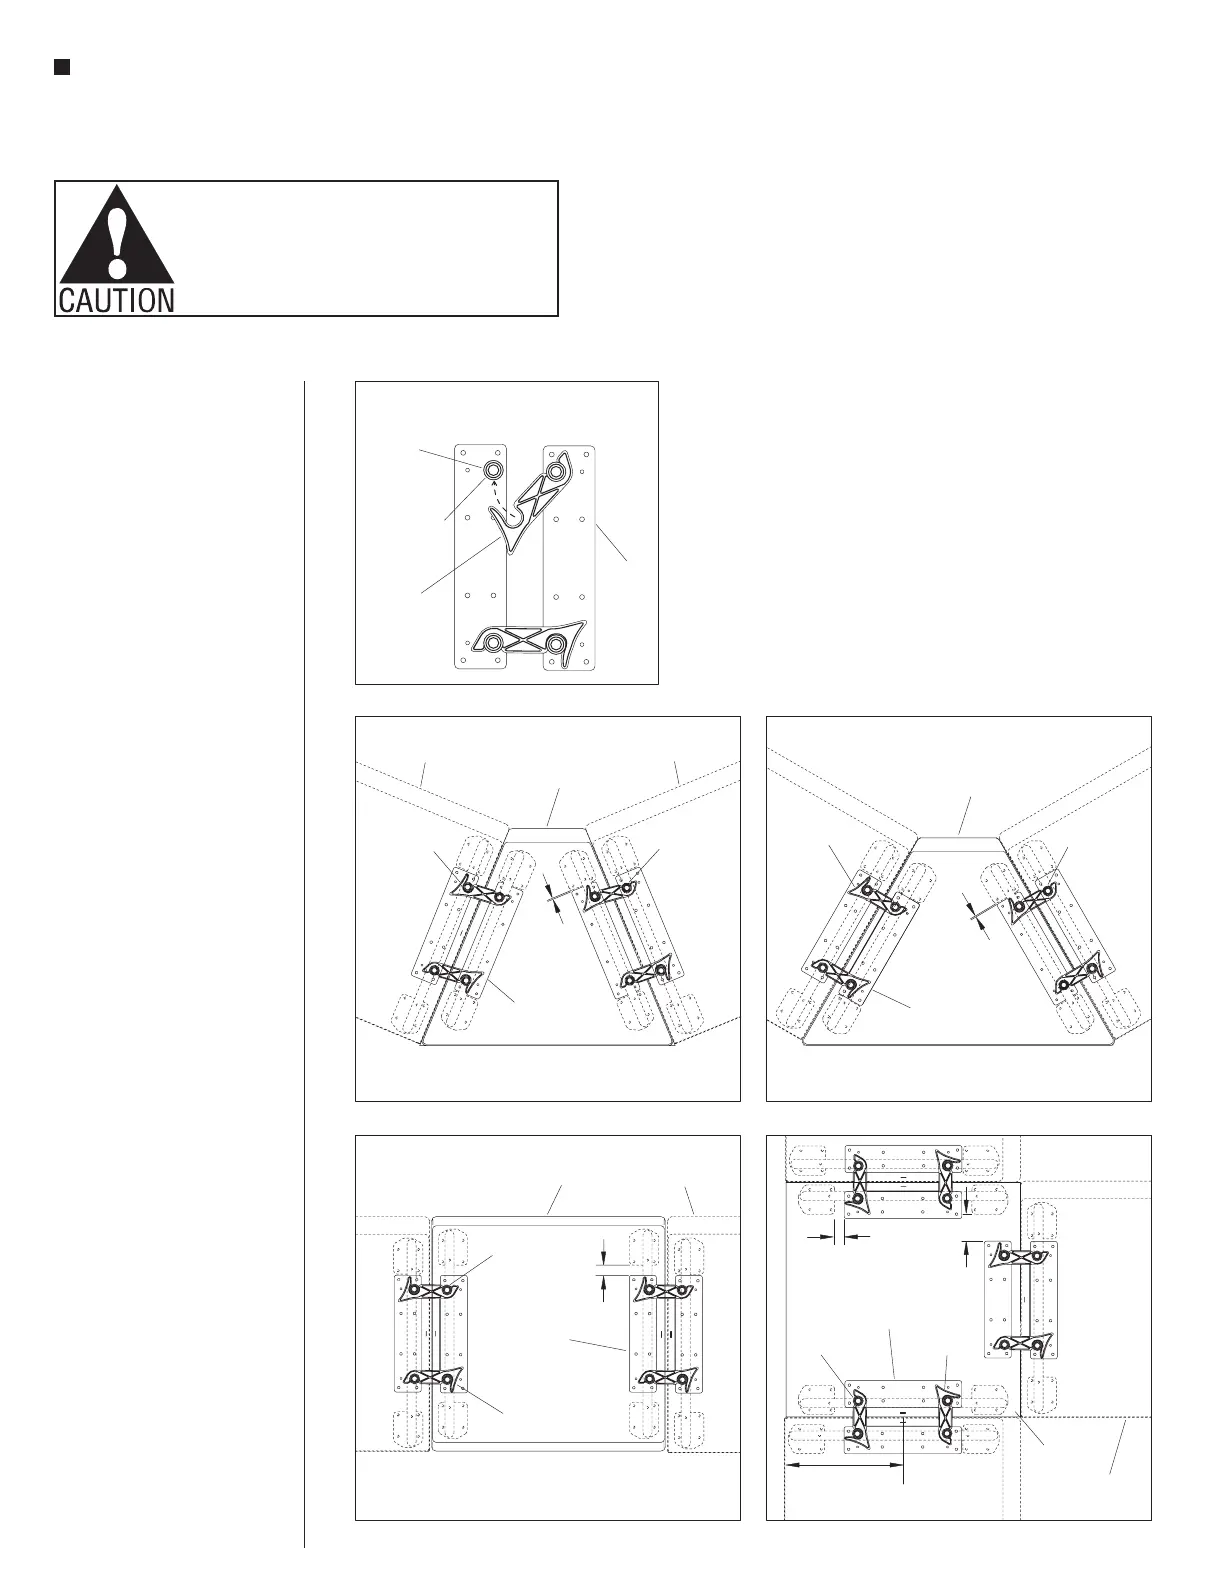
Table, Wedge & Ottoman Alignment & Installation
1. Carefully reference details E, F, G & H on this page
for ganger position/alignment and measurements
regarding attachment of tables, ottomans & wedges
(Details E, F, G & H).
2. Locate a pair of ganging plates and orient them as
illustrated on a flat, firm surface. Latch the hooks to
the opposing posts, snapping together firmly as
illustrated (Detail I).
3. Correctly position a ganger plate pair to the
bottom of the table, ottoman or wedge as specified
and where required to connect to the configuration.
Use the mounting holes of the correctly positioned
ganger plate as a "drill template" and pre-drill
mounting holes into the bottom of the table, ottoman
or wedge units using a 5/32" drill bit and power drill
(Details E, F, G & H).
Detail F - 60 Wedge Alignmentº
hook
peg
C
L
centered between
leg mounting
or table ends
3.0”
1.25”
hook
peg
Detail E - 45 Wedge Alignmentº
ganging plate
assembly pair
ganging plate
assembly pair
ganging plate
assembly pair
ganging plate
assembly pair
hook
1
/”
8
1
/”
8
Detail D
45 wedge°
60 wedge°
peg
table
modular
seating unit
modular
seating unit
modular
seating unit
Detail G - Ottoman Alignment
ottoman
modular
seating unit
peg
hook
1.25”
Detail H - Ottoman Alignment
orient pegs
and hooks as
illustrated below
latch hook to
the opposing
peg firmly
hook
peg
ganging
plate
assembly
Hub Table, Wedge & Ottoman
Alignment & Installation
Note: Carefully reference details
E, F, G & H on this page for
ganger position/alignment and
measurements regarding attachment
of tables, ottomans & wedges to
modular seating.
1. Locate a pair of ganging plate
assemblies and orient them as
illustrated on a flat, firm surface.
Latch the hooks to the opposing
pegs, snapping together firmly as
illustrated (Detail D).
2. Correctly position a ganging
plate assembly pair to the bottom
of the table, ottoman or wedge,
where required to connect to the
configuration. Use the mounting
holes of the correctly positioned
ganging plate as a “drill template”
and pre-drill eight mounting holes
using
1
/
8
" drill bit and power drill.
Then secure the mounting plate to
the table, ottoman or wedge first
using a drill driver, #2 Phillips
bit and all eight #10 x 1” screws
provided (Figure 3).
 Loading...