14
MyWay
®
Seating - Ganger Kit
Assembly Instructions
Assemble units as described herein only. To do otherwise
may result in instability. All screws, nuts and bolts must be
tightened securely and must be checked periodically after
assembly. Failure to assemble properly, or to secure parts
may result in assembly failure and personal injury.
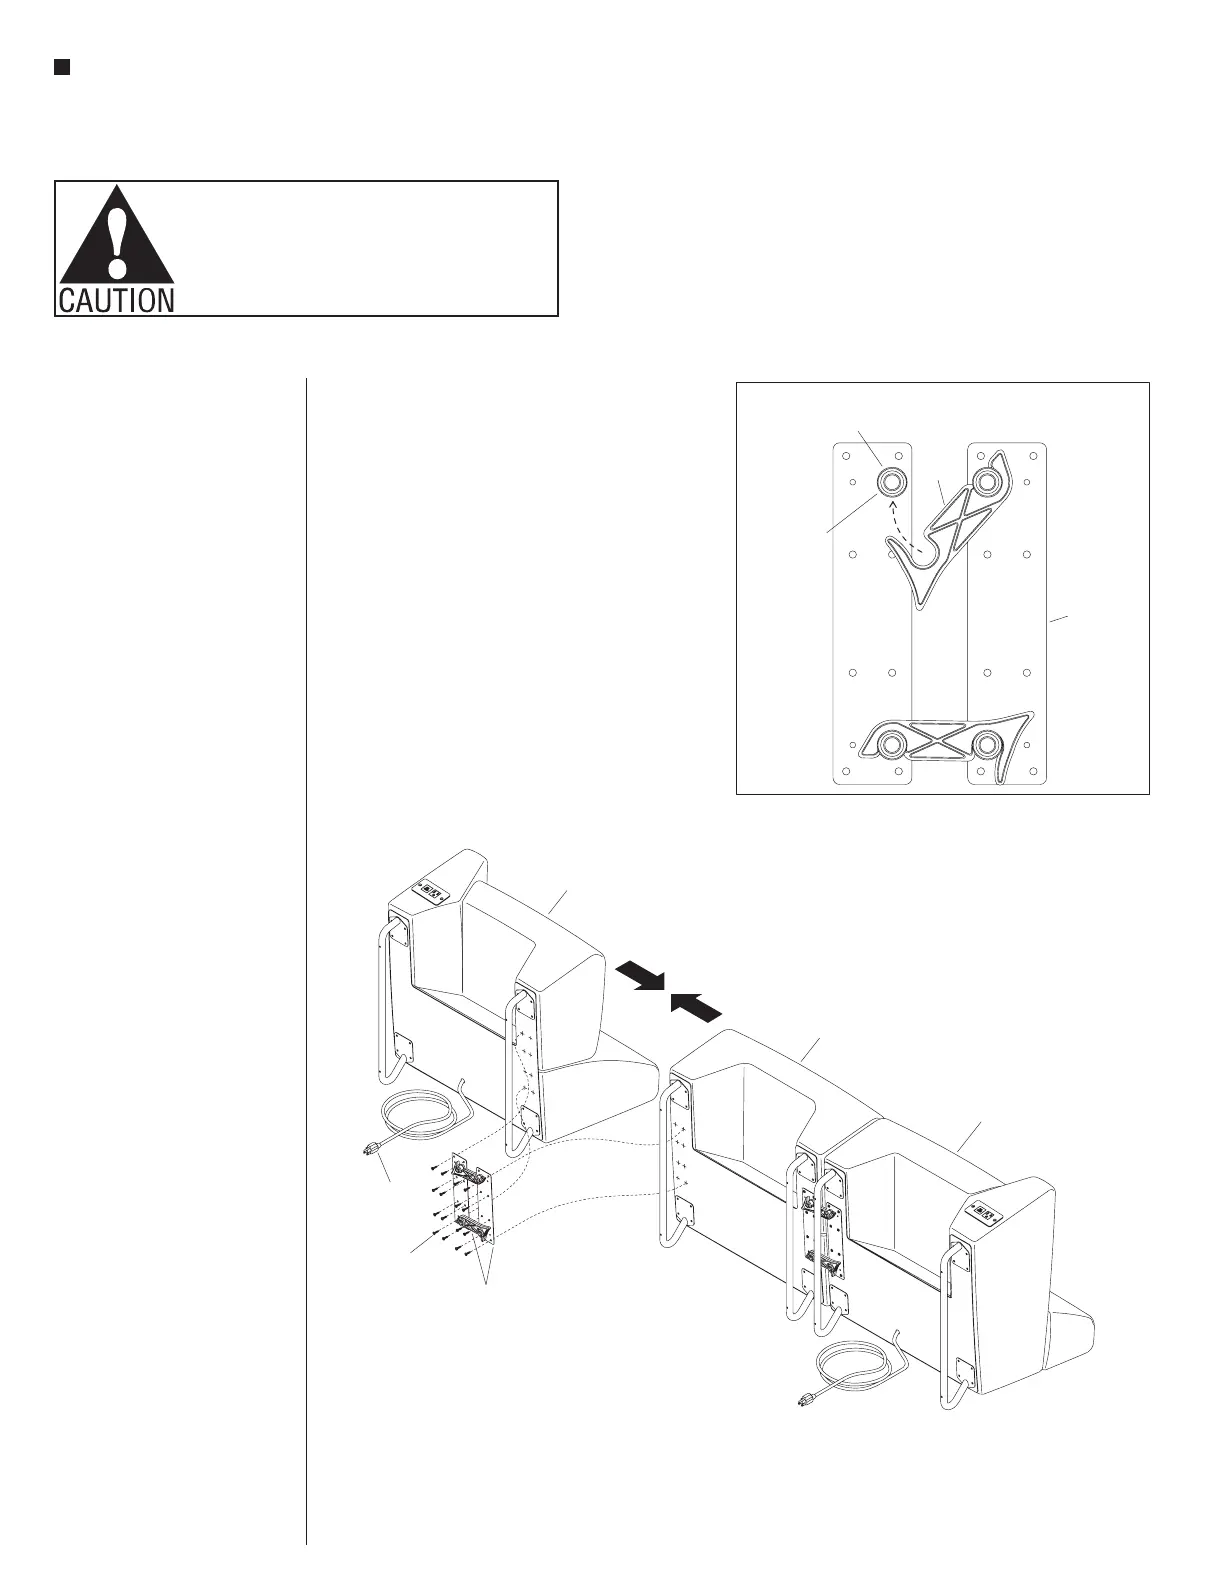
Detail C
hook
ganging
plate
assembly
peg
#10 x 1”
phillips
screw
MyWay seating
unit #2
MyWay seating
unit #1
MyWay seating
unit #3
Figure 3
Note:
latch hook to
the opposing
post rmly.
Note: orient pegs
and hooks like
illustration below.
ganging plate
assembl pairy
power
cord
MyWay Ganging Assembly
(cont.)
6. Use the mounting holes of the
correctly positioned ganging plate
assembly pair as a “template” and
pre-drill the mounting holes into
the bottom of the units using a
1
/
8
” drill bit and power drill.
7. While holding the units tightly
together, secure the
hooked-together ganging plate
assembly pair to the bottom of the
two units using a drill driver, #2
Phillips bit and all sixteen
#10 x 1” screws provided.
Repeat steps 6 & 7 for all units
to be ganged side-to-side for the
configuration (Figure 3).
Important: If more than three
units have been ganged
side-to-side for the final
configuration, units must be
un-hooked so no more than two
or three ganged units are turned
upright at one time. Units may be
re-hooked after all are upright at
their final location in step 9.
8. Using two people or more, gently
and slowly rotate the ganged
seating onto their legs (two
to three units maximum) and
position the units as desired,
carefully moving them across the
floor rather than picking them up.
Note: Damage to
hooked-together ganging
assemblies is possible if joined,
upright units are lifted off the floor
and moved. Careful sliding of
joined units is advised.
9. Once all units are rotated to their
upright position, gang together
any un-hooked seating by
reaching under the units and latch
all hooks to the pegs tightly.