Chapter 3: Programming
42 GSA-REL Technical Reference Manual
2. Click the Responses tab, click the Response Type arrow, and then select
Active.
3. Click Outputs, select the device labeled GSA-REL1 A005 PRERELEASE 1 &
2, and then click OK.
4. Click Delays and set the delay options as follows:
Delay On: Activation and Restoration
Seconds: 0
5. Click Outputs, select the device labeled GSA-REL1 A003 RELEASE 1 & 2,
and then click OK.
Note: The delay is required so that the prerelease and release responses occur
in the correct order. Prerelease must come before release.
Step 8: Supervise the service disconnect switch
If your application requires supervision of the service disconnect station, install
and wire components according to Figure 13. A GSA-CT1 module supervises the
RELA-SRV-1 switch. Configure the GSA-CT1 as follows:
Device Type: Supervisory
Personality: (3) Active B
Text 1: GSA-REL1 RELEASE 1
Text 2: DISCONNECT SW
No further programming is necessary.
Step 9: Indicate active prerelease and release circuits
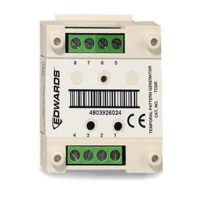
Two PAM-1 control relays and a GSA-CT2 module are used to indicate activation
of the prerelease and release relays.
Install and wire the components according to Figure 14. In this case, the 1st
Device represents terminals 7 and 8, the release relay. The 2nd Device
represents terminals 5 and 6, the prerelease relay.
Configure the GSA-CT2 module as follows:
1st Device represents
1st Device Type: Monitor
1st Personality:(3) Active B
1st Text 1: REL1_RELEASE
1st Text 2: CKT_ACTIVE
2nd Device Type: Monitor
2nd Personality:(3) Active B