PT8100 Service Manual
2
2.2 Licenses
It is requested by rules that each radio installation site (for
mobile station or base station) should be provided with a license.
The license carrier should guarantee that the Tx power, frequency
and deviation comply with the license requirements.
Transmission adjustment can only be conducted by
license-authorized technicians. Installation or operation of the
radio does not need a license.
2.3 Check before Installation
Every radio has been adjusted and checked before shipment.
Before installation, it’s better to check if the radio’s
transmission and receiving are normal to make sure its proper
operation.
The test should be performed with all cables and accessories
correctly connected.
Tx frequency, deviation, and power output should be checked,
as should Rx sensitivity, squelch, audio output, and signaling
operation.
2.4 Installation
1) Preparation
Check the vehicle and decide how and where to install the
radio antenna and accessories. Make sure that the cable will not
be extruded. And pay attention to the heat dissipation of the radio
to avoid overheating.
2) Antenna
The best position for the antenna is in the center of an open
and flat conduction region, usually the center of the vehicle roof
or the cover of the luggage trunk. Connect one end of the earth
wire to the cover of the luggage trunk and the other end to the car
outer shell so that the cover of the luggage trunk is grounded.
3) Connection of Power Cable
* First of all, please check whether there is a hole for the power
cable on the insulating board. If no, please bore the board with a
suitable drill bit and fix a rubber grommet on it to protect the
cable from abrasion.
* Afterwards, please pass the cable through the insulating board
and lead from the car into the engine room. Connect the red
conductor to the positive terminal of the accumulator and the
black conductor to the negative terminal.
* At last, ring the remained conductor and fix it.
Note: Please guarantee sufficient relaxation of the power
cable in the car so that the radio can be conveniently
disassembled, assembled, and repaired in the state of power
connection.
4) Installation
Warning: For passenger safety, please install the radio
securely using the supplied mounting bracket so that the
radio will not be loosened in case of collision.
* Take the mounting bracket as the sample to draw the position of
the four holes for screws. Then drill the holes on the instrument
panel, and then install the mounting bracket with 4 M5*16
self-tapping screws. (Note: Please install the radio at a position
convenient for operation, and leave enough space for connection
of the cable.)
* Slide the radio into the mounting bracket and fix it to the
bracket with 4 M4*10 SEMS screws (with flat washer and spring
washer). (Set an appropriate height and angle for the radio by
using different screw holes of the bracket.)
* Connect the antenna and the power cable to the radio.
* Install the microphone hanger at an appropriate position using 2
M4*16 self-tapping screws. (It should be made sure that the
microphone and its cable will not affect safe driving.)
* Connect the microphone to the MIC jack on the front panel of
the radio and put the microphone on the hanger.
Note: When replacing the fuse of the power cable, only use
fuses of the same type and rating; otherwise the radio could
be damaged.
5) Attention
If you have no plan to use external speaker, please cover the
speaker jack with the supplied rubber plug to prevent dust and
sand getting in.
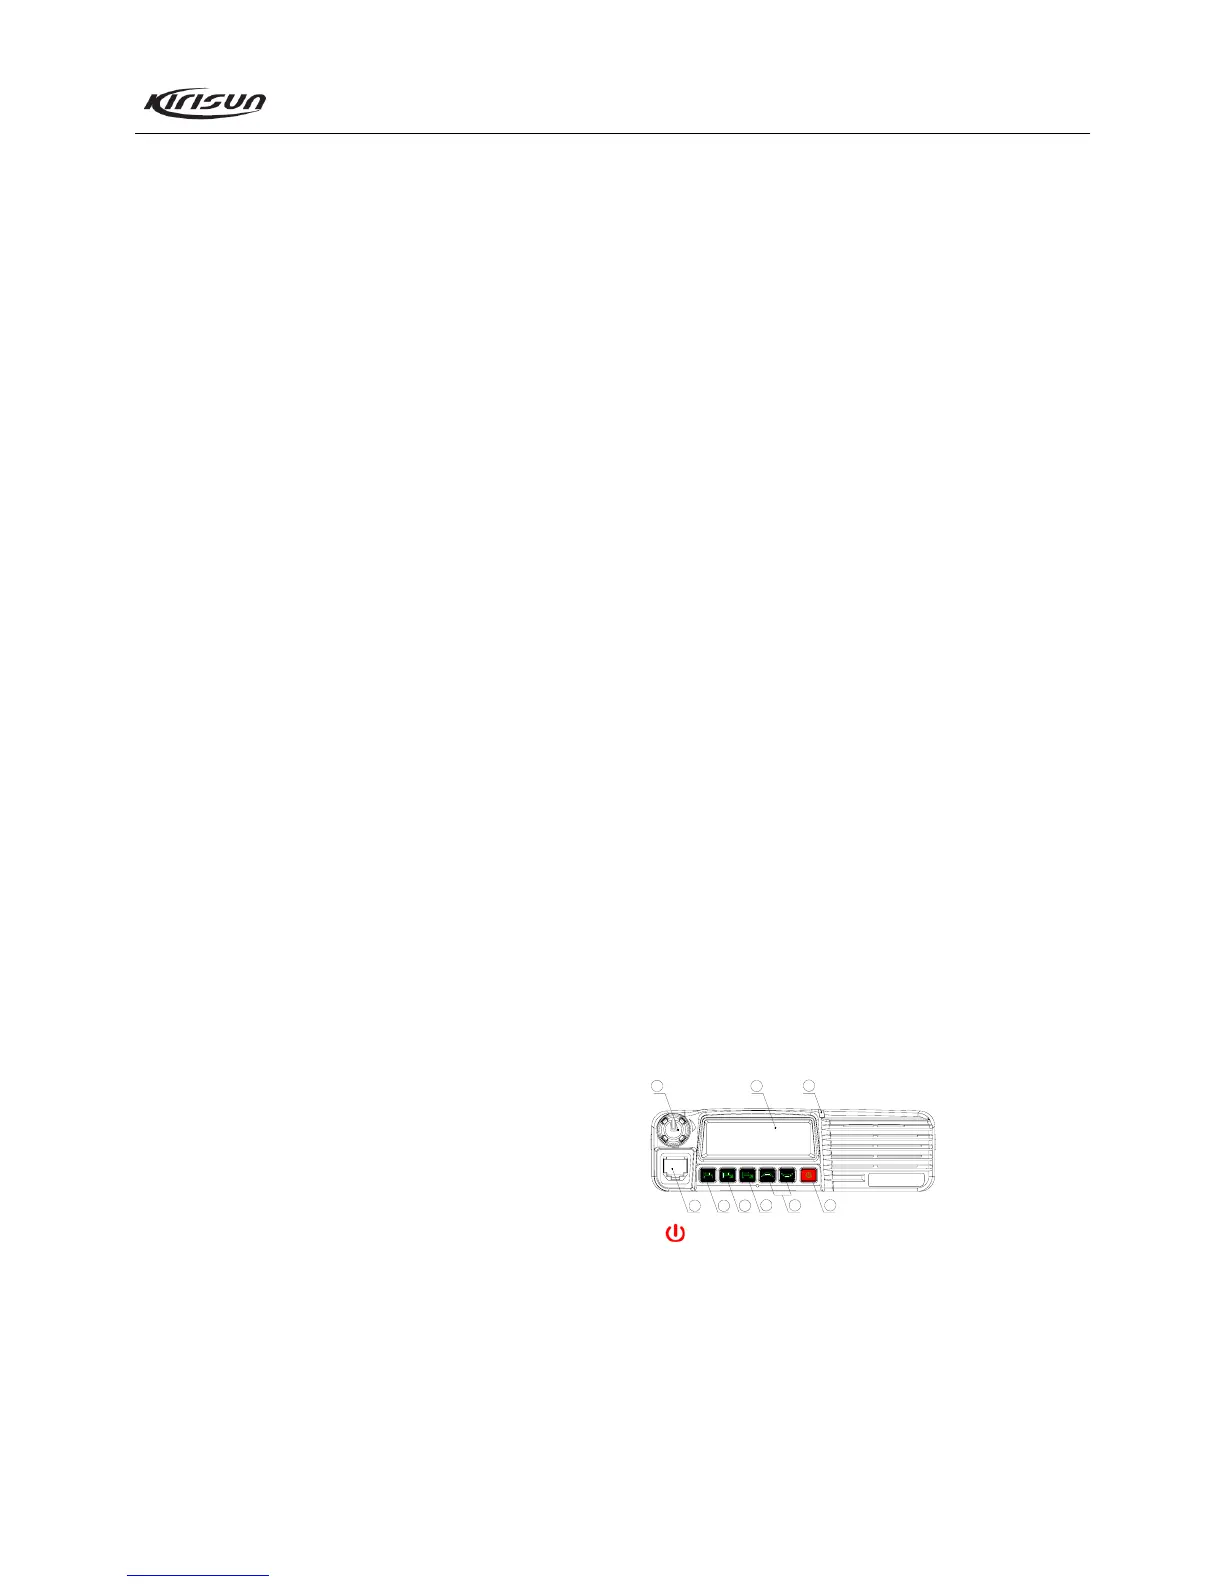
Chapter 3 External View and Functional Keys
3.1 Front Panel
1
2
3
4
5
6
7
8
9
① Power Button
Press and hold this button (1.5 seconds or longer) to turn the
radio power ON or OFF.
② LED Indicator
Lights red while the radio is transmitting, lights green while
the radio is receiving.
Flashes orange while receiving DTMF, 2Tone or 5Tone
signals the same as the setting of the radio.
Flashes red while the radio is scanning (This function can be