EasyManua.ls Logo

Kistler 6113C Series - User Manual

Kistler 6113C Series
26 pages
Print Icon
To Next Page IconTo Next Page
Loading...
Instruction
Manual
6113C_002-797e-07.23
Measuring spark
plugs
Type 6113C...
Type 6115C...
Type 6118C...
Question and Answer IconNeed help?

Do you have a question about the Kistler 6113C Series and is the answer not in the manual?

Overview

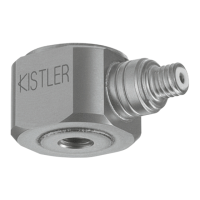
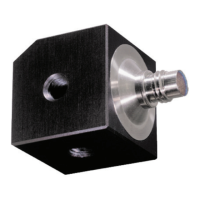
The Kistler measuring spark plugs, available in types 6113C, 6115C, and 6118C, are high-frequency piezoelectric pressure sensors designed for measuring cylinder pressure in internal combustion engines. These sensors are integrated into a spark plug, making them suitable for both gasoline and diesel engines, and are particularly useful for engine development, research, and monitoring applications. The compact, flush-mounted design ensures minimal impact on the combustion chamber, allowing for accurate and reliable pressure measurements.

Function Description

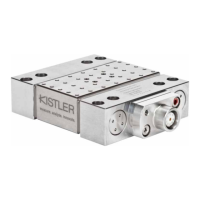
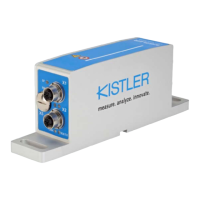
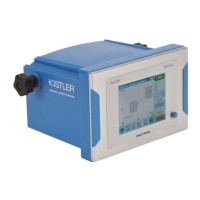
The primary function of the Kistler measuring spark plugs is to provide precise, dynamic cylinder pressure measurements. This is achieved through a piezoelectric sensing element integrated into the spark plug body. When pressure changes occur in the combustion chamber, the piezoelectric element generates an electrical charge proportional to the applied pressure. This charge is then converted into a voltage signal by an external charge amplifier, which can be further processed and analyzed.

The measuring spark plugs are designed to withstand the harsh conditions within an engine's combustion chamber, including high temperatures, pressures, and vibrations. They offer a high natural frequency, which is crucial for detecting rapid pressure changes during combustion. The flush-mounted design ensures that the sensor's diaphragm is level with the combustion chamber wall, minimizing any interference with the combustion process and providing accurate pressure readings.

These sensors are particularly valuable for:

  • Engine development: Optimizing combustion processes, fuel injection timing, and ignition strategies.
  • Research: Studying combustion phenomena, knock detection, and misfire analysis.
  • Monitoring: Real-time monitoring of engine performance and diagnostics.

The measuring spark plugs are available with different thread types (M10x1, M12x1.25, M14x1.25) to accommodate various engine designs. The sensor cable and the ceramic of the measuring spark plugs are exchangeable and serviceable, enhancing their versatility and longevity.

Important Technical Specifications

The Kistler measuring spark plugs come in different types, each with specific technical characteristics:

  • Type 6113C: Typically features an M10x1 thread.
  • Type 6115C: Typically features an M12x1.25 thread.
  • Type 6118C: Typically features an M14x1.25 thread.

Key characteristics of the spark plugs include:

  • Thread length: Varies depending on the specific spark plug and engine application.
  • Seal seat: Available in flat or tapered (conical) designs.
  • Heat range: A critical parameter indicating the thermal characteristics of the spark plug. Kistler provides a conversion table for heat ranges across different manufacturers (NGK, Denso, Champion, Bosch).
  • Spark position ("S" and maximum depth "A"): Defines the position of the ground electrode relative to the combustion chamber. The optimum position depends on the engine geometry and combustion process.
  • Max. depth: The maximum depth the ground electrode protrudes into the combustion chamber.
  • Electrode gap ("G"): The distance between the center and ground electrodes, which influences spark performance.
  • Ceramic diameter ("D") and insulator length ("K"): These dimensions are crucial for ensuring an optimum connection between the ignition coil and the measuring spark plug. Kistler uses insulators of size 7.7 mm with built-in diameter adaption made from glass fibre reinforced plastic (GRP), size 9 mm or 10.5 mm.

The maximum ignition voltage for these spark plugs is 40 kV (Type 6113C) and 45 kV (Type 6115C and 6118C). The maximum energy that can be exchanged between the electrode gap and ignition is also important. The greater the gap, the greater the ignition voltage, and consequently, the more the unit is subject to wear.

Usage Features

The installation and commissioning of the Kistler measuring spark plugs involve several key steps to ensure accurate and reliable measurements:

  1. Installation:

    • Preparation: Ensure the contact surfaces on the spark plug and cylinder head are clean. The measuring spark plug and the mounting bore in the cylinder head must be clean. The cable and ignition coil must also be clean, dry, and free from oil.
    • Lubrication: Apply anti-seize paste to the thread of the measuring spark plug to prevent seizing, especially for high alloy steel and screw-in types.
    • Torque: Tighten the spark plug to the specified torque using a Type 1300A11 torque wrench and the correct torque in accordance with the recommendation in Fig. 10. The tightening torque varies based on the thread type and seal type (flat or conical).
    • Mounting the spark plug terminal/ignition coil: Apply a thin layer of 2K mounting grease (Type 1067) to the insulator to facilitate later removal. Ensure the plug is fastened in place. The ignition coil must be fixed properly to minimize lateral forces on the insulator.
    • Connecting the sensor cable: The cable must be protected from vibration and heat. Use a high-insulation coaxial cable. The cable is screwed onto the delivered BNC coupling (Type 1721), hand-tightened, and connected to the amplifier.
  2. Adjusting sensitivity and measuring range: This step is performed on the amplifier to match the sensor's output to the desired measurement range.

  3. Starting the engine and measure: Once the installation and amplifier settings are complete, the engine can be started, and measurements can be taken.

Selecting a Measuring Spark Plug:

The selection of a measuring spark plug is determined by the original spark plug used in the engine. Kistler provides a selection key (Fig. 3) to help identify the appropriate measuring spark plug type based on parameters like general name, type-generation, heat range, customer-specific version, and cable type. It is crucial to select a spark plug that closely matches the geometric and electrical data of the original spark plug.

Maintenance Features

Regular maintenance is essential to ensure the reliability and longevity of the Kistler measuring spark plugs.

  1. Cleaning and checking the electrode spacing:

    • Frequency: Periodically check the condition of the electrodes every 50 hours of operation, and adjust the electrode spacing if necessary.
    • Cleaning: Remove the spark plug from the engine. Clean the thread with a brass brush and then with Type 1003 cleaning spray. The measuring spark plug must never be cleaned with a spraying machine or abrasives.
    • Inspection: Check the spark plug for deposits and for any cracks in the insulator. The ceramic insulator must be cleaned.
    • Electrode spacing adjustment: Test the electrode spacing with a feeler gauge (Fig. 14, 18). Adjust the electrode spacing using a tool (Type 1253A) and a vise (Fig. 15, 16, 17). Screw on the terminal connection nut and then tighten it (0.5 N·m).
    • Re-installation: The spark plug can be re-installed in the engine (refer to Section 4.2).
  2. Replacing the sensor cable:

    • Inspection: Check the condition of the cable for any signs of damage (cuts, damaged insulation, excessive bending).
    • Testing: Test the insulation resistance of the cable using a suitable measuring device (Kistler Type 5493). The insulation resistance should be above 10 GΩ.
    • Replacement: Detach the defective cable from the spark plug with the tool Type 0500A91. Take a new cable out of its packaging. Clean the terminal contacts with Type 1003 cleaning spray and then dry using compressed air spray. Once this has been done, the cable can be mounted and then tightened (hand-tight).
  3. Replacing the pressure sensor: The highly insulated parts of the measuring chain must be exchanged under laboratory conditions with absolute cleanliness. If the pressure sensor has been replaced, the measuring spark plug needs to be calibrated, and its seal tightness needs to be checked. If a pressure sensor needs replacing, the measuring spark plug must be sent to a Kistler Service Center.

  4. Replacing the insulator: The ceramic insulator can be replaced if damaged. After it has been replaced, the seal tightness of the measuring spark plug needs to be checked. If the ceramic insulator needs to be replaced, the measuring spark plug must be sent to Kistler.

Troubleshooting Misfiring:

Misfiring can be caused by several factors, including:

  • Spark erosion and corrosion: Resulting from thermal load, incorrect spark plug heat range, deposits, and misfiring due to increased electrode spacing.
  • Pre-ignition: Ignited by overheated components, spark plugs with incorrect heat range, or sharp increase in temperature resulting from damage to the engine.
  • Knocking combustion: Caused by a sharp rise in pressure with a rich air-fuel mixture, high temperature, or misfiring due to incorrect ignition timing or too high compression.

A diagram (Fig. 21) illustrates the important points for measuring spark plug misfire, including correct geometry (thread, spark position), suitable connection (SAE/CUP), electrode gap, voltage of ignition system, correct heat range, ignition extension cable (undamaged and clean), correct diameter of insulator, and cleanliness of the spark plug/sensor cable/ignition coil. Regular checks of these parameters can help prevent and diagnose misfiring issues.

Kistler 6113C Series Specifications

General IconGeneral
BrandKistler
Model6113C Series
CategoryMeasuring Instruments
LanguageEnglish

Related product manuals