To return oven to regular use after
a self-clean cycle:
1. Slide the Oven Lock Lever all the
way to the left.
2. Turn the Selector to OFF and the
Temperature Control fully
counterclockwise.
3. Allow oven to cool sufficiently
before wiping up any residue.
Oven self-cleaning tips:
• Evening is a good time to clean the
oven, after normal oven use is
completed.
• Smallamounts of smoke escaping
from the oven vent are normal when
oven isheavily soiled. Excessive
smoke may indicate heavy spillovers
have not been wiped up.
• Do not force the Oven Lock Lever
open when the Lock Indicator Light
ison. Damage to the lock mechanism
may result.
• Clean both ovens regularly,before
they become "'excessively dirty." If
oven isnot clean after one cycle,
repeat the Self-Cleancycle.
• After a Self-Cleancycle, any powdery
residuecan be wiped away with a
damp cloth. If white spots remainin
the oven after a Self-Cleancycle,
remove them with a non-scratch
scouring pad before usingthe oven
again. Thesespots are usuallysalt
residuesthat cannot be removed
during the Self-Cleancycle.
• If the soil removal was not complete,
increasethe length of the clean time
in the next cycle.
Adjusting The Temperature
Control
You may find the oven temperature to
be lower or higher than you are used
to. Your old oven may have shifted
gradually while your new oven may
be more exact. If, after using the oven,
you are not satisfied with the
temperature settings, they can be
adjusted by following these steps:
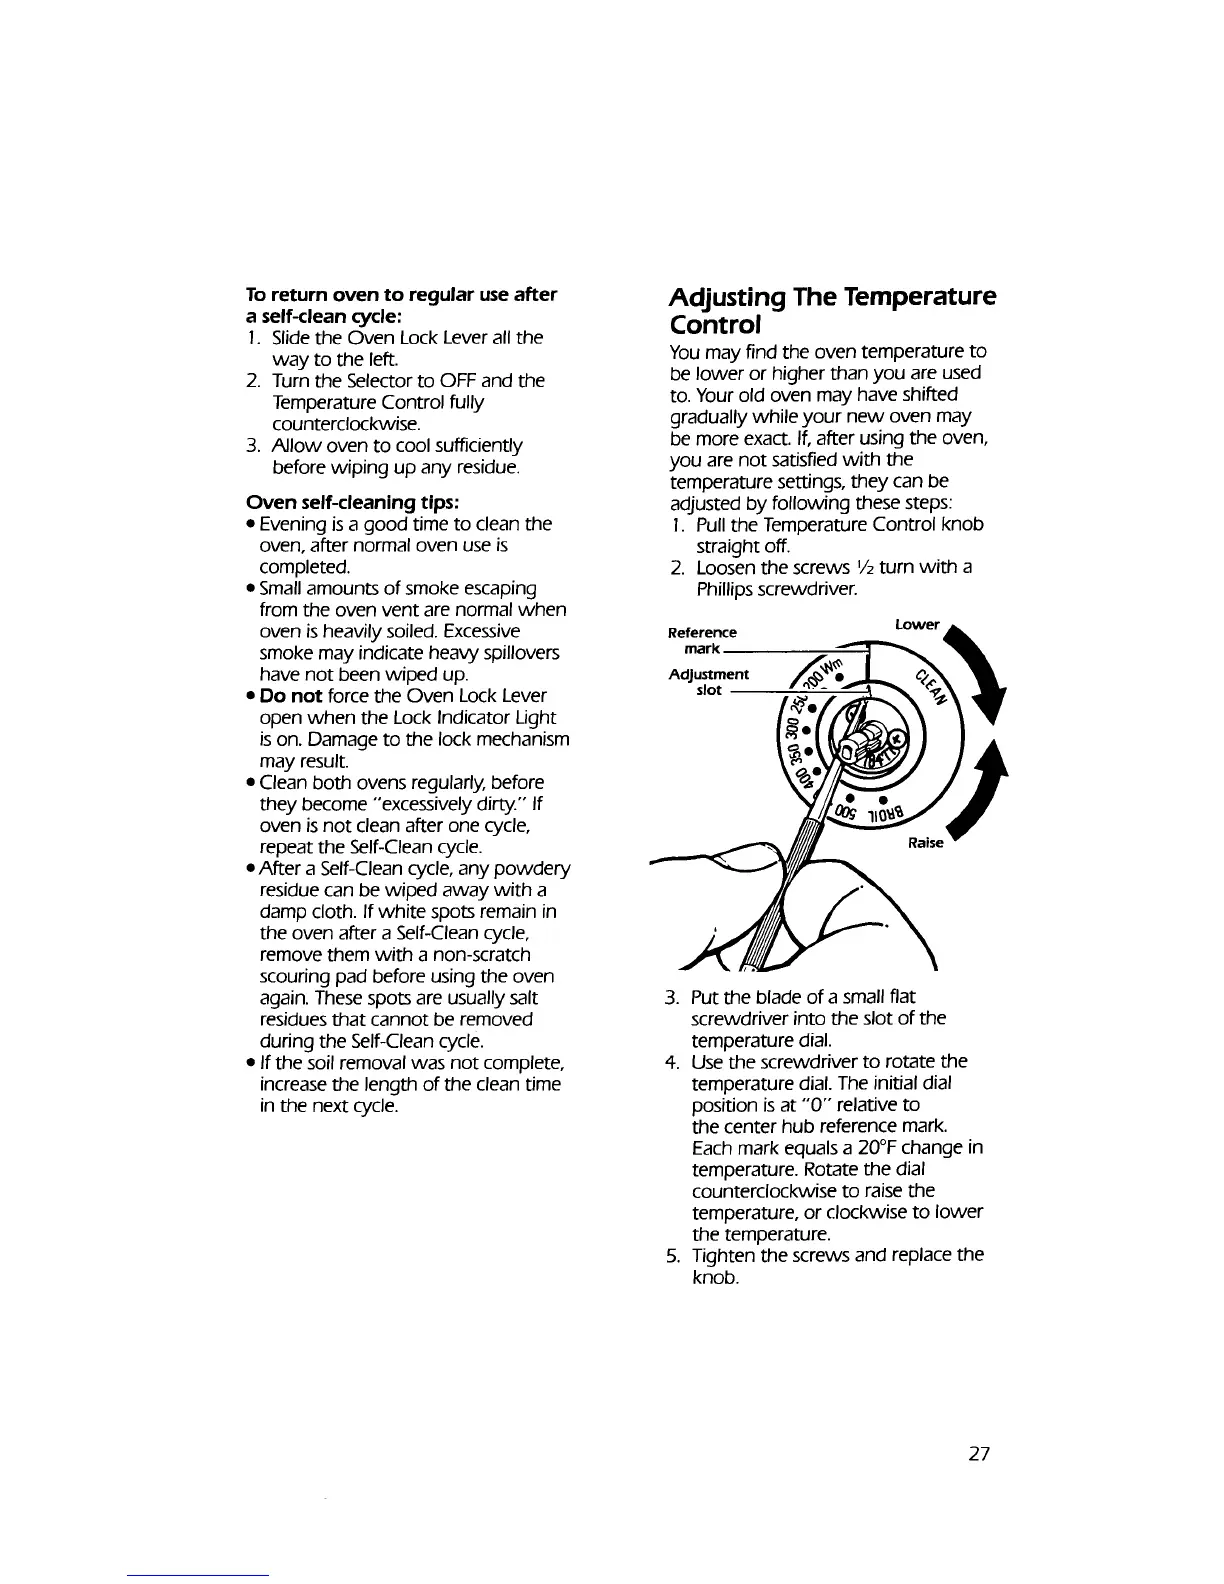
1. Pull the Temperature Control knob
straight off.
2. Loosen the screws 1/2turn with a
Phillips screwdriver.
Reference
mark
Adjustment
slot
Lower
3. Put the blade of a small fiat
screwdriver into the slot of the
temperature dial.
4. Use the screwdriver to rotate the
temperature dial. The initial dial
position isat "'0"" relative to
the center hub reference mark.
Each mark equals a 20°F change in
temperature. Rotate the dial
counterclockwise to raise the
temperature, or clockwise to lower
the temperature.
5. Tighten the screws and replace the
knob.
27